Luxea
™
Video Editor 6
is radiant
Share your world
at the speed of life

ACDSee Luxea Video Editor User Guide
Page 1 of 74
Contents
Welcome to ACDSee Luxea Video Editor 3
Creating, Opening, Saving, and Sharing Projects 4
Creating and Opening Projects 4
Saving Projects 4
Sharing Projects 4
Adding and Removing Media 5
Organizing, Adjusting, and Displaying Media 9
Timeline Tracks 9
Copying and Pasting Properties 10
Closing Gaps on the Timeline 11
Playback Quality 11
Full Screen Playback 11
Display Area 11
Timeline Toolbar 14
Creating Selections 16
Deleting selections 17
Markers and Setpoints 17
Timeline Marker 17
Clip Marker 17
Keyboard Shortcuts 18
Recordings 23
Recorder Options 24
Annotations 25
Adjusting Audio Levels 29
Audio and Voice Recordings 30
Audio Effects 32
Transitions 32
Animations 33
Behaviors 36
Behavior Settings 37
Filters 37
Filter Settings 39
Filter Settings Options 40
Adding Text to Media 46
Creating Custom Text Styles 46
Text Effects 47
Batch Text Edit 47
Fading Text In and Out 49
Adding Captions 49
Overlays 52

ACDSee Luxea Video Editor User Guide
Page 2 of 74
Advanced Effects 53
Chroma Key 53
Color LUTs 54
Clip Speed 55
Audio Speed 55
Mosaic 55
Color Pass 56
Replace Color 56
Media Duration and Freeze Frames 57
Adjusting Duration 57
Adjusting the Duration of Text, Images, Overlays, Captions and Mosaics 57
Using Ripple Edit Duration 57
Freeze Frames 58
Creating Snapshots From Video 58
Snapshots 58
Content Packs 59
Options and Configuration 60
Overview 63
Local Tab 64
Output Type Section 64
Options Section 64
Custom Templates 65
Setting Custom Values 65
Device Tab 66
Device Type Section 67
Options Section 67
Custom Templates 68
Setting Custom Values 68
YouTube Tab 69
YouTube Sign-in Section 69
Options Section 70
Vimeo Tab 71
Vimeo Sign-in Section 71
Options Section 72
acdID account 73
Creating an acdID account 73
Upgrading a License 74
ACDSee Luxea Video Editor User Guide
Page 3 of 74
WELCOME TO ACDSEE LUXEA VIDEO EDITOR
Luxea is video editing software that puts the power in your hands.
l Create incredible videos in a variety of formats including MP4, WEBM, MOV, M4V, GIF, and MP3.
l Produce content using audio, video, and image files.
l Get creative with editing by adding transitions, captions, filters, animations, and more.
l Customize videos to master a unique style, then upload the finished work straight to YouTube or Vimeo.
l Share videos directly to Facebook or Twitter during YouTube and Vimeo uploads.
This documentation details the many features of Luxea. For additional information on Luxea, please visit the forum.

ACDSee Luxea Video Editor User Guide
Page 4 of 74
CREATING, OPENING, SAVING, AND SHARING PROJECTS
After initially opening Luxea, it is possible to add media without opening a new project, then begin a new project
without closing the application. Adding media before opening a project is also a helpful starting method for
unfinished projects that have lost their direction and need a fresh look.
CREATING AND OPENING PROJECTS
To create a new project:
Select File | New Project from the menu, or press Ctrl + N.
To open an existing project:
Select File | Open Project... from the menu, or press Ctrl + O.
To open a recent project:
1. Select File | Recent Projects from the menu.
2. Choose a desired project from the list of the ten most recent projects.
To import a zipped project from another user:
1. Select File | Import | Zipped Project... from the menu, or click Ctrl + E.
2. In the Import Zipped Project File dialog, click the ... button associated with the Zipped project file to
import field.
3. Click the ... button adjacent to the Import to project directory field.
4. Enable the Open project after import checkbox to launch the project.
5. Press OK.
SAVING PROJECTS
To save a project:
To save a project, do one of the following:
Select File | Save Project from the menu, then enter a name for the project, and click the Save button.
Press Ctrl +S.
To save the project under a new name, select File | Save Project as... from the menu, then enter a name
and click the Save button.
Exit Luxea. (If you have not already saved, or have made changes since your last save, you will be asked if
you want to save your project. Click Yes, enter a name, then click the Save button.)
Click the Save icon in the top right.
SHARING PROJECTS
To share a project:

ACDSee Luxea Video Editor User Guide
Page 5 of 74
Projects can be shared with other users running Luxea by exporting the project as a zip file. The other user
imports a received zip file into their copy of Luxea and all of the elements of the sent project (except downloadable
content) will display on the Timeline in the same layout as the original version.
To export a project as a zip file:
1. Select File | Export Zipped Project... from the menu.
2. In the Export Project as Zip dialog, enter a name for the zipped project file, or click the ... button to
select a new location and enter a name.
3. Enable the Include all files from My Media in zip checkbox to ensure the media in the project is
useable for the other user.
4. Click OK.
ADDING AND REMOVING MEDIA
Add media from the hard drive to My Media, and then place the file on the Timeline for editing and production. File
types include video, image, and sound. These files are referred to as clips or media. There are two tabs in the
Media section which act as media repositories: My Media, and Library. The My Media tab contains files imported
to use in projects. The Library tab contains content from Content Packs that have been downloaded and imported
from the ACDSee website. To find out more about Content Packs, see Content Packs.
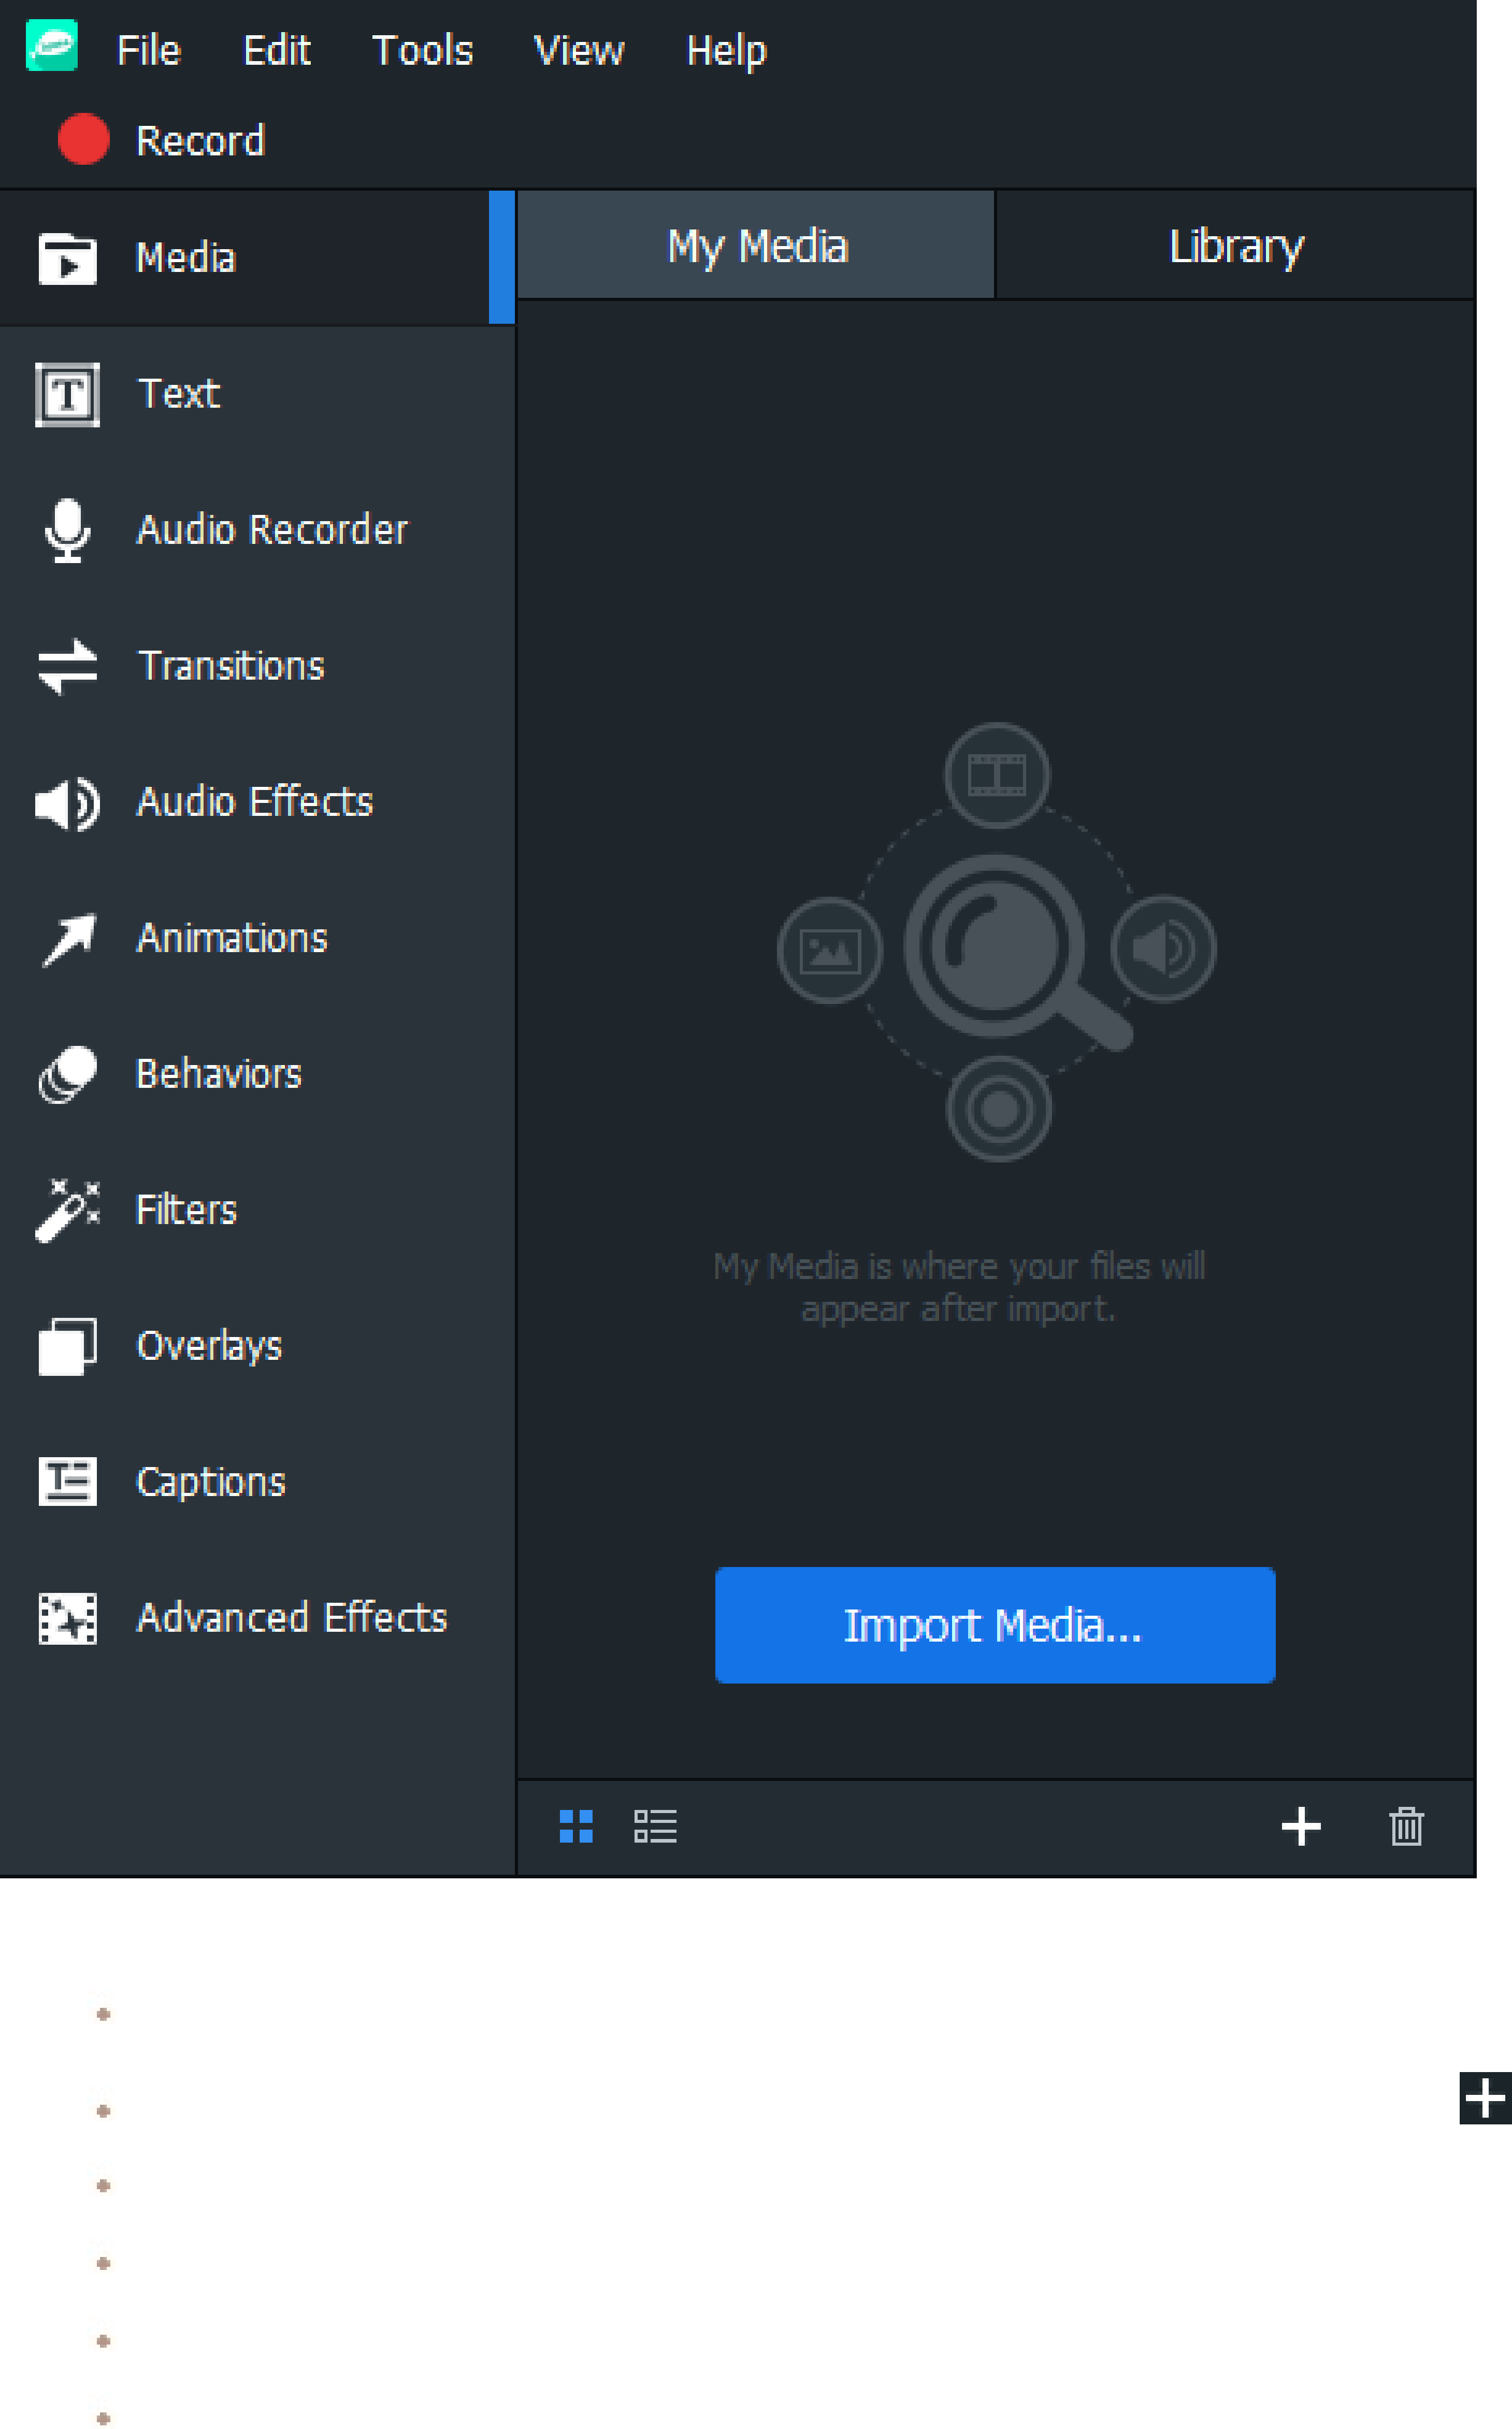
To add media to My Media:
1. Click the Media tab or press M.
ACDSee Luxea Video Editor User Guide
Page 6 of 74
2. To add media to My Media, do one of the following:
Select File | Import | Media... from the main menu.
Click the Import Media button at the bottom right of the My Media pane.
Click the Import Media... button in the My Media pane.
Double-click an empty space in the My Media tab to import media files.
Press Ctrl + M.
Drag media files from Windows Explorer directly into the My Media pane or onto the Timeline.
3. In the Add Media Files dialog, browse to and select media, or press Ctrl + click to select specific files,
Shift + click to select multiple files, or click + drag around files to select multiple files.
4. Press Open.
ACDSee Luxea Video Editor User Guide
Page 7 of 74
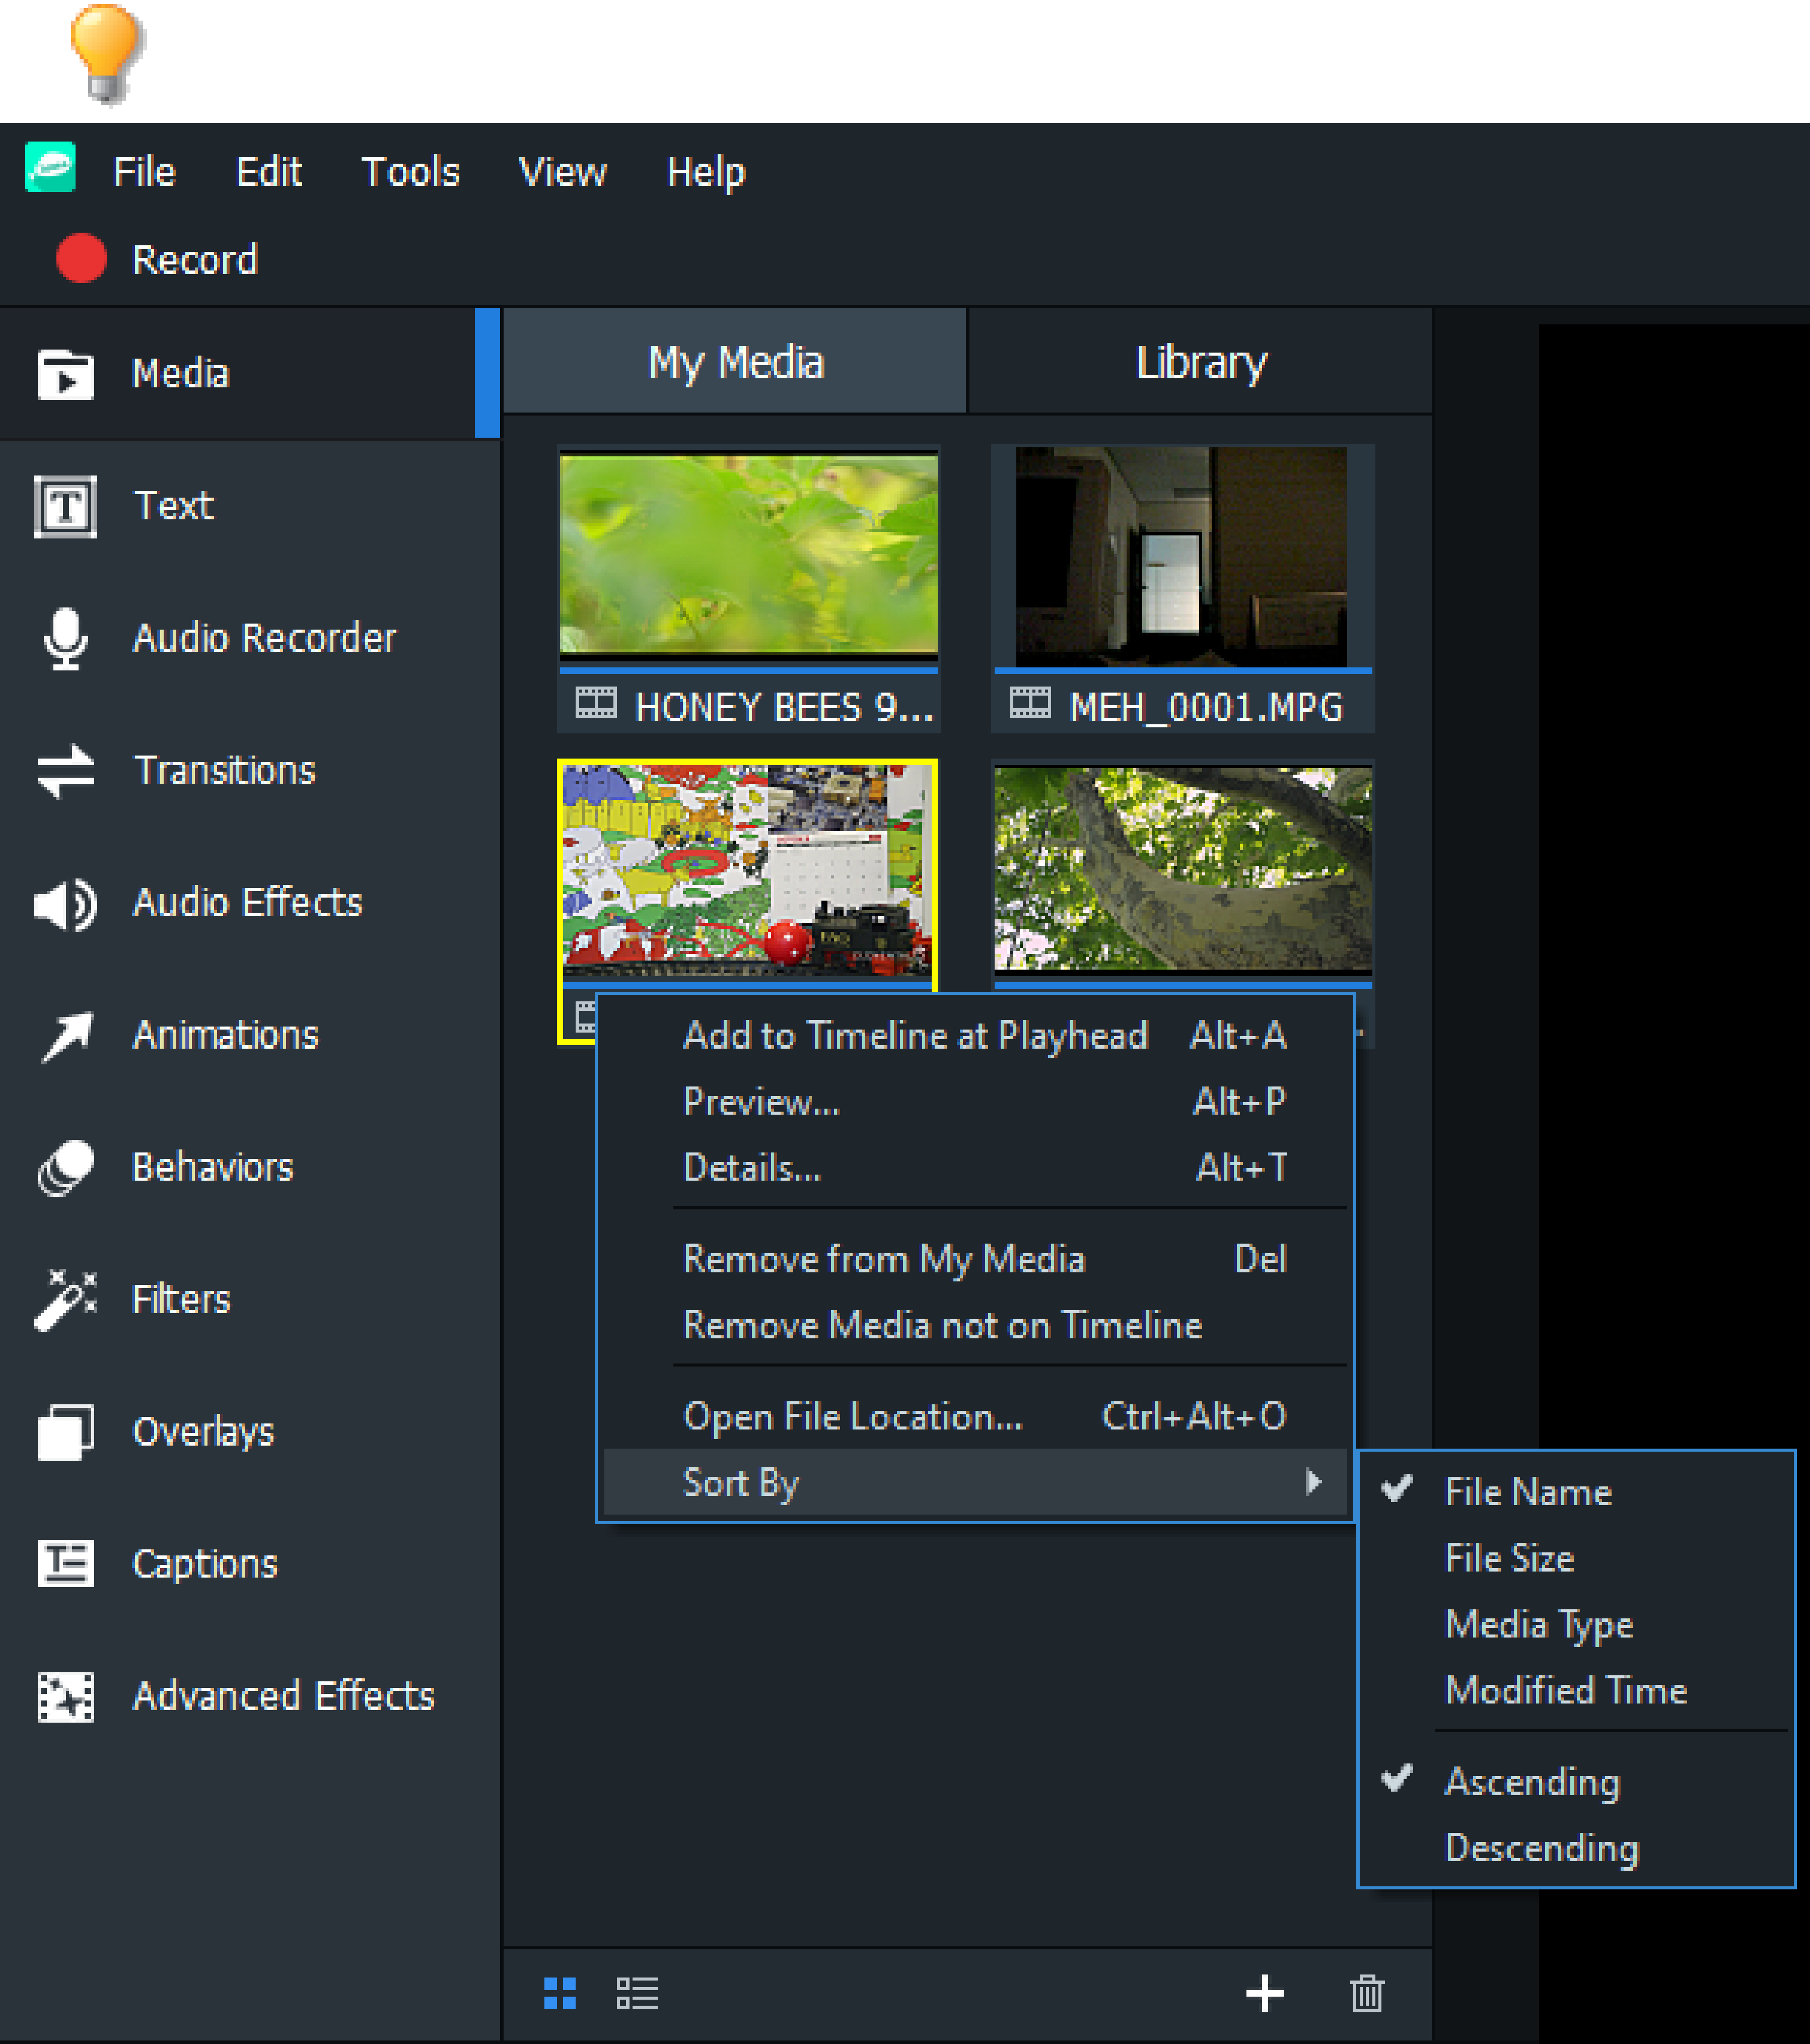
Use the Sort menu to sort added media by File Name, File Size, Media Type, or Modified Time.
Right-click a file to access the context menu, then select Sort By.
To add media to the Timeline:
To add media to the Timeline, do one of the following:
1. Right-click the media to be added to the Timeline.
2. Select Add to Timeline at Playhead from the context menu. Continue this action for all media to be
added. Select and drag the edge of the clip to specify the desired duration.
Or:
1. Select the media to be added to the Timeline.
2. Drag media onto the desired location on the Timeline. Select and drag the edge of the clip to specify the
desired duration.
ACDSee Luxea Video Editor User Guide
Page 8 of 74
Or:
1. Select the media to be added to theTimeline.
2. Press Alt + A. The clip will be added to the Timeline at the Playhead's current position.
Move multiple clips from My Media to the Timeline in one step by dragging the cursor over the clips and
dragging them onto the Timeline. Or, hold Shift while selecting clips, then drag the clips onto the
Timeline.
The Timeline makes it easy to keep track of a video's duration at a glance. Hover the cursor over a clip on
the Timeline to see its duration data. Please note that the first five digits represent time. However, the last
two digits (after the semi-colon) represent frames, rather than milliseconds. There are up to 60 frames
per second.
To remove media from My Media:
To remove media from My Media, do one of the following:
Right-click the media to be removed. Select Remove from My Media from the context menu.
Select the media in My Media and click the Delete button.
To remove all media from My Media, do one of the following:
Select Edit | Remove All from My Media from the menu.
Press Ctrl + Alt + R.
To remove all media not added to the Timeline:
All media can be removed from My Media that have not been added to the Timeline.
Right-click anywhere in My Media and choose Remove Media not on Timeline from the context menu.
To remove media from the Timeline:
Remove an individual clip by right-clicking it on the Timeline and selecting Delete.
To remove all of the clips on the Timeline, select Edit | Remove All from Timeline from the menu.
To preview media in My Media:
Do one of the following:
Right-click the file and select Preview... from the context menu.
Double-click a file in My Media.
Select the clip and press Alt + P.
Press F to display the preview full screen, or press the Full Screen button.
ACDSee Luxea Video Editor User Guide
Page 9 of 74
ORGANIZING, ADJUSTING, AND DISPLAYING MEDIA
Media can be arranged on Timeline tracks to create and edit a video. Using multiple tracks allows for unlimited
layering of content. Drag and drop audio, video, and images from the My Media tab to any track on the Timeline,
at any point on the Timeline. It is also possible to drag text, transitions, audio effects, animations, behaviors,
filters, overlays, and advanced effects to specific media locations on the Timeline, or on the track above the media.
Captions will be added at the Playhead. After media has been added to the Timeline, move media to a desired
location by selecting and dragging.
TIMELINE TRACKS
Use the tracks on the Timeline to create a layered hierarchy of content. For instance, if a media asset on Track 1,
but then add another media asset on Track 2, the media asset on Track 2 will cover the media asset on Track 1.
However, the way in which media appears can be altered by adjusting its opacity and blend mode. Opacity
determines the transparency of the media. By altering the opacity of the media asset on Track 2, the media asset
on Track 1 can show through. Blend modes determine how layers blend together.
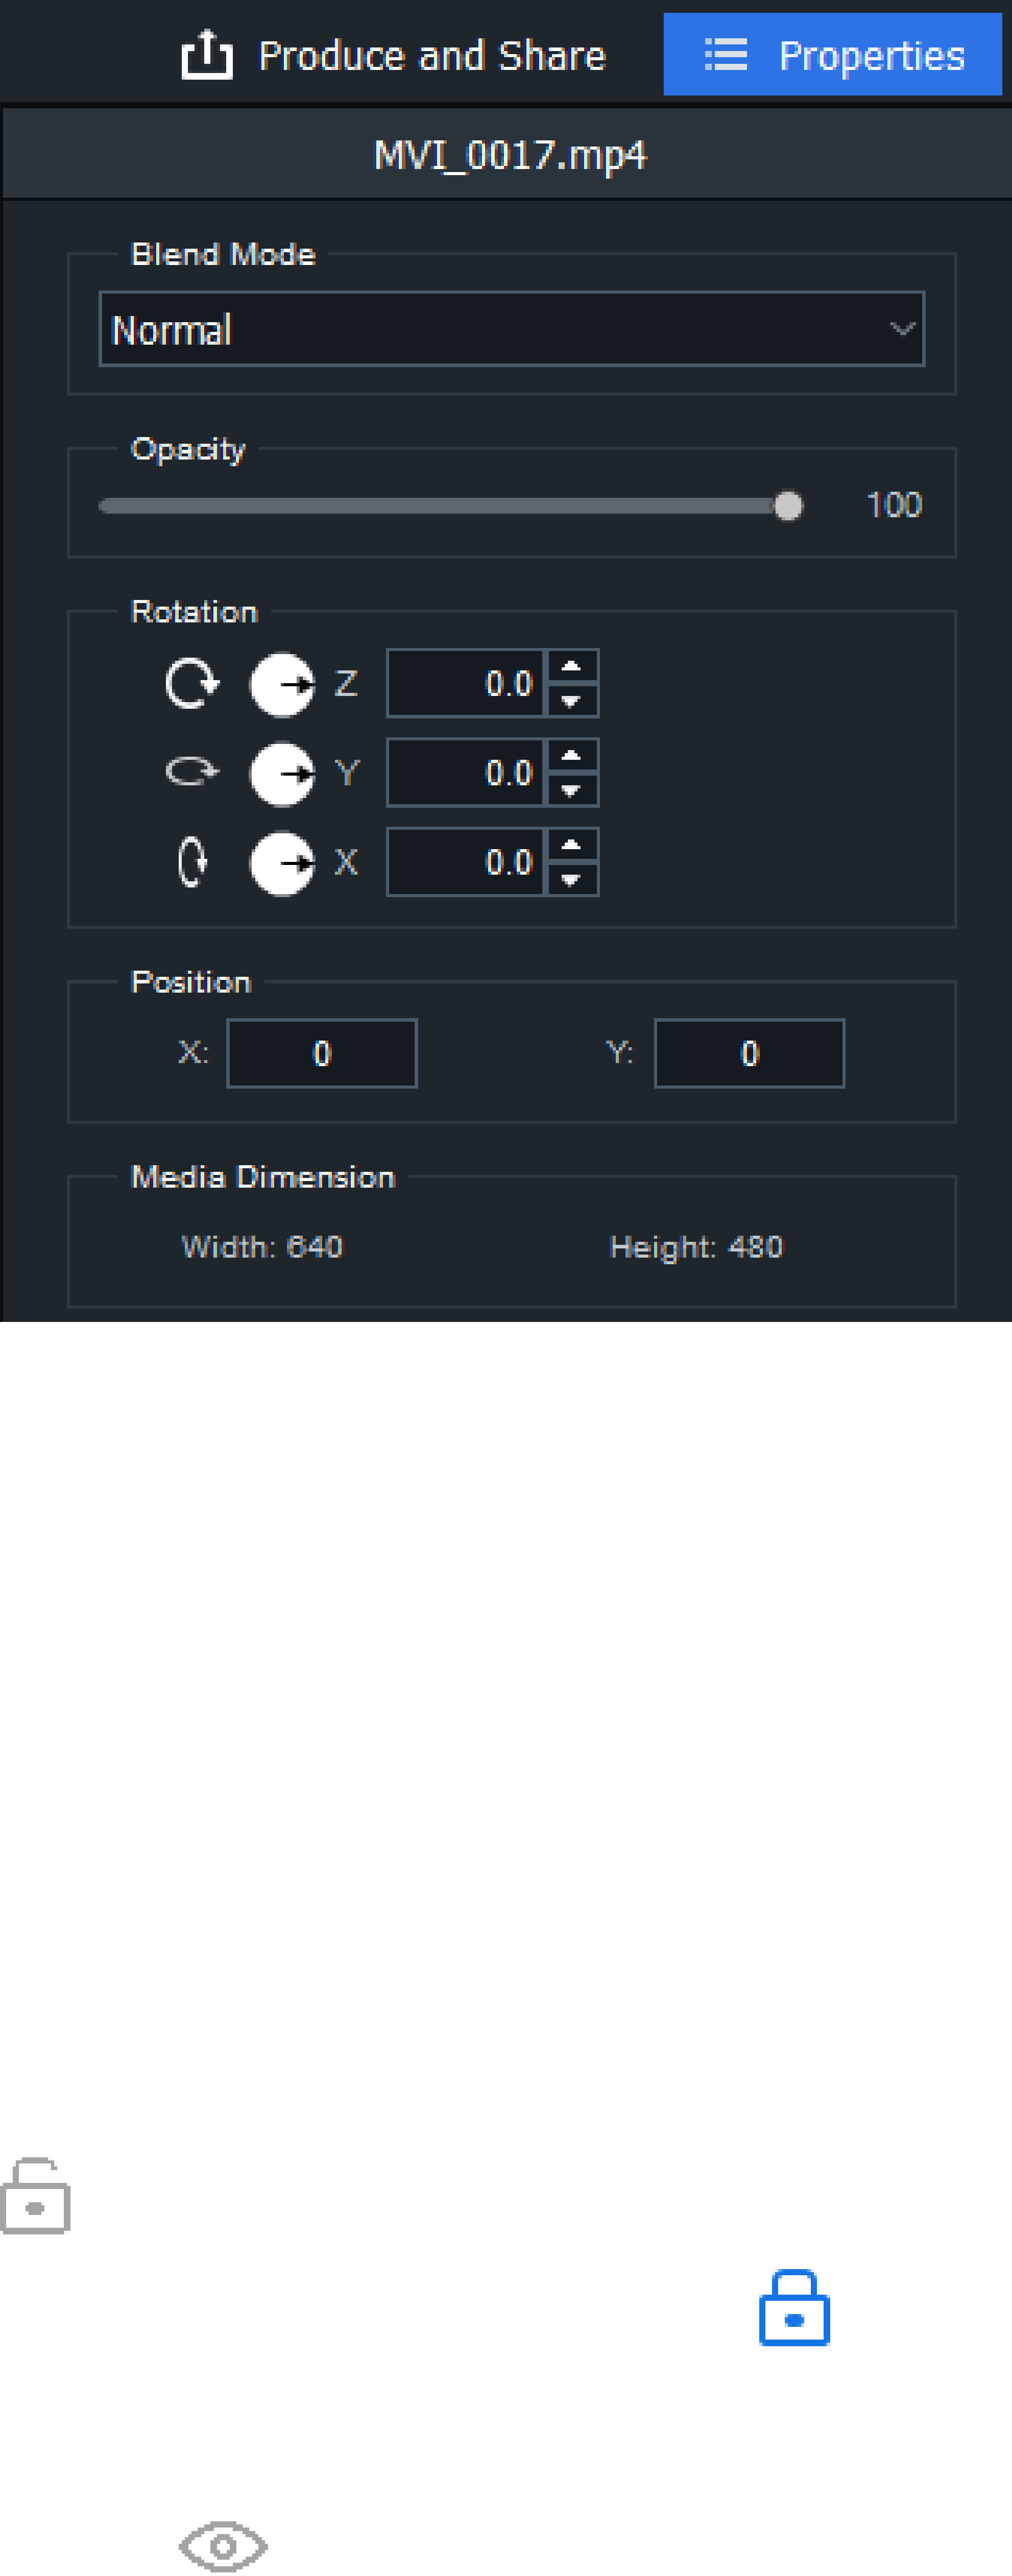
To adjust media properties:
1. Select media on the Timeline.
2.
Click the Properties button in the top right corner.
3. Adjust the settings as described below.
Properties Pane Options
Blend Mode Use the effects in the Blend Mode drop-down menu to control how media blends
with the media or background below it. If the media asset is not stacked on one
or more tracks, blend modes will blend the media with the background. By
default, the background is black, however, the color of the background can be
changed in the Project Settings. For more information, see Display Area below.
Opacity Use the Opacity slider to change the media opacity.
Rotation To rotate the media asset, enter a value in the field or drag the arrow handles to
rotate the media by the X, Y, or Z axes.
Position Enter a value in the X and/or Y fields, or drag the clip around in the Display Area
to change its position.
ACDSee Luxea Video Editor User Guide
Page 10 of 74
COPYING AND PASTING PROPERTIES
The blend mode, opacity, position, and rotation values of clips on the Timeline can be copied and pasted to other
clips on the Timeline.
To copy and paste properties:
1. Right-click a clip on the Timeline with blend mode, opacity, position, and rotation values.
2. Select Copy Properties from the context menu, or press Ctrl + Alt + C.
3. Select another clip on the Timeline.
4. Right-click and select Paste Properties, or press Ctrl + Alt + P.
Locking tracks:
Tracks and their associated media can be locked to prevent editing or other changes by clicking the Lock button.
To unlock the track, press the Lock button.
Hiding tracks:
Tracks can be hidden or revealed, and by extension, the media on those tracks, by clicking the Disable button on
the track.
Hiding tracks can be useful for isolating and editing specific parts of a video.
ACDSee Luxea Video Editor User Guide
Page 11 of 74
Video productions will not include media on tracks set to "Disabled".
CLOSING GAPS ON THE TIMELINE
Empty spaces between media can be removed on the Timeline by using Close Gaps on Track.
To remove an empty space on a track:
1. Right-click an empty area on a track in the Timeline.
2. Select Close Gaps on Track from the context menu.
To remove an empty space between multiple media assets:
1. Select multiple media assets in a track on the Timeline.
2. Right-click one of the selected media assets.
3. Select Close Gaps from the context menu.
PLAYBACK QUALITY
The video playback quality can be adjusted to help speed up the editing process. This is useful when working with
high quality videos or if the host computer is processing the video slowly.
To change playback quality:
To change playback quality, do one of the following:
Click the drop down menu beside the seek bar and select a quality.
Select View | Playback Quality from the menu and make a selection from the list.
Changing the playback quality will not affect the quality of the final output.
FULL SCREEN PLAYBACK
Video playback can be viewed in full screen to experience the video in more detail.
To view playback in full screen:
To view the video playback in full screen, do one of the following:
Select View | Display Area from the menu and select Full Screen/Restore.
Press F.
Click the Full Screen button.
DISPLAY AREA
The Display Area previews how a video will look once rendered. Content can be moved around and resized within
the Display Area. Resize by dragging the handles on the edges of the media. To resize while maintaining the
aspect ratio, use one of the corner handles. To create an abnormal aspect ratio, hold down Shift while dragging
the corner handles.
ACDSee Luxea Video Editor User Guide
Page 12 of 74
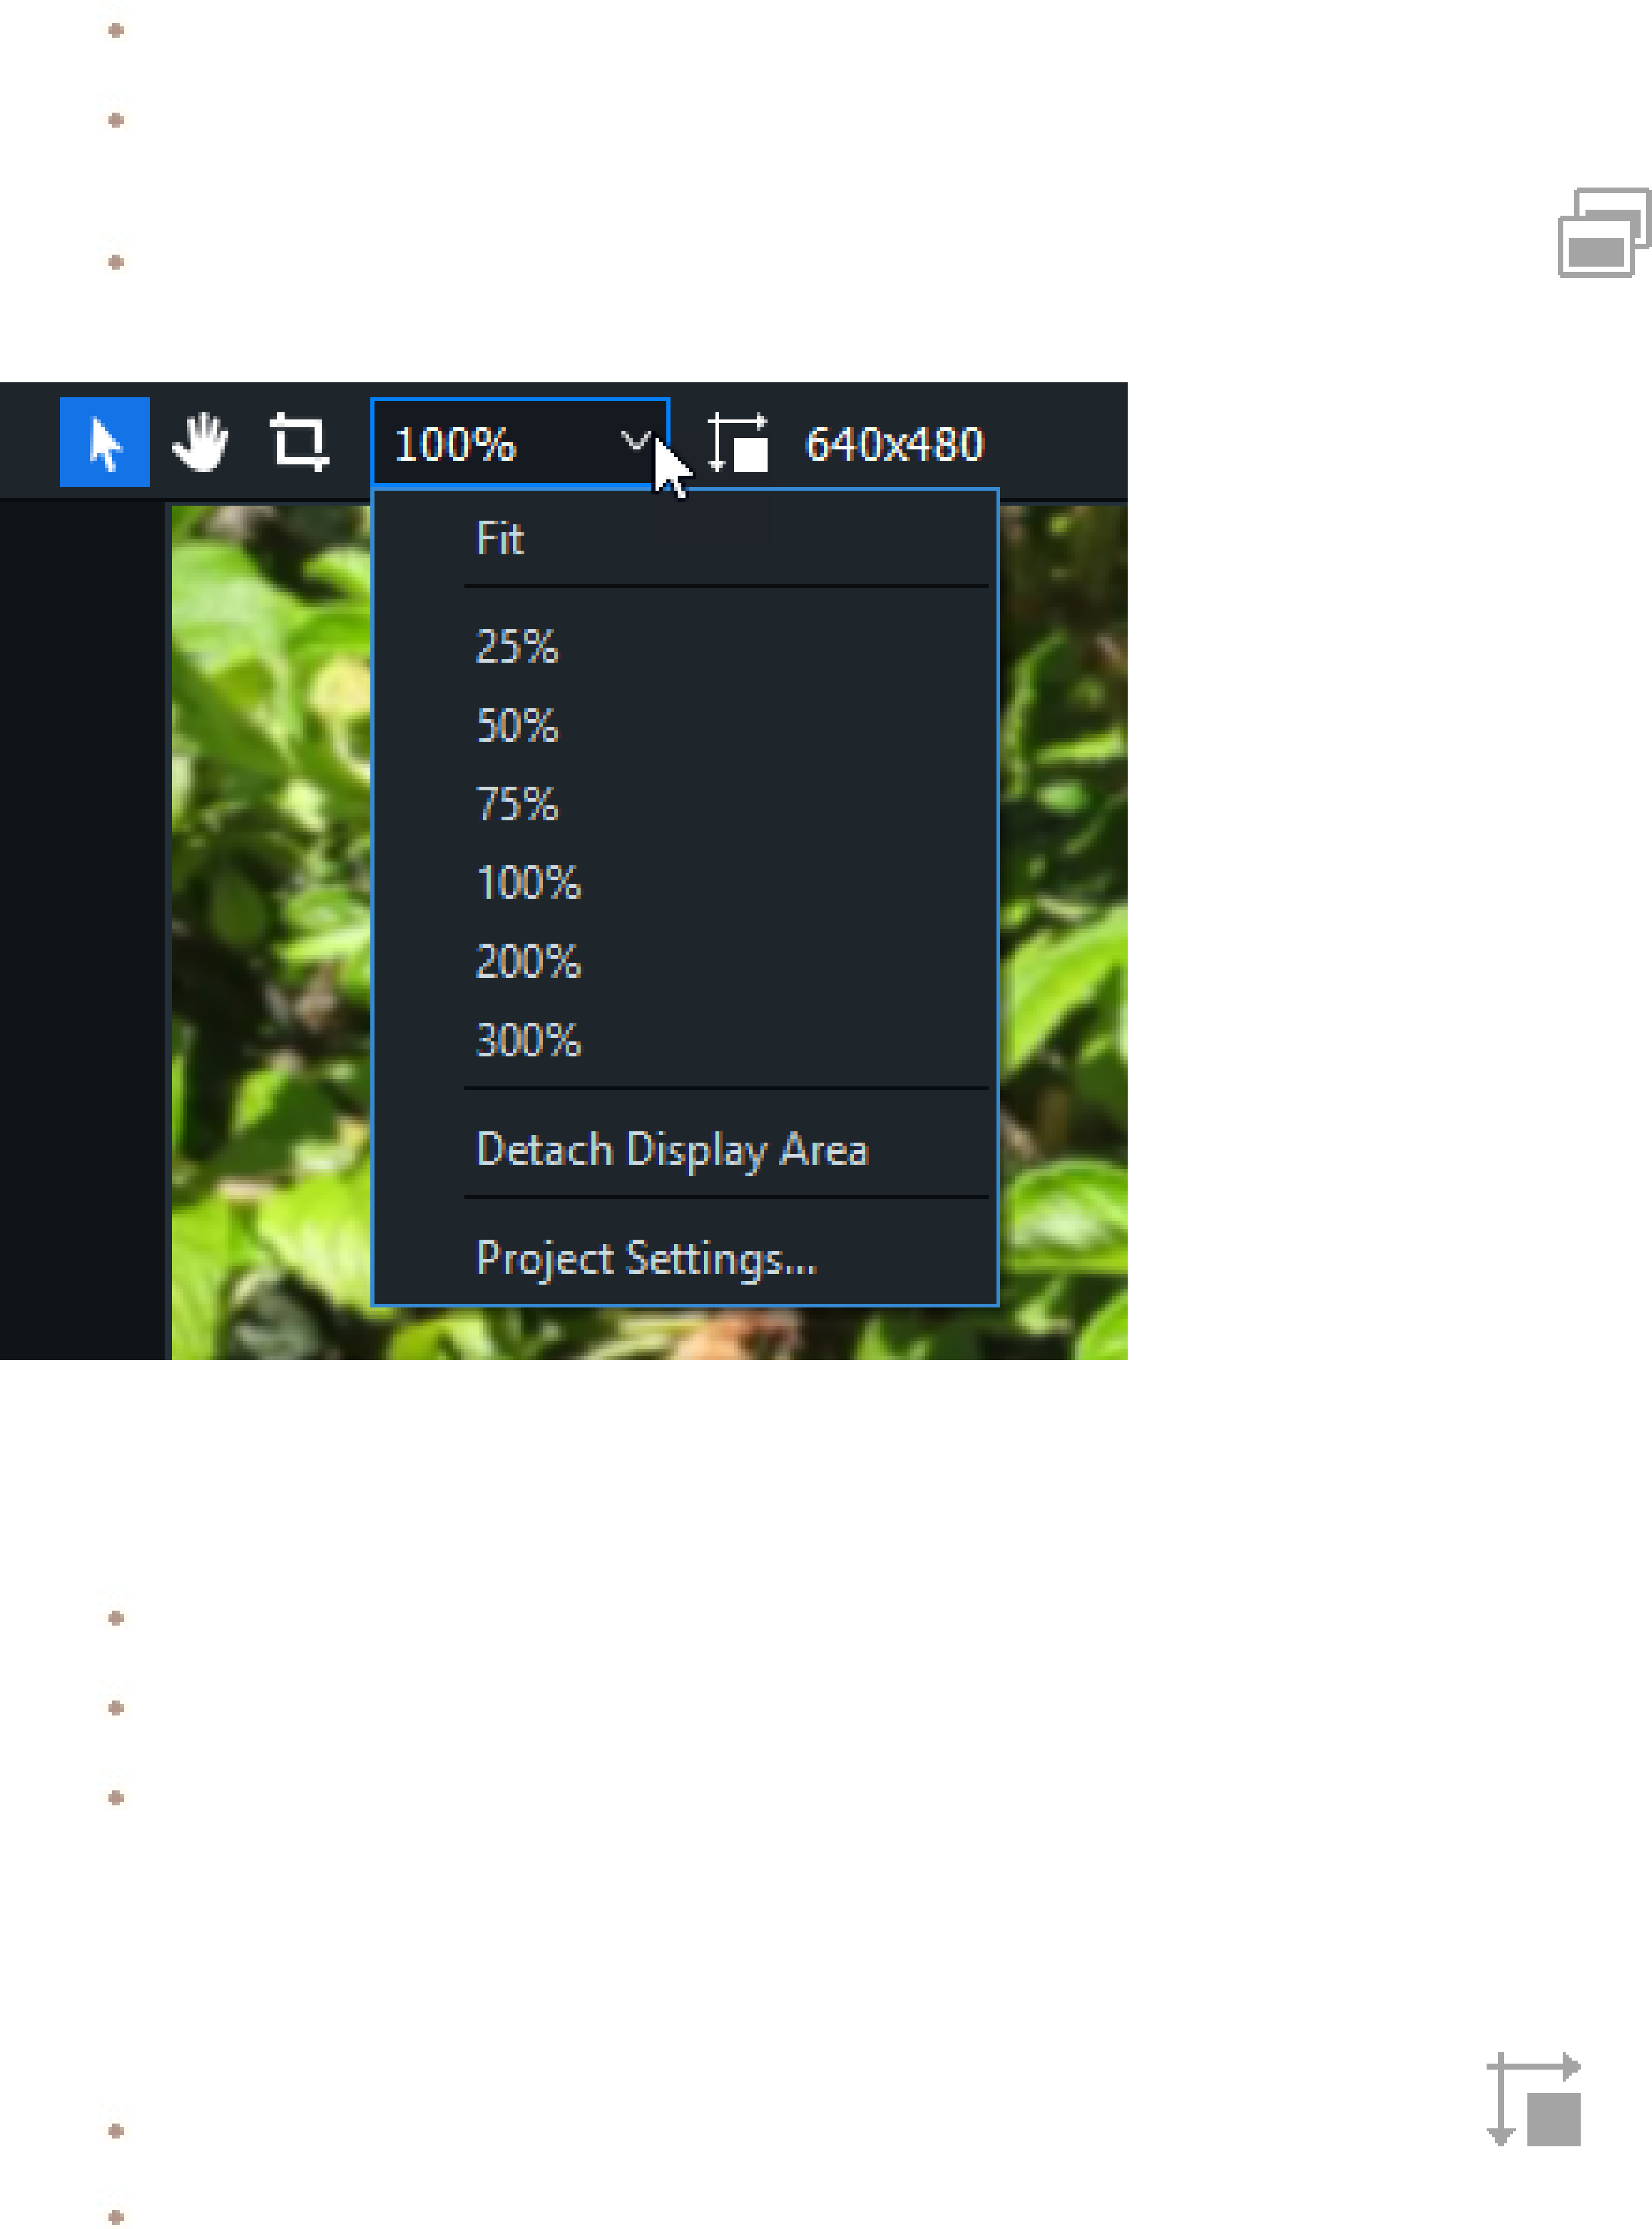
Zoom the Display Area to accommodate monitor size by using the percentages in the drop-down menu at the top of
the Display Area. Select Fit to allow Luxea to adapt automatically. Detach the Display Area to make editing easier.
Detaching is useful when editing across two screens, or for viewing edits in full screen.
To detach the Display Area:
To detach the Display Area, do one of the following:
Select View | Display Area from the menu and click Detach Display Area.
Select Detach Display Area from the drop-down menu at the top of the Display Area.
Above the Timeline Toolbar, click the Detach Display Area button.
To reattach the Display Area:
To reattach the Display Area, do one of the following:
Click the drop-down menu at the top of the Display Area and select Reattach Display Area.
In the Display Area, click the Reattach Display Area button.
Close the detached display area.
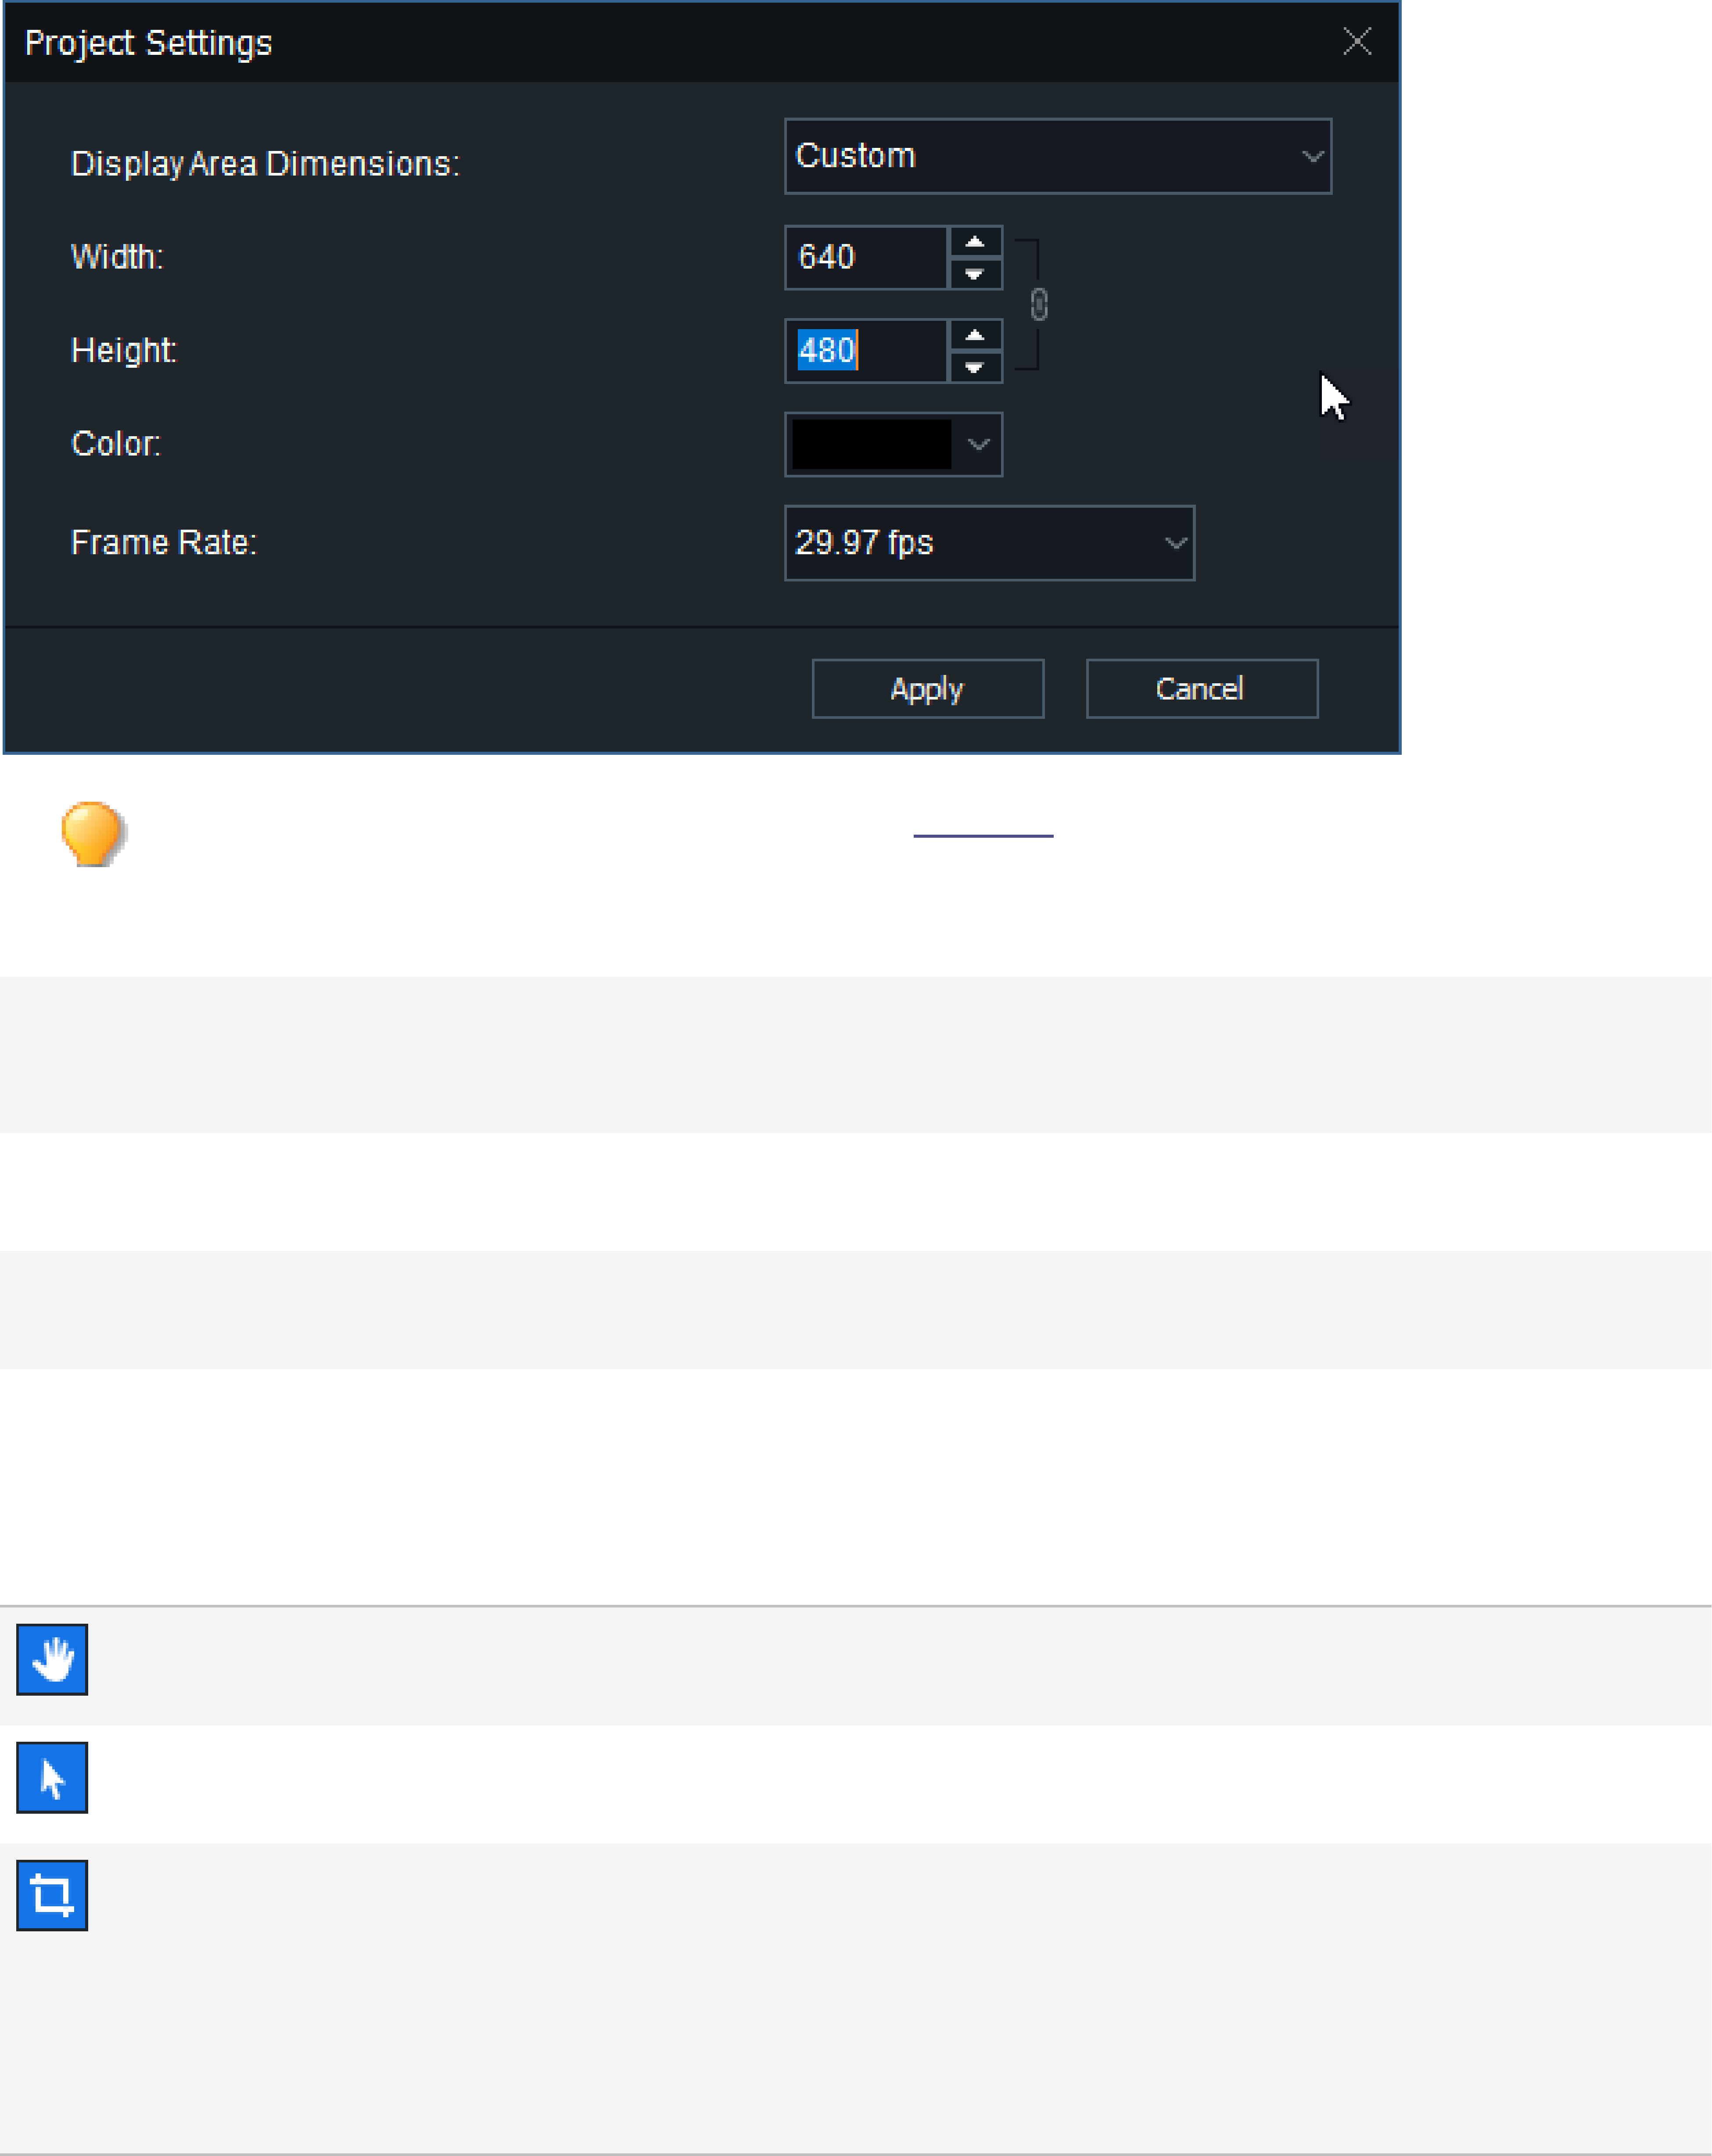
To configure the Display Area settings:
To configure the Display Area settings for a project and resulting video production, do one of the following:
Click the Project Settings button at the top of the Display Area.
Click the drop-down menu at the top of the Display Area and select Project Settings.
Configure the settings as described below and click Apply the apply button.
ACDSee Luxea Video Editor User Guide
Page 13 of 74
Change the size settings for a rendered video in the Settings dialog in the Production Assistant.
Project Settings
Display Area Dimensions Select dimensions for the Display Area from the drop-down menu, or select
Custom to specify a unique width and height. Select preset dimensions for
social media channels TikTok and Instagram.
Width/Height Resizes the Display Area when Custom is selected from the Display Area
Dimensions drop-down menu.
Color Customize the Display Area background color by selecting a color from the
drop-down menu.
Frame Rate Choose a Frame Rate for a video from 23.97 frames per second (fps) to 60 fps.
Media tools
Pan tool: use the Pan tool to move the Display Area
without resizing it.
Press Ctrl + Shift + P.
Edit tool: use the Edit tool to move and resize media
within the Display Area.
Press Ctrl + Shift + E.
Crop tool: use the Crop tool to remove unwanted parts
of the media. Drag the handles of the crop window to
your desired size. To maintain the media's aspect ratio,
resize the crop window by dragging the corners. Move
the crop window around. To restore cropped material,
re-enter the Crop tool and resize the crop window as
desired.
Press Ctrl + Shift + C.

ACDSee Luxea Video Editor User Guide
Page 14 of 74
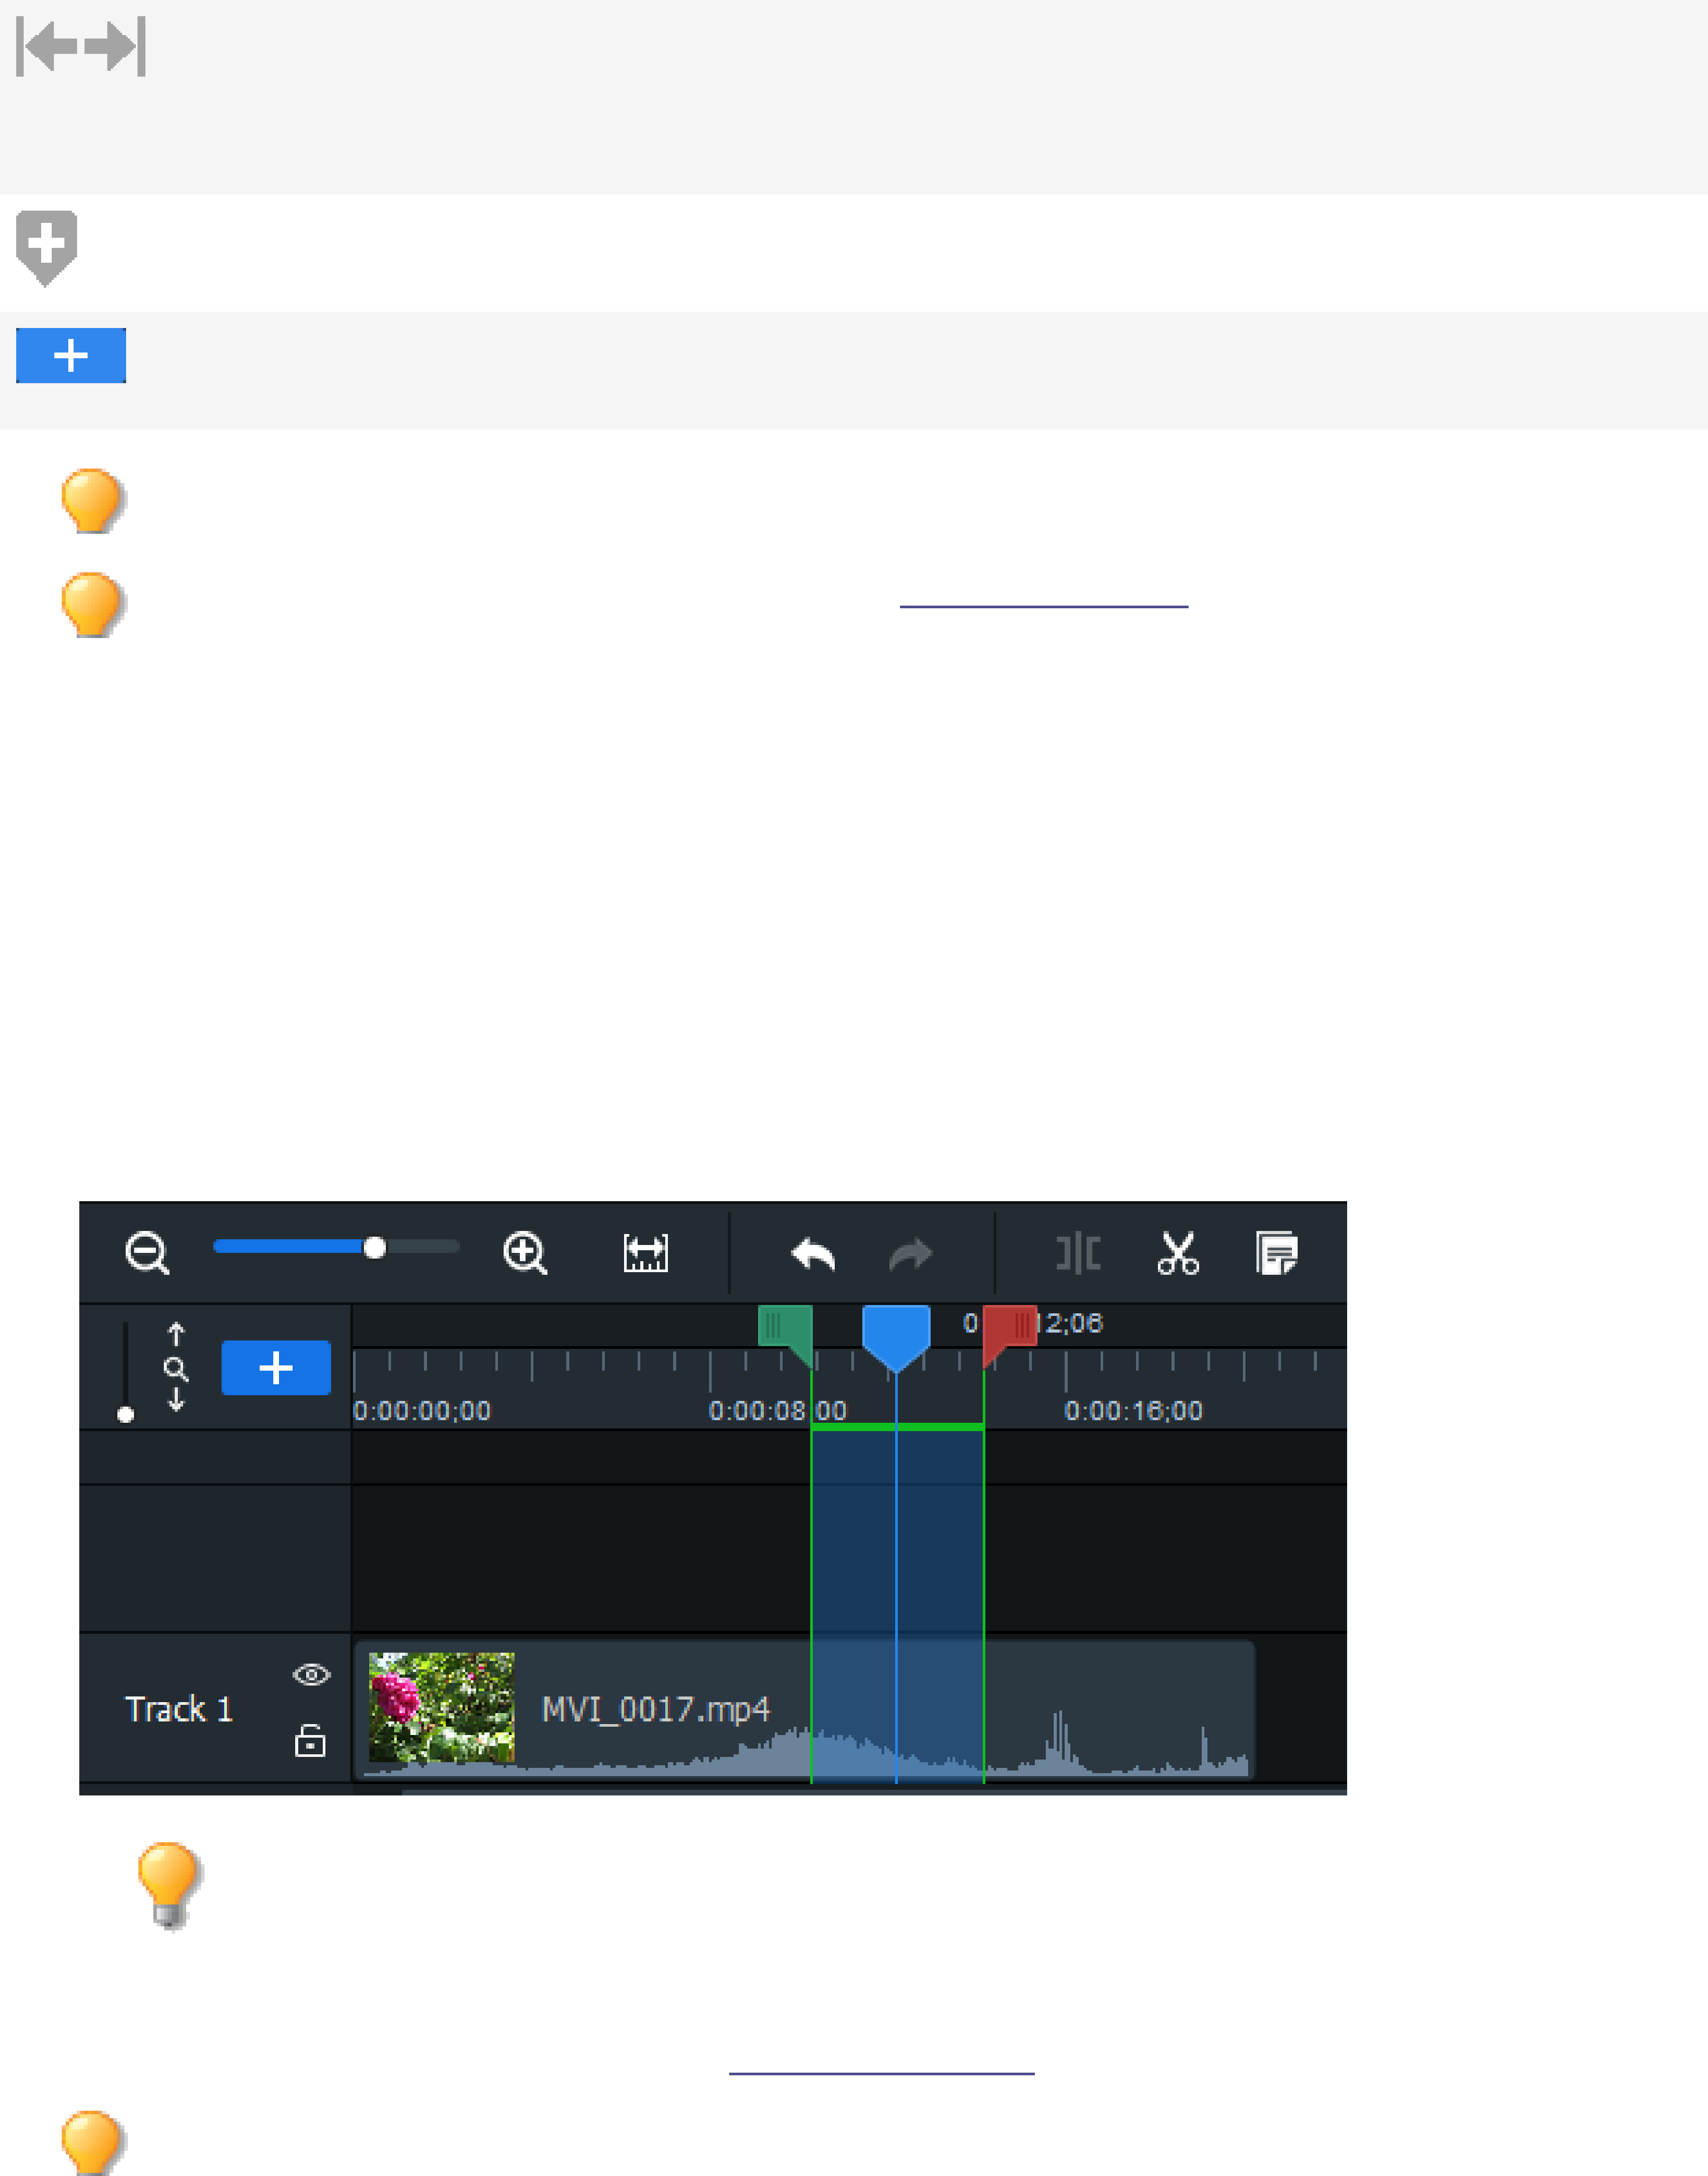
TIMELINE TOOLBAR
The Timeline toolbar has a number of video editing functions.

ACDSee Luxea Video Editor User Guide
Page 15 of 74
Zoom in/Zoom out Zoom in to expand the appearance of your
tracks on the Timeline, allowing for
precision editing. Zoom out to condense the
appearance of tracks on the Timeline, to
view your project in its entirety. Or press
Ctrl + Shift + = or Ctrl + Shift + -.
Zoom to fit timeline Zoom in or out to view the entire length of
the track on the Timeline, to provide a
sense of the bigger picture. Or press Ctrl
+ Shift + F.
Undo Use the Undo button to undo recent
actions. Or press Ctrl + Z.
Redo Use the Redo button to repeat the most
recent undone actions. Or press Ctrl + Y.
Split Use the Split button to divide one clip into
two or more clips. This allows for the
insertion of transitions and other clips
between two scenes.
Select a clip to split and click the Split
button. Or press Ctrl + Shift + S.
Cut Use the Cut button to remove unwanted
clips or sections of clips. (See Split.) Paste
the clips using the Paste button. (See
Paste.)
Select a clip to remove, then click the Cut
button. Or press Ctrl + X.
Copy Use the Copy button to duplicate tracks or
sections of tracks. (See Split.) Paste clips
by using the Paste button. (See Paste.)
Select a clip to copy, then click the Copy
button. Or press Ctrl + C.
Paste Use the Paste button to add cut or copied
clips to desired locations on the Timeline.
After copying or cutting a clip, move the
Playhead to where the additions will be
placed in the Timeline, and click Paste. Or
press Ctrl + V.
Seek to left/right
selection slider
Use the Seek to left selection slider to
find the start of a selection on the Timeline.
Use the Seek to right selection slider to
find the end of a selection on the Timeline.
This is useful for viewing the Timeline
zoomed in, or when working with a large
selection.
Seek to Playhead Use the Seek to Playhead button to find
the Playhead on the Timeline. This is useful
when viewing a zoomed in Timeline.
ACDSee Luxea Video Editor User Guide
Page 16 of 74
Move Playhead to the
start/end of Timeline
Use the Start/End Timeline buttons to
move the Playhead to the beginning of the
Timeline (Page Up) or to the end of the
media on the Timeline (Page Down).
Add Marker Use the Add Marker button to add multiple
markers to the Timeline.
Add Tracks Use the Add Tracks button to add multiple
tracks to the Timeline.
Cut, Copy, and Paste can also be accessed by right-clicking on the Timeline.
Video editing functions can also be accessed using keyboard shortcuts.
CREATING SELECTIONS
The selection feature enables sections of the clip to be deleted, moved, or produced. A section of a clip, rather
than the entire project, can be produced by creating a selection. This can be useful when creating a trailer or for
producing one scene of the entire project.
To create and produce a selection:
1. With media residing on the Timeline, pull the green selector (on the left of the Playhead) to where the
selection will start. Then pull the red selector (on the right of the Playhead) to where the selection will
end.
If the Selection sliders are out of sight, click the Seek to left selection slider to find the start of
the selection. Click the Seek to right selection slider to find the end of the selection.
2. Right-click the selection and select Produce Timeline Selection as... from the context menu.
3. Configure the production settings in the Production Assistant.
Play selections by placing the Playhead before the selection on the Timeline.

ACDSee Luxea Video Editor User Guide
Page 17 of 74
DELETING SELECTIONS
To delete a selection:
1. Use the red and green selectors to select the area of a clip to be removed.
2. Right-click the clip and select Delete.
To delete and fill a selection:
After deleting clip selections, Luxea fills in the gap by moving the surrounding media.
1. Use the red and green selectors to select the area of a clip to be removed.
2. Right-click the clip and select Ripple Delete.
MARKERS AND SETPOINTS
For a finer degree of control during the creative or editing phase of a project, place setpoints in the playback by
adding markers to the Timeline. To help with the critical task of aligning clips, media assets in the Timeline snap to
setpoints by default.
To remove the "snap-to-setpoint" functionality when moving clips in the Timeline, hold down the Ctrl
key.
There are two types of markers: the Timeline Marker, and the Clip Marker.
TIMELINE MARKER
The Timeline Marker is a marker added to the Timeline.
To add a marker to the Timeline:
1. With a project open but no clips selected, move the playhead to a position in the Timeline where the marker
will be placed.
2.
Click the Marker icon on the Timeline toolbar, or press Shift + M.
CLIP MARKER
The Clip Marker is a marker added to a clip residing on the Timeline.
To add a marker to a clip:
1. With a project open, move the playhead overtop of a clip in the Timeline.
2. Select the clip.
3.
Click the Marker icon on the Timeline toolbar, or press Shift + M.
The Prev and Next buttons in the Marker Editor dialog can be used to move between setpoints on the
Timeline, or if a clip is selected, between setpoints on the selected clip.
To edit a marker:
ACDSee Luxea Video Editor User Guide
Page 18 of 74
1. Do one of the following:
l Select the marker, then select Edit | Markers | Edit Marker from the main menu, or
l Double-click the marker.
The value in the Time value matches the position of the playhead.
2. Add any relevant comments about the marker in the Comments field.
3. Select a color for the marker.
4. Click the OK button.
Both Timeline Markers and Clip Markers have context menus with the items highlighted below.
Marker Context Menu Items
Menu Item Description
Edit Marker Opens the Marker Editor dialog
Remove Marker Deletes the current marker from the project's Timeline, regard-
less of whether the marker is a Timeline Marker or a Clip
Marker.
Remove Timeline Markers Available only in Timeline Marker context menus, Remove
Timeline Markers deletes all Timeline Markers from the pro-
ject's Timeline.
Remove All Markers Deletes all Timeline Markers and Clip Markers from the pro-
ject's Timeline.
Go To Next Marker Selects the marker after the current marker.
Go To Previous Marker Selects the marker before the current marker.
KEYBOARD SHORTCUTS
The following keyboard shortcuts can be used to expedite the video editing process.

ACDSee Luxea Video Editor User Guide
Page 19 of 74
Shortcut Resulting Action
Project Management
Ctrl + N Creates a new project.
Ctrl + O Opens the Open dialog.
Ctrl + S Saves the project.
Ctrl + P Launches the Production Assistant.
Ctrl +R Launches the ACDSee Video Recorder.
Ctrl +W Closes Luxea.
Ctrl + M Opens the Add Media files dialog.
Ctrl + E Opens the Import Zipped Project File dialog.
Alt + O Opens the Options dialog.
M Opens My Media.
Editing
Ctrl + Z Undo
Ctrl + Y Redo
Ctrl + X Cut
Ctrl + C Copy
Ctrl + V Paste
Delete Delete
Ctrl + Delete Ripple Delete.
Ctrl + Shift + S Split
Ctrl + Shift + E Activates the Edit tool.
Ctrl + Shift + P Activates the Pan tool.
Ctrl + Shift + C Activates the Crop tool.
= Zooms in.
- Zooms out.
Ctrl +Shift + = Zooms into the Timeline.
Ctrl + Shift + - Zooms out of the Timeline.
Ctrl + mouse wheel Zooms in or out of the Timeline.
ACDSee Luxea Video Editor User Guide
Page 20 of 74
Shortcut Resulting Action
Alt + = Expands the height of the Timeline.
Alt + - Reduces the height of the Timeline.
Ctrl +A Selects All.
Ctrl +D Deselects All.
Page Up Jumps Playhead to beginning of Timeline.
Page Down Jumps Playhead to end of Timeline.
Left Arrow Move the Playhead back one frame on the Timeline.
Right Arrow Move the Playhead forward one frame on the Timeline.
Up Arrow Jump backwards to the beginning or end of the next piece of media.
Down Arrow Jump forwards to the beginning or end of the next piece of media.
Ctrl + Alt + C Copies the properties of the selected media. These properties include
blend mode, opacity, position, and rotation settings.
Ctrl + Alt + P Pastes properties onto the selected media.
Ctrl + 2 Toggles the Properties pane open and closed for the selected clip.
Ctrl + 1 Shows or hides the Content Pane.
Ctrl + Alt + T Removes everything from the Timeline.
Ctrl + Alt + R Removes all media from My Media.
Ctrl + Alt + S Removes all captions.
Shift + C Adds a caption to the Timeline.
F Opens project to view in full screen.
With media selected in My Media...
Alt + A Adds the media to the Playhead's current position on the Timeline.
Alt + P Launches a preview of the media.
Alt + T Opens the Media Details dialog.
Ctrl + Alt + O Opens the file location of the media.
Tools and Effects
M Opens the Media tab.
T Opens the Text tab.
R Opens the Audio Recorder tab.

ACDSee Luxea Video Editor User Guide
Page 21 of 74
Shortcut Resulting Action
S Opens the Transitions tab.
D Opens the Audio Effects tab.
A Opens the Animations tab.
B Opens the Behaviors tab.
L Opens the Filters tab.
O Opens the Overlays tab.
C Opens the Captions tab.
E Opens the Advanced Effects tab.
Shift + S Takes a snapshot of your media's current playback.
F1 Opens the online help.
With a clip selected on the Timeline...
Spacebar Plays or pauses the media on the Timeline.
Alt + M Mutes media during playback.
Alt + F
Creates a still image or Freeze Frame at the Playhead's position on the
Timeline. You can customize how long the freeze frame will last.
Alt + A The selected clip's audio switches to an editable state. See Adjusting
Audio.
Alt + S
Separates the selected clip's audio and video. The audio will be moved
to the track above. See Adjusting Audio.
Alt + C Adds the Clip Speed effect to the selected clip.
Alt + Left Arrow
Adds all media to the left of the selected clip to the current selection on
the Timeline.
Alt + Right Arrow Adds all media to the right of the selected clip to the current selection
on the Timeline.
Left Arrow Move the Playhead back one frame on the Timeline.
Right Arrow Move the Playhead forward one frame on the Timeline.
Ctrl + Left Arrow
Shifts the media in the Display area one unit to the left. The unit
depends upon your level of zoom.
Ctrl + Right Arrow Shifts the media in the Display area one unit to the right. The unit
depends upon your level of zoom.
Ctrl + Up Arrow
Shifts the media in the Display area one unit up. The unit depends
upon your level of zoom.
Ctrl + Down Arrow Shifts the media in the Display area one unit down. The unit depends
ACDSee Luxea Video Editor User Guide
Page 22 of 74
Shortcut Resulting Action
upon your level of zoom.
Ctrl + Shift + Left Arrow Move the Playhead to the beginning of previous media on Timeline.
Ctrl + Shift + Right Arrow Move the Playhead to the beginning of next media on Timeline.
Ctrl + Alt + E
Expands the height of clips on the Timeline which have applied filters
in order to expose the filter bars for adjustment. See Adding Filters to
Media.
Ctrl + Shift + L Rotate clip 90 degrees to the left.
Ctrl + Shift + R Rotate clip 90 degrees to the right.
Shift + M Add a marker
ACDSee Luxea Video Editor User Guide
Page 23 of 74
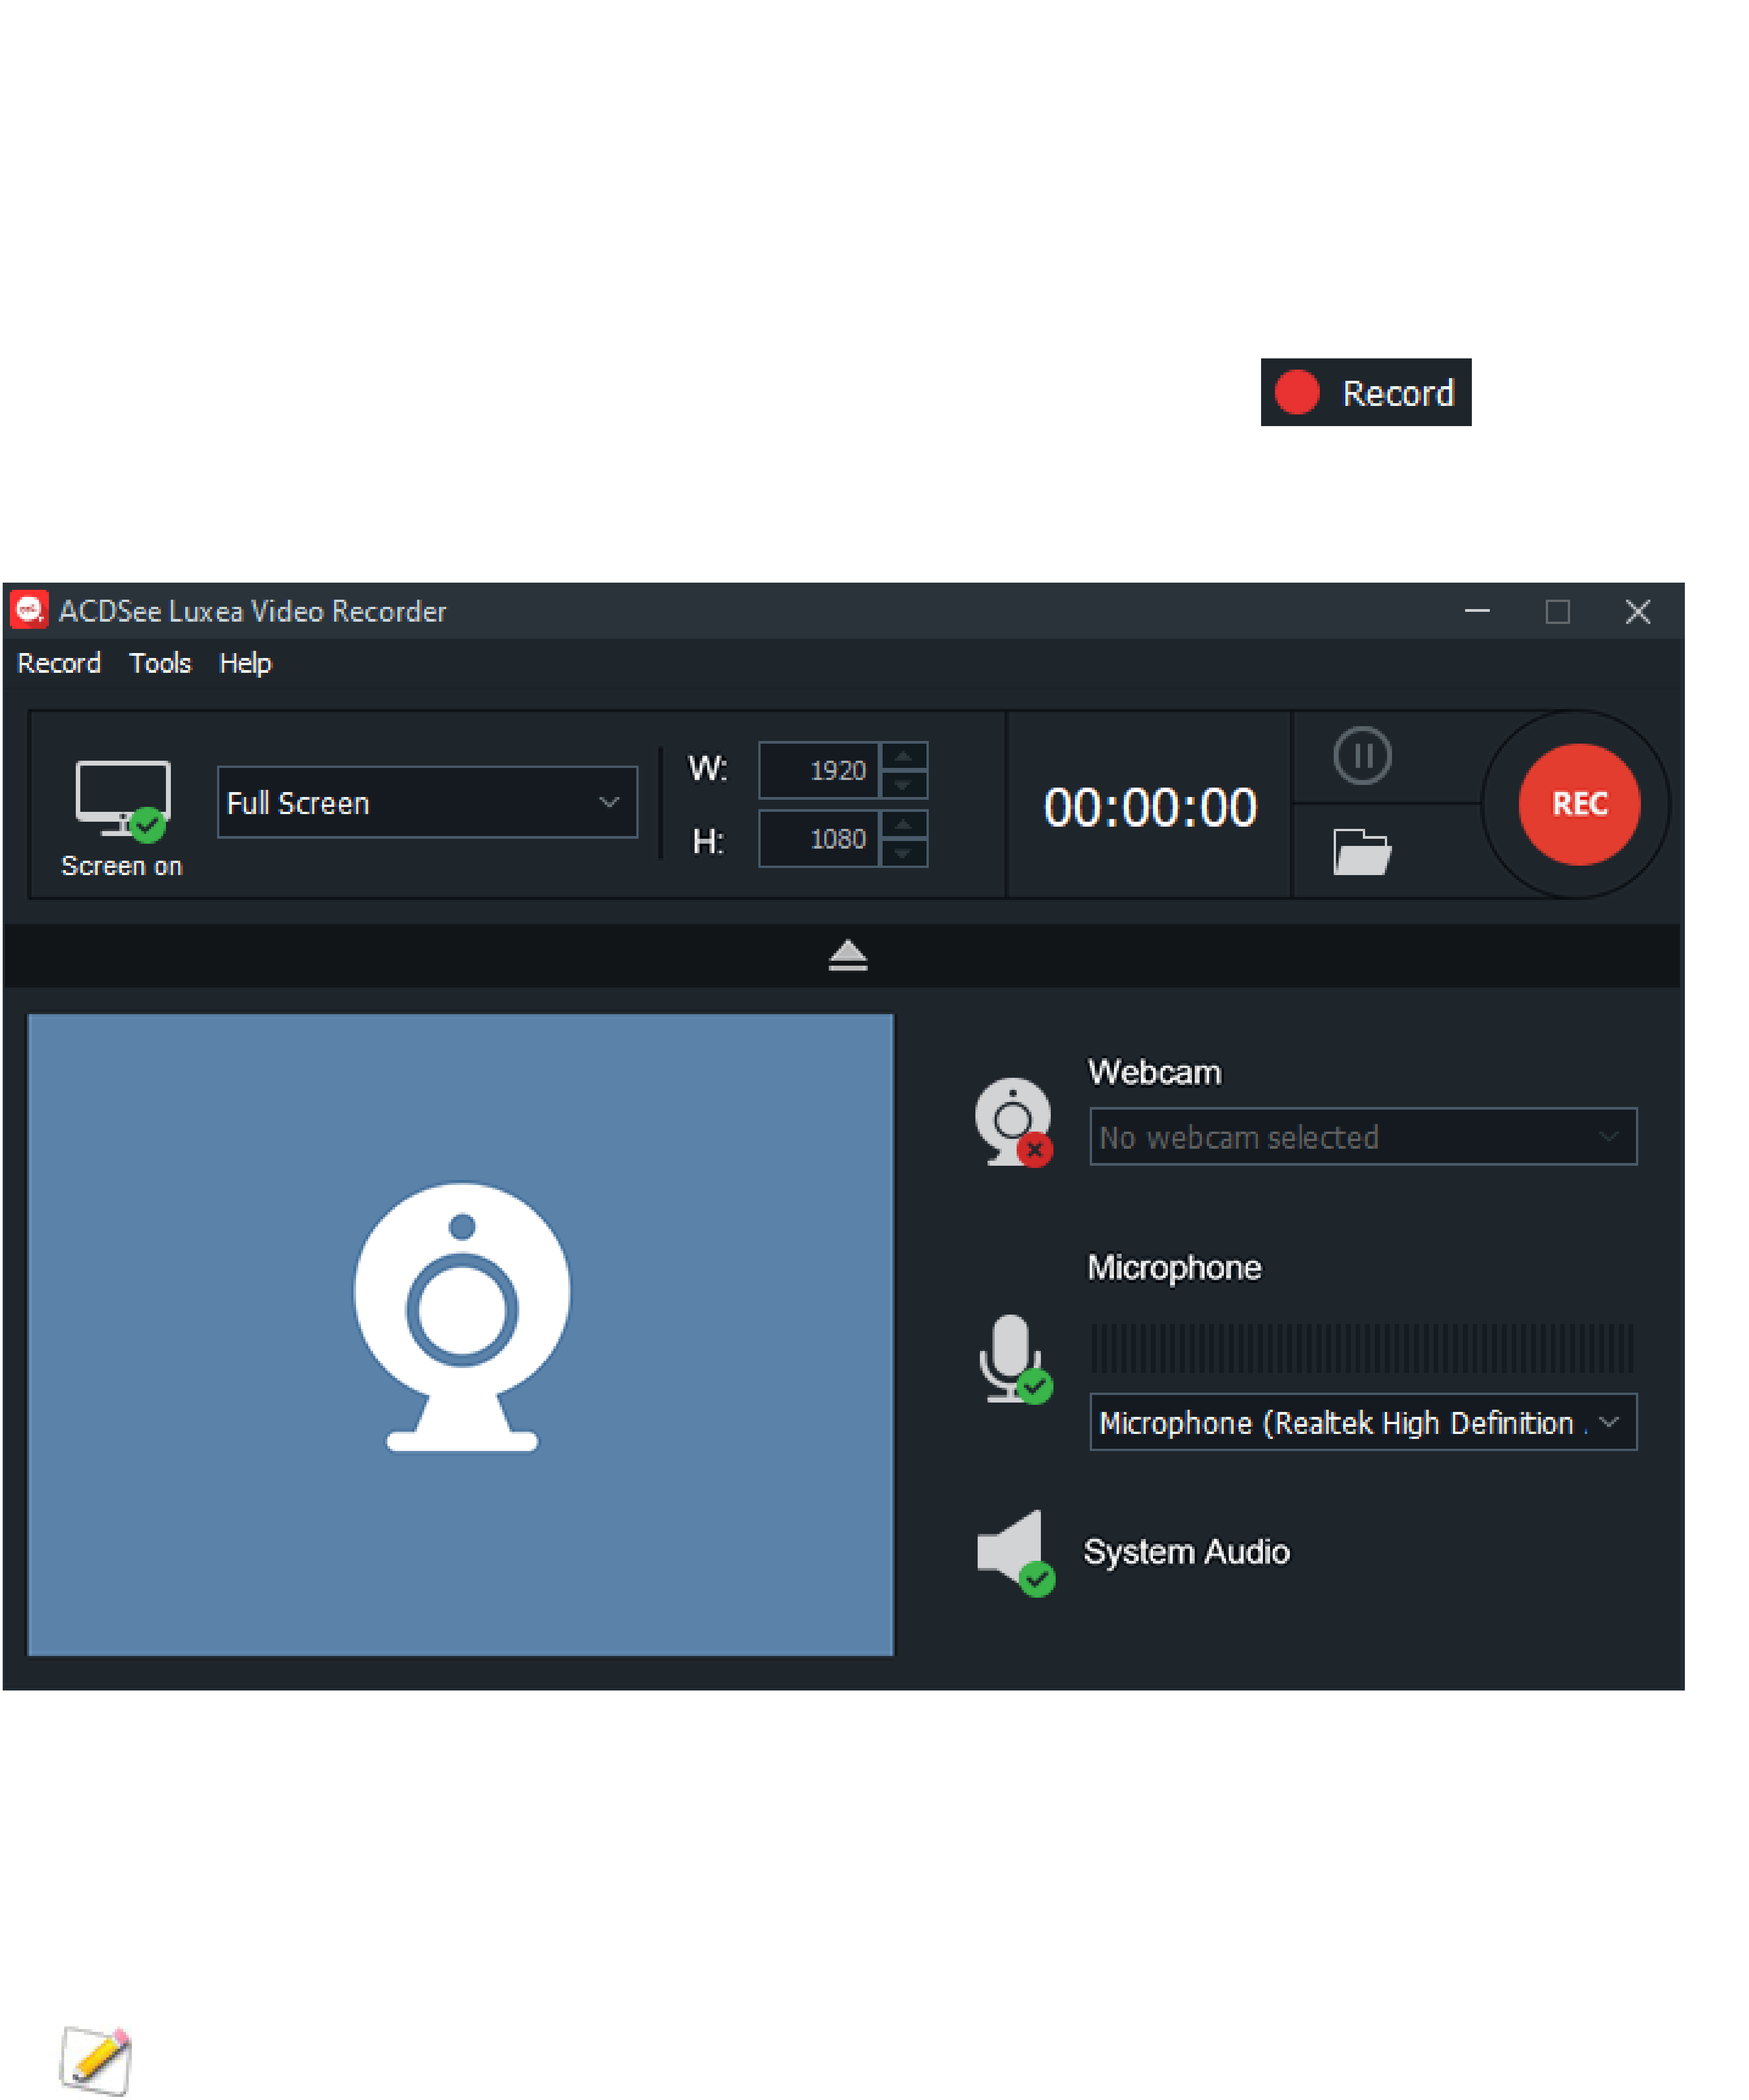
RECORDINGS
Luxea Video Recorder is used to record webcam, microphone, system audio, and screen. The recorded clips can
then be added to a project's Timeline.
To launch Luxea Video Recorder from within Luxea:
To launch Luxea Video Recorder from within Luxea, do one of the following:
l
Click the Record button in the top left corner of ACDSee Luxea Video Editor.
l Press Ctrl + R.
To launch Luxea Video Recorder as a standalone app:
To launch Luxea Video Recorder as a standalone app, do the following:
l Access the Windows Start menu and select Luxea Video Recorder from the ACD Systems folder.
When using the Luxea Video Recorder as a standalone app, to have the Luxea Video Editor automatically
open after a recording, select Tools | Options from the Recorder main menu, and under the General
Settings tab, enable the Start Luxea Video Editor after recording checkbox.
ACDSee Luxea Video Editor User Guide
Page 24 of 74
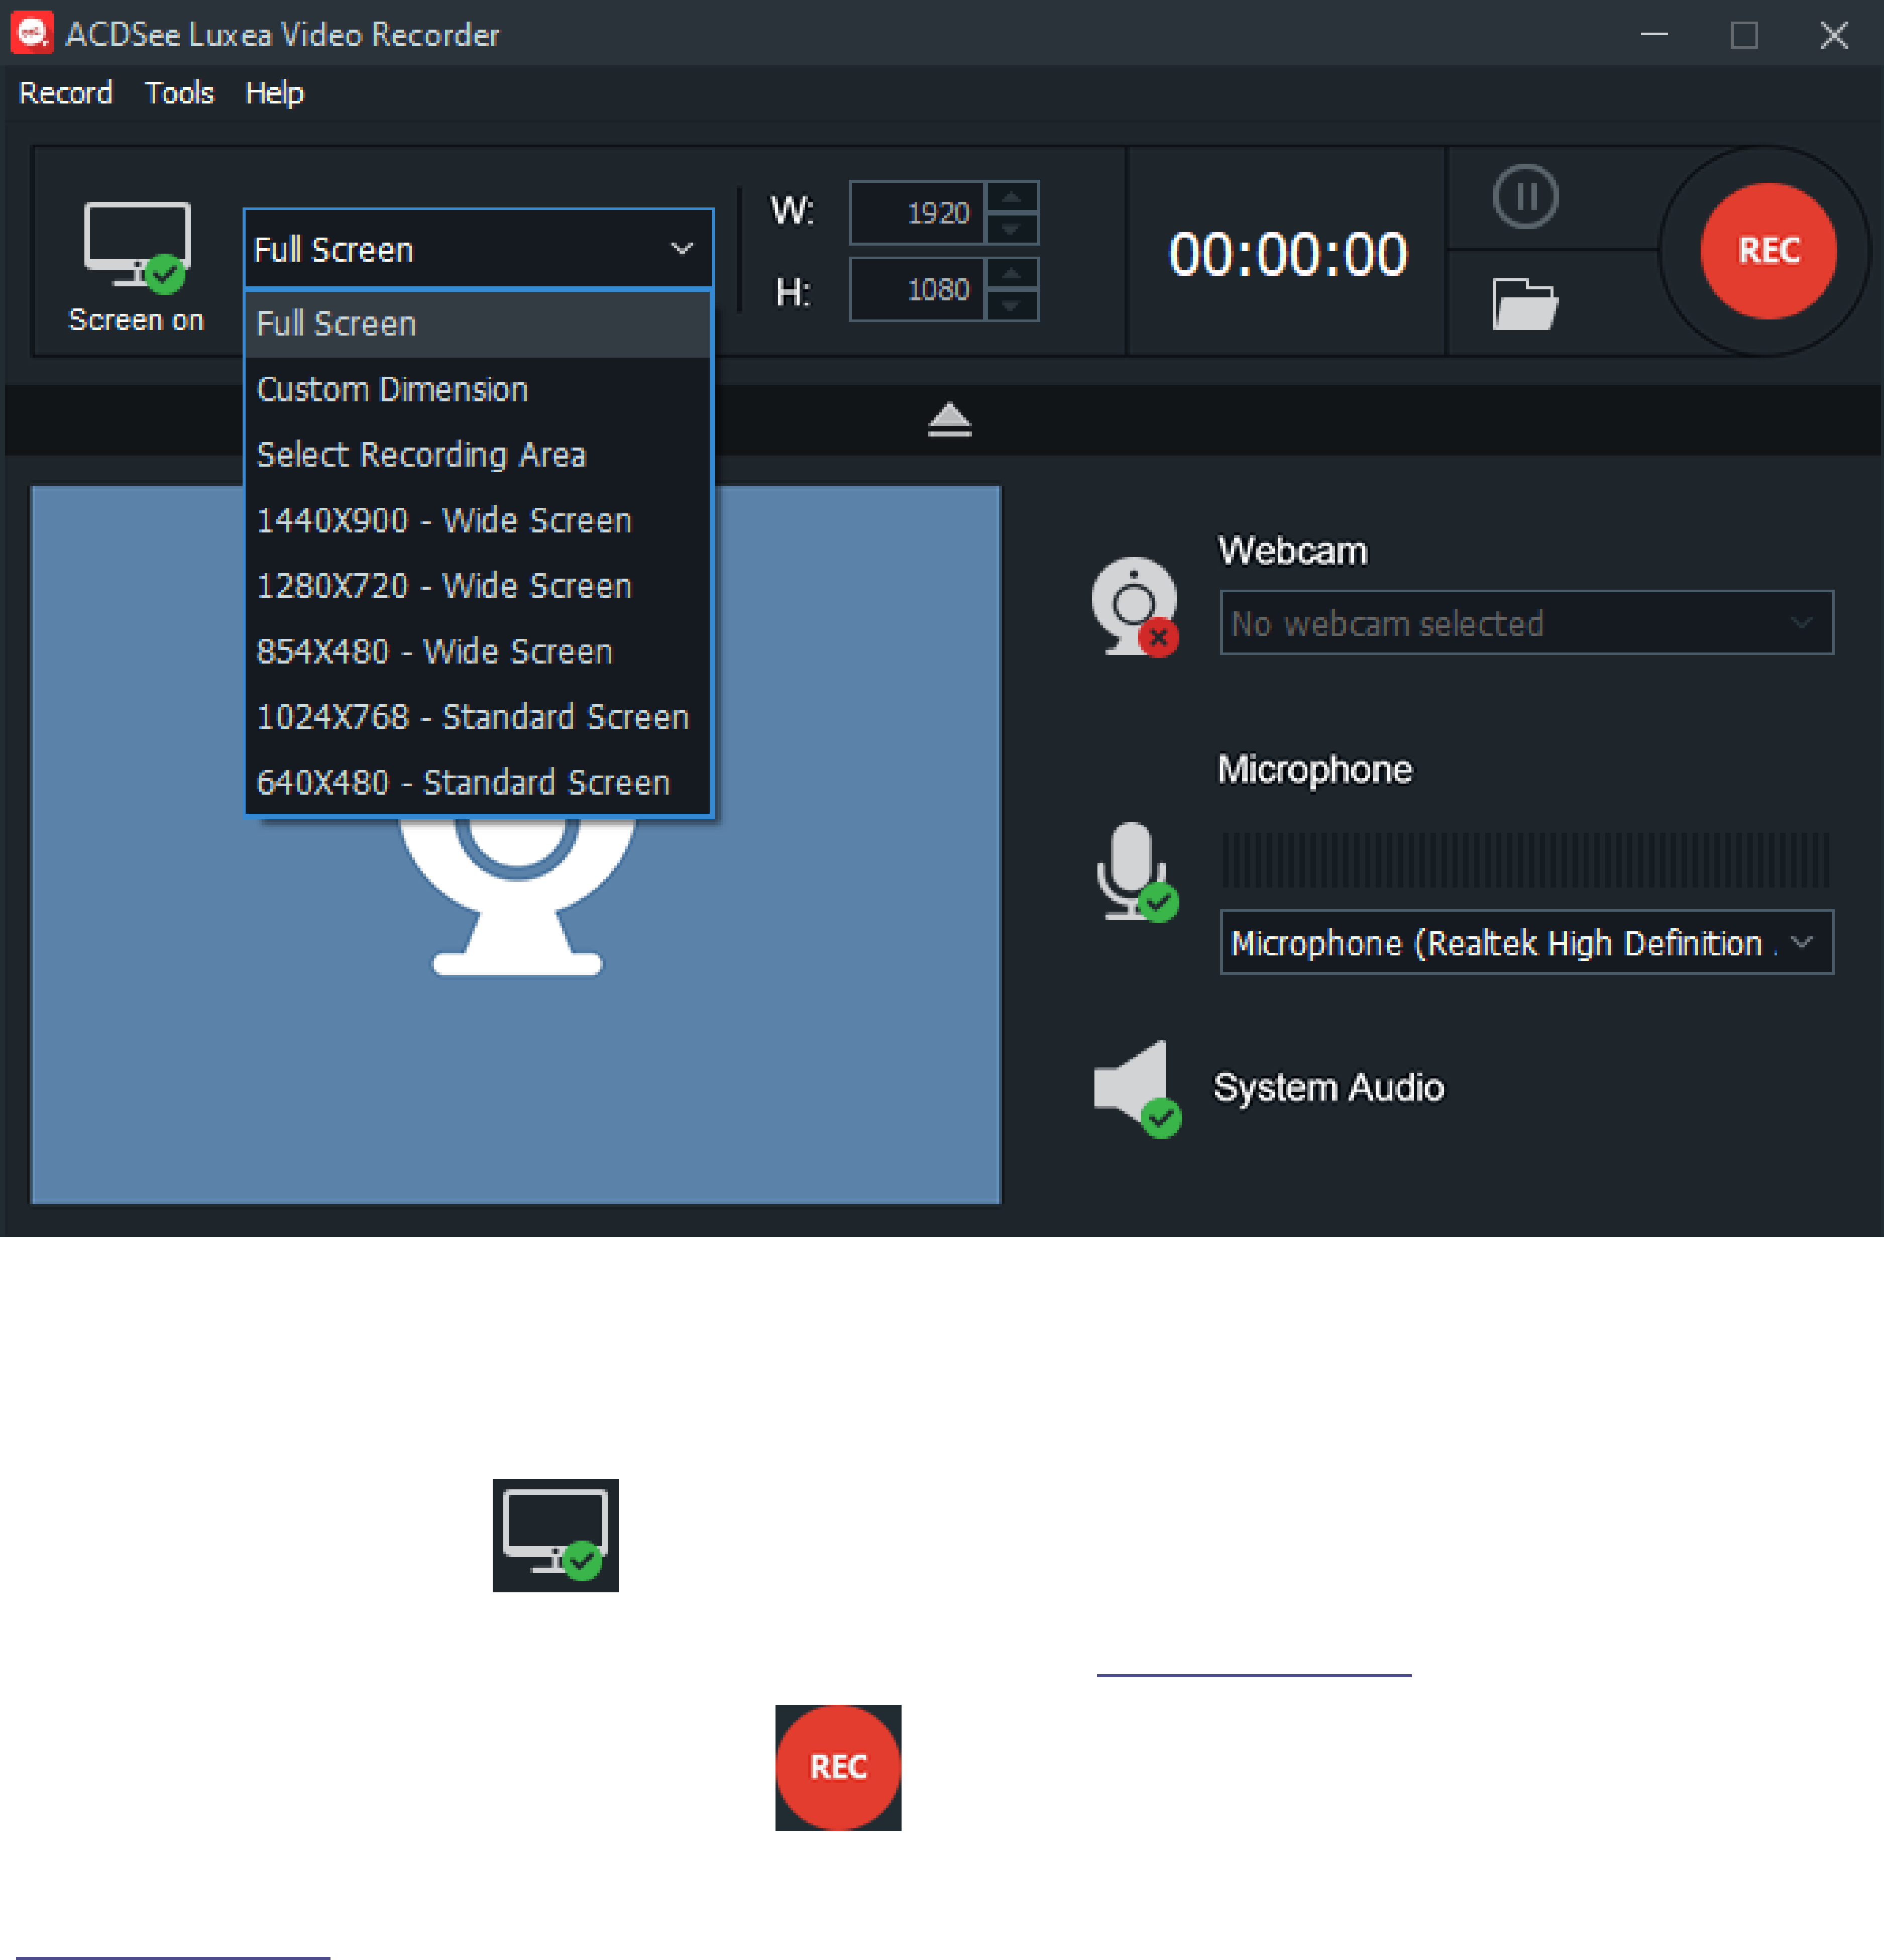
RECORDER OPTIONS
To set the recorder window options:
1. Select the drop-down menu next to the Dimension section.
2. Select the recording area dimensions.
3. Optional: When using a dimension other than "Full Screen", drag the marquee handles to adjust the record-
ing area to the desired dimensions.
4. Optional: Select "Custom Dimension" from the drop-down and enter values for the Width and Height
fields.
To record a screen:
1.
Ensure the Screen on icon is accompanied by a green check mark.
2. Configure the desired settings in the recorder window. See the Recording Options section below.
3.
In the top right corner, click the REC button , or press F9.
4. To stop recording, press F10. (To change this keyboard shortcut, see the Hotkeys section in the
Recording Options table below.)
The options during recording include:
l Toggle the Pause/Resume button to start and stop the recording.

ACDSee Luxea Video Editor User Guide
Page 25 of 74
To record a webcam:
1.
Ensure the Webcam icon is accompanied by a green checkmark.
2. Select the device from the drop-down menu.
To disable webcam recording, toggle the Webcam icon's green checkmark to a red X .
To record using the microphone:
1.
Ensure the Microphone icon is accompanied by a green checkmark.
2. Select the audio input device from the drop-down menu.
To disable a microphone recording, toggle the Microphone icon's green checkmark to a red X .
To record system audio:
Ensure the System Audio icon is accompanied by a green checkmark.
When recording video or audio, Luxea records in real-time MP4.
ANNOTATIONS
There are three types of annotation that can be added to a recording:
l System Time Stamp,
l Caption, and
l Watermark.
ACDSee Luxea Video Editor User Guide
Page 26 of 74
To add annotations:
1. In the Recorder dialog, select Tools | Annotations from the main menu.
2. Select one of the three following options:
l Add the date and time to a recording by selecting Tools | Annotations | Add System Time Stamp.
l Add a caption to a recording by selecting Tools | Annotations | Add Caption.
l Add a watermark to a recording by selecting Tools | Annotations | Add Watermark.
Recording Options
To set the recording options, go to Tools | Options.... In the Options dialog, configure the settings as described
below.

ACDSee Luxea Video Editor User Guide
Page 27 of 74
General
General
Settings
Record Disable
screensaver
during
recording
Temporarily disables the
screensaver, which is useful
for longer recordings.
Start Luxea
Video Editor
after recording
When using the Luxea Video
Recorder as a standalone app,
enable the Start Luxea Video
Editor after recording check-
box to have Luxea Video Editor
automatically open after end-
ing the recording secession.
Hardware
Acceleration
Enable
hardware
acceleration
Enabled by default, the
Hardware Acceleration option
ensures that the encoding
process is undertaken by the
graphics card, rather than
the CPU. Hardware
Acceleration quickens the
media rendering process. If
presented with multiple
graphics cards, Luxea will
prioritize hardware
acceleration options using
the following hierarchy:
NVIDIA, Intel® Quick Sync.
Hardware Accel-
eration Drop-
down
List of potential Hardware
Acceleration options available
to the current Luxea install-
ation.
Record Duration Stop recording
after
Enable the Stop recording
after checkbox to stop the
recording at the time specified
in the adjacent hr, min, and
sec fields.
Annotation Configure options for annotations. To add an annotation, navigate to Tools | Annotations
System Time
Stamp
System Time Stamp Position Select a square to indicate
where on the screen the date
and time should appear.
Text Click the Font button to
configure the font, size,
style, and color.
Click the Background
color button to choose
the background color to
appear behind the date
and time.
For no background
color, enable the
Transparent
background checkbox.
Preview Displays the date and time as
it will appear in the

ACDSee Luxea Video Editor User Guide
Page 28 of 74
recording.
Caption Caption Enter the caption's text.
Position Select a square to indicate
where on the screen the
caption should appear.
Text Click the Font button to
configure the font, size,
style, and color.
Click the Background
color button to choose
the background color to
appear behind the date
and time.
For no background
color, enable the
Transparent
background checkbox.
Preview Displays the caption as it will
appear in the recording.
Prompt
before
recording
After clicking the Record
button, Luxea confirms the
caption.
Watermark Watermark Browse to the file to use as a watermark.
Position Select a square to indicate
where on the screen the
watermark should appear.
Opacity Drag the Opacity slider to
specify the transparency of
the watermark.
Recorder
Recorder
Settings
Video
Maximum
screen
recording
frame rate
Select the screen record
frame rate to determine how
quickly the picture refreshes.
While it is possible to
limit the frame rate
during capture, a
higher quality
cannot be achieved
by setting the frame
rate above the host
computer's
capabilities.
Screen record-
ing video qual-
ity
Select between "Best", "Bet-
ter", and "Normal" to determ-
ine a resource-appropriate
video quality setting for Screen
recordings.
Output
ACDSee Luxea Video Editor User Guide
Page 29 of 74
Output Settings Saving Output Dir-
ectory
Either manually enter the dir-
ectory, or click the "..." button
to select a directory.
File naming setting Text String and
Drop-down
Enter a text string portion of
the file name to be combined
with the value selected from
the drop-down list. The file
name used to save output from
Luxea is the combination of the
text string and the value selec-
ted in the drop-down list.
Mouse
Mouse Settings Play mouse click
sounds
Left click Enable to play a mouse-click
sound for each left-click
mouse event.
Right click Enable to play a mouse-click
sound for each right-click
mouse event.
Mouse click
effect
Add mouse click effect Add mouse click
effect
Enable to add an effect to a
mouse click event.
Type Select the type of effect to
apply to a mouse click.
Left click color Select the color of the effect
applied to a left-mouse click.
Right click color Select the color of the effect
applied to a right-mouse click.
Size The slider determines the size
of the mouse click effect.
Hotkeys
Set keyboard shortcuts for the recording process.
Hotkey
Settings
Start/Resume/Pause Enable the checkboxes and/or use the drop-
down menu to indicate the hotkey(s) to be used
for starting, pausing, and resuming a
recording.
Save Enable the checkboxes and/or use the drop-
down menu to indicate the hotkey(s) to be used
for saving a recording.
Webcam Configure webcam recording options.
Webcam
Settings
Webcam Position Select a square to indicate
where the webcam recording
should appear on the screen
recording.
Size Move the slider to set the size
of the webcam recording.
ADJUSTING AUDIO LEVELS
Audio points can be added to audio clips on the Timeline to raise and lower the volume at desired intervals. Audio
levels can also be adjusted independently or deleted from video clips altogether. See Audio Effects to learn how to
quickly add a fade in at the beginning of an audio file, or a fade out at the end.
ACDSee Luxea Video Editor User Guide
Page 30 of 74
Control audio speed by using the ClipSpeed effect.
To separate audio from video clips:
Right-click the clip on the Timeline and select Separate Audio and Video from the context menu, or select the
clip and press Alt + S. The audio will separate onto a new track above, allowing for independent movement.
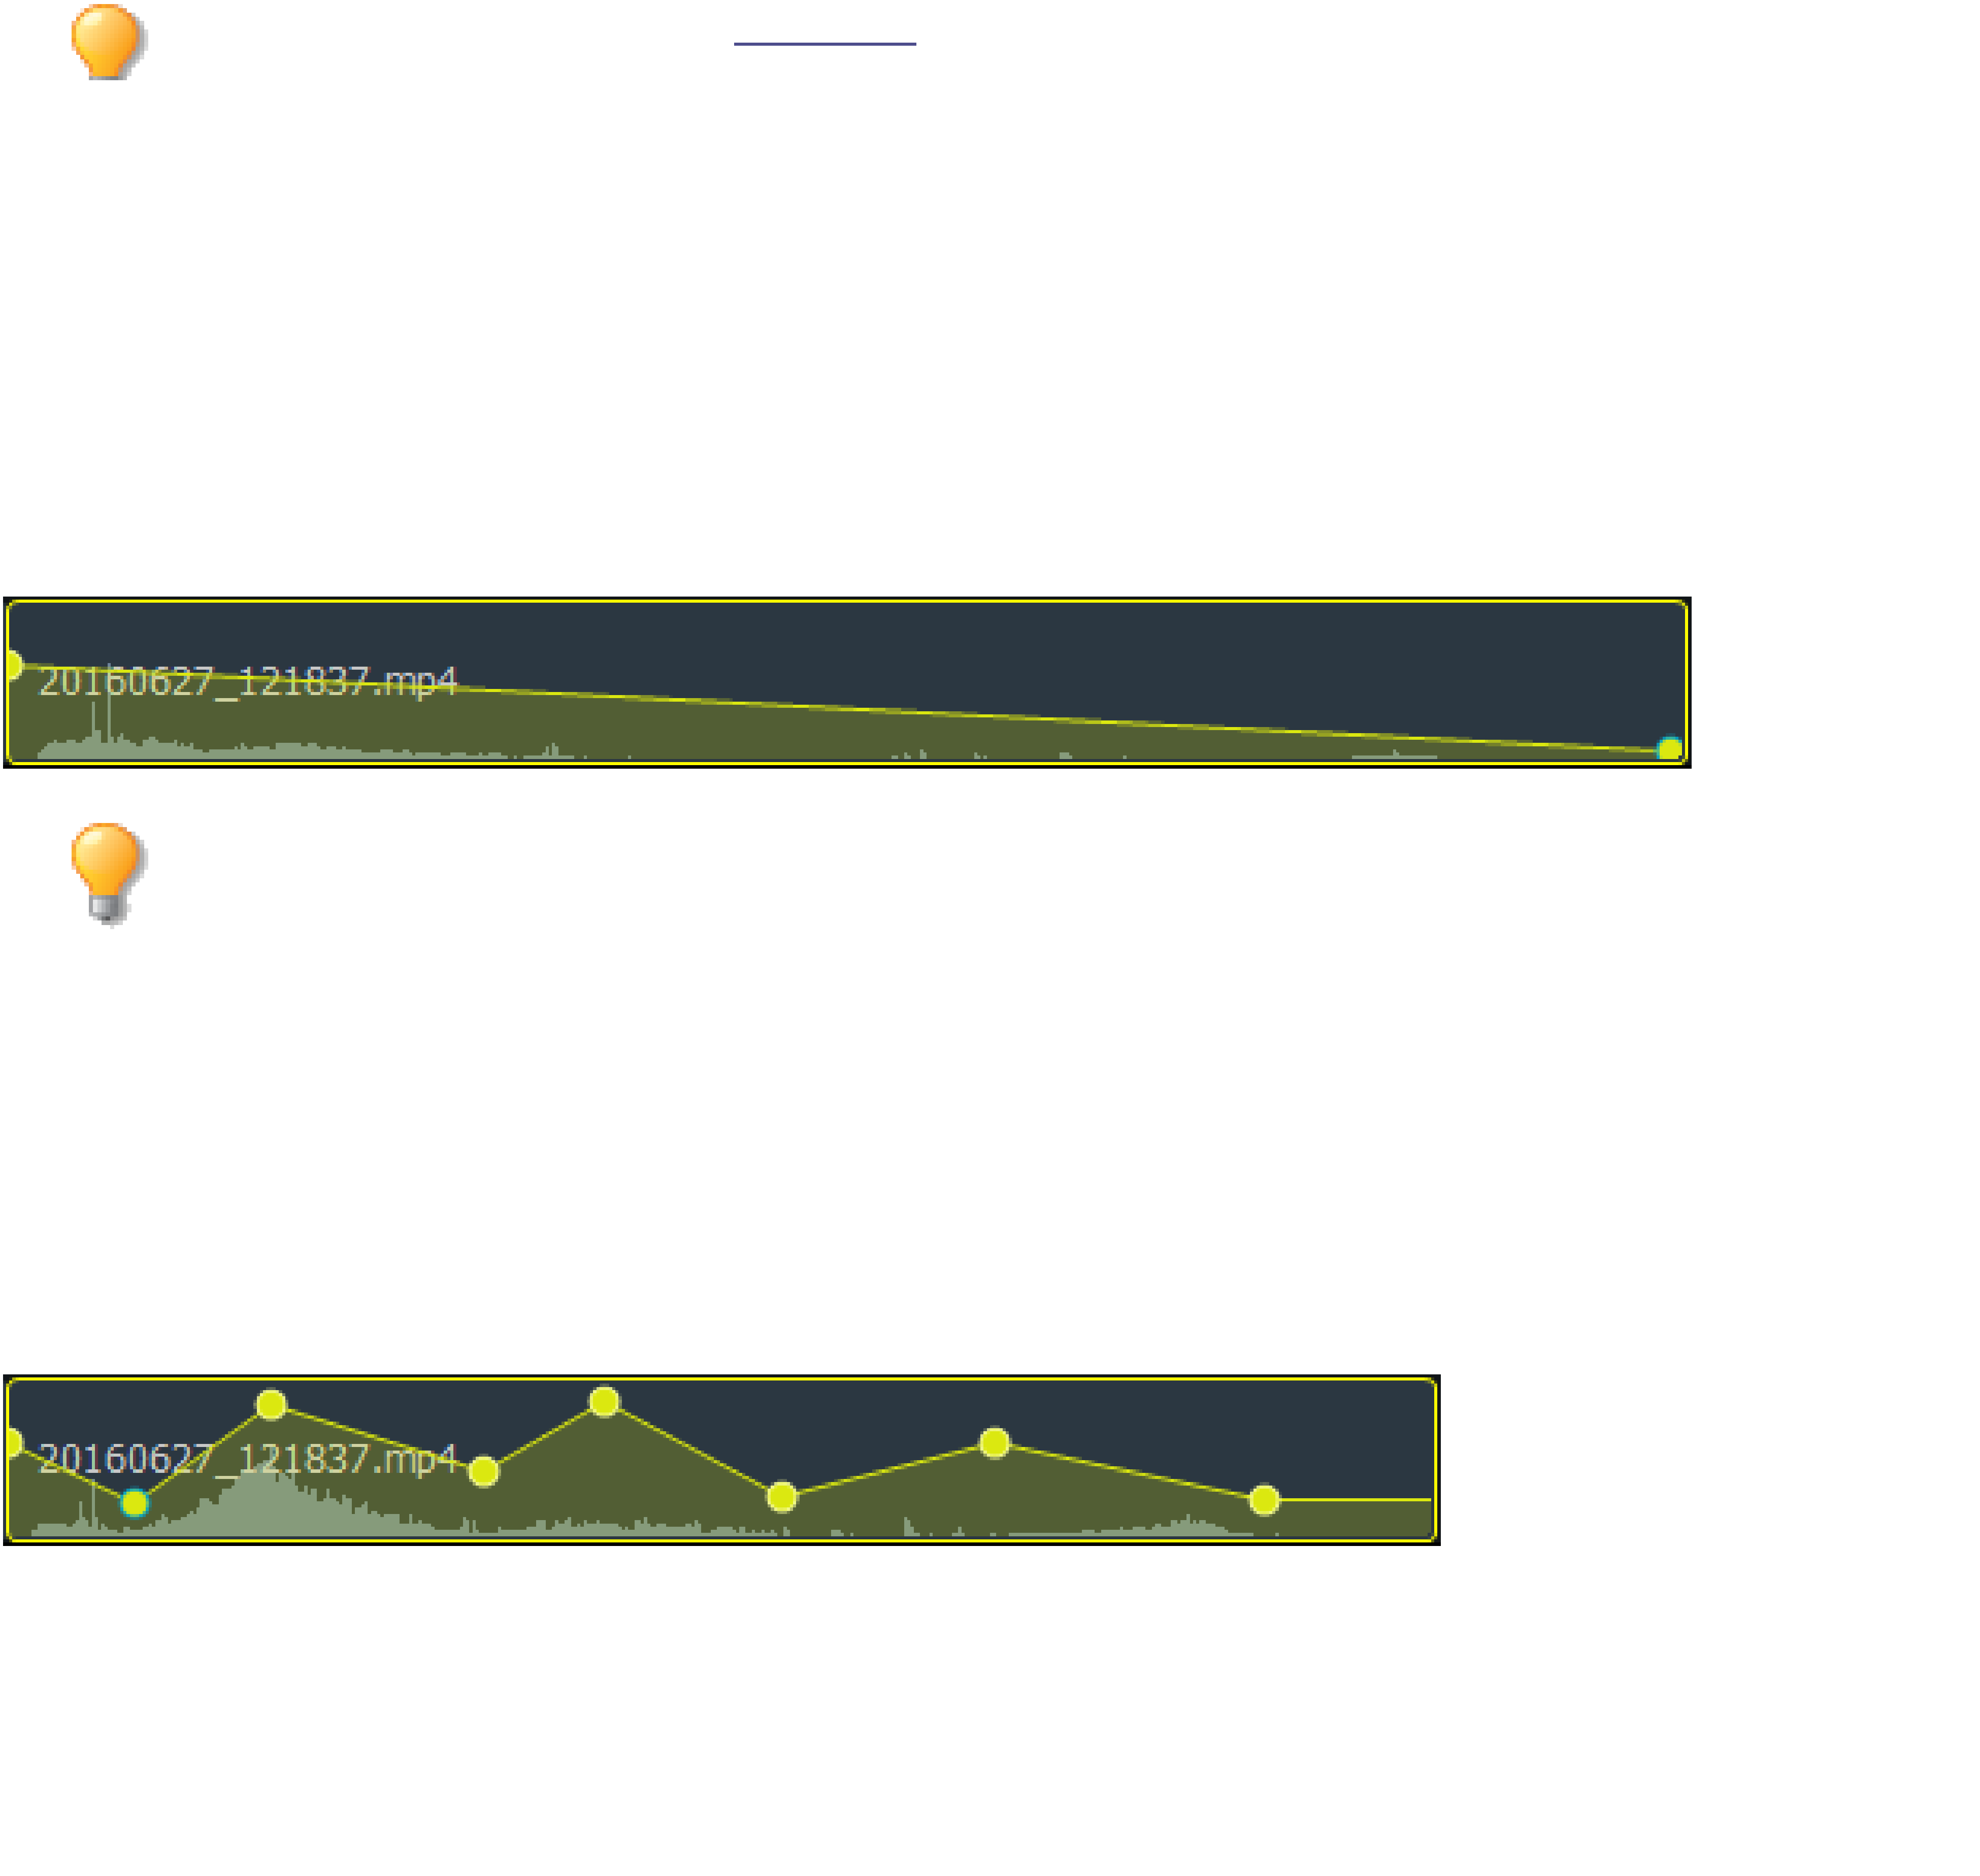
To raise or lower the volume of an audio clip:
1. Right-click the clip on the Timeline and select Separate Audio and Video from the context menu.
2. The audio will separate onto a new track above the original track. On the track with the audio, select the
yellow line and drag it up to raise the volume, or down to lower the volume.
While raising or lowering the volume, the level will snap to 100% as the yellow line nears the center. To
avoid this, hold down Shift while raising or lowering the volume.
To add audio points to an audio clip:
1. At the desired location on the clip, right-click the audio clip and select Add Audio Point from the context
menu.
2. Continue to add as many audio points as necessary.
3. Select an audio point (dot) and drag up to raise the volume at that point, or drag down to lower the volume
at that point.
To remove audio from a video clip:
Right-click the clip on the Timeline and select Remove Audio from Video from the context menu.
AUDIO AND VOICE RECORDINGS
Narration or sounds can be recorded using a microphone and incorporated into a video project by adding the
audio files to the Timeline.
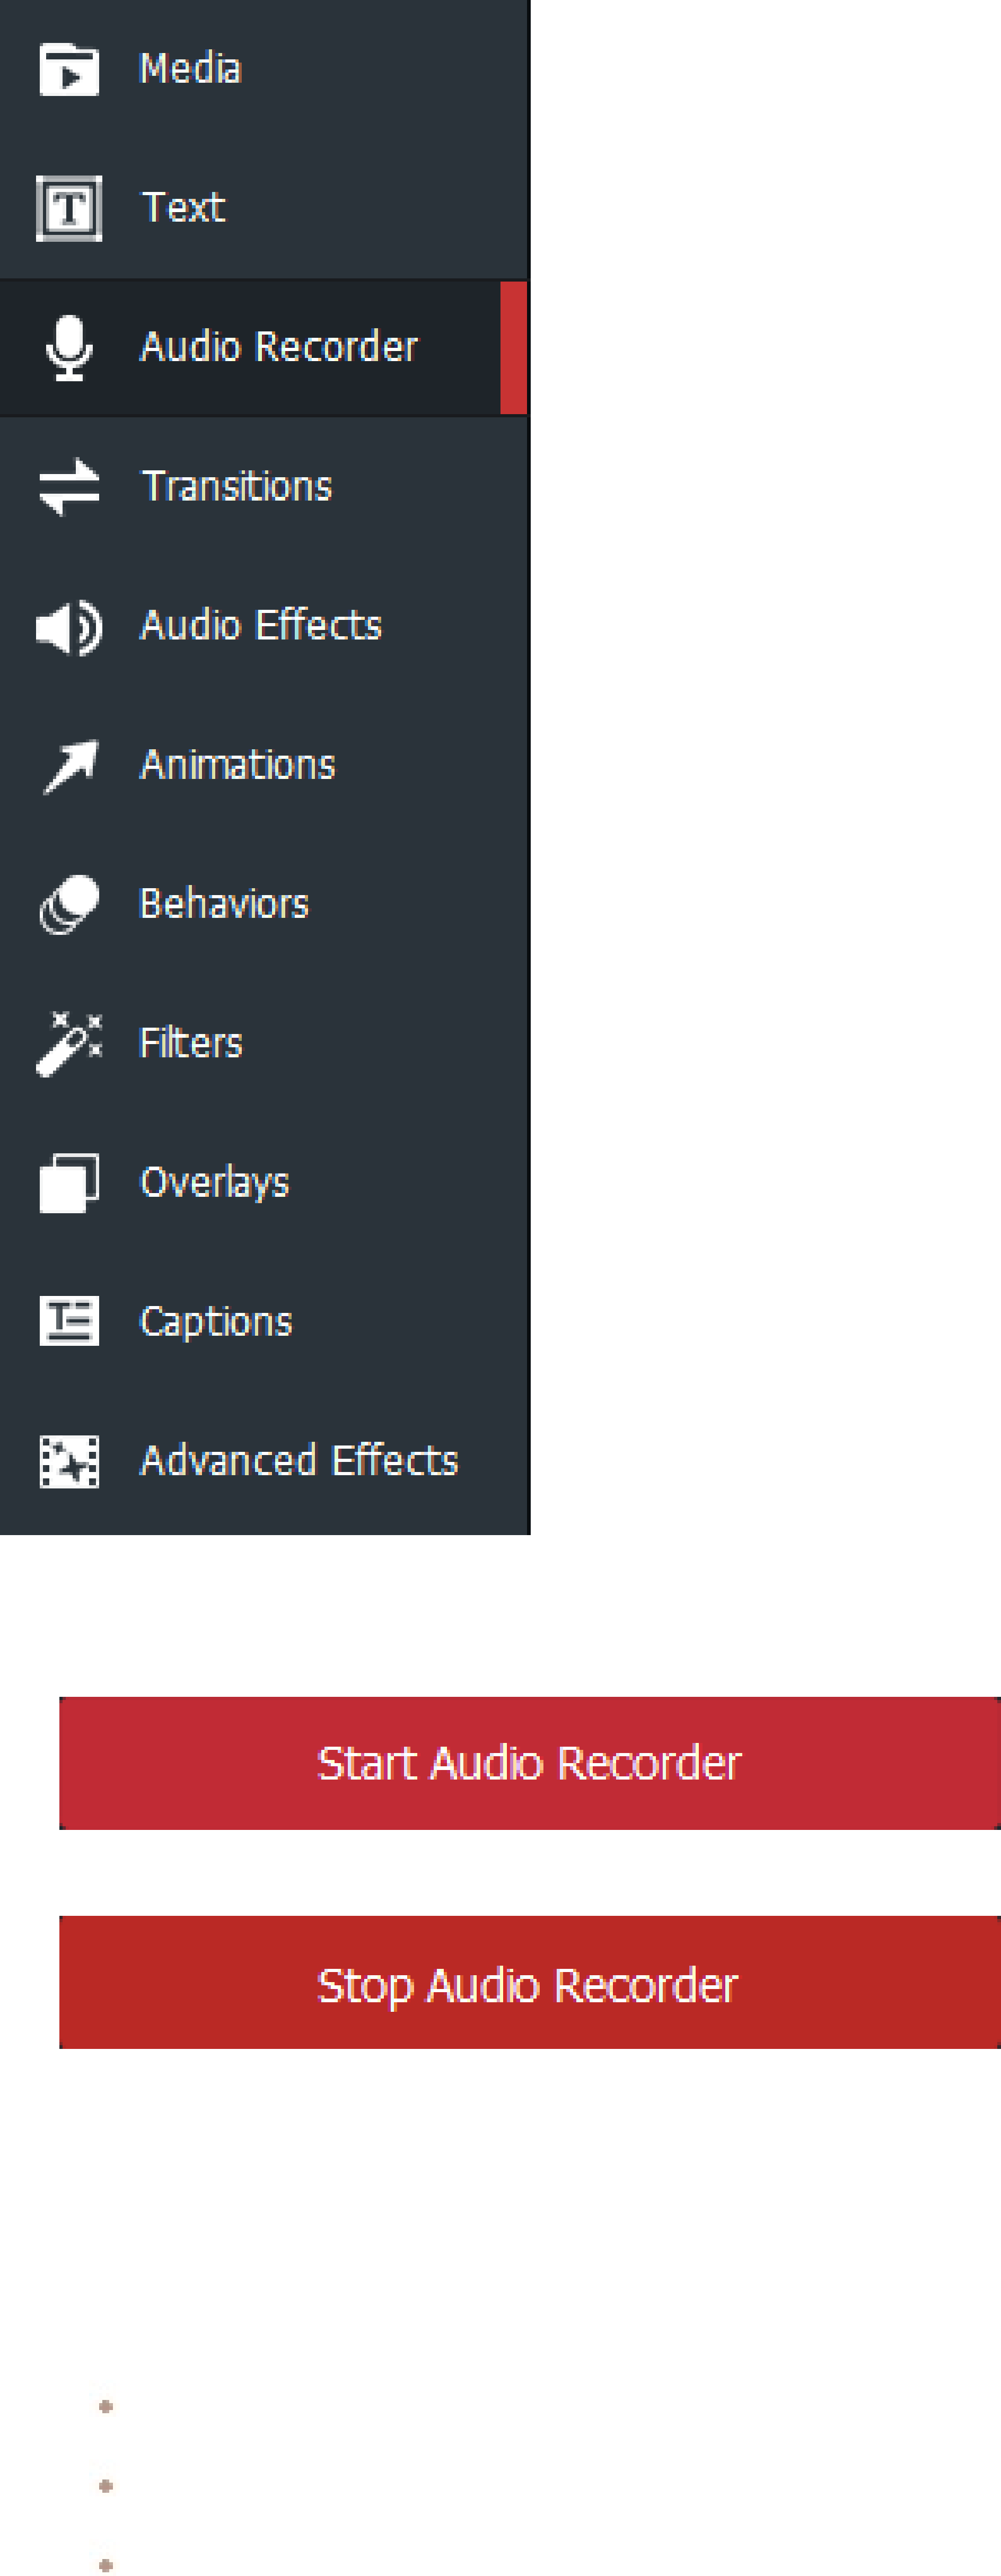
To make a recording:
1. Select the Audio Recorder tab, or press R.
ACDSee Luxea Video Editor User Guide
Page 31 of 74
2. Select a desired recording device from the drop-down menu.
3. To begin recording, click the Start Audio Recorder button.
4. To stop recording, click the Stop Audio Recorder button.
5. When prompted, enter a name for the audio clip and click Save. The recorded clip is saved to the My
Media tab.
To add a recorded clip to a project:
1. In the My Media tab, do one of the following:
Right-click a recorded clip and select Add to Timeline at Playhead.
Select a recorded clip and press Alt +A.
Select a recorded clip and drag it onto a desired location on the Timeline.
To remove an audio clip from the Timeline:
Right-click the audio clip on the Timeline and select Delete from the context menu.

ACDSee Luxea Video Editor User Guide
Page 32 of 74
AUDIO EFFECTS
A fade-in audio effect can be added at the beginning of a video file, and a fade-out audio effect added at the end of
a video file.
Control the speed of an audio file by using the ClipSpeed effect.
To add an audio effect:
1. With clips added to the Timeline, select the Audio Effects tab, or press D.
2. Select the desired audio effect and drag it to the beginning or end of a clip on the Timeline.
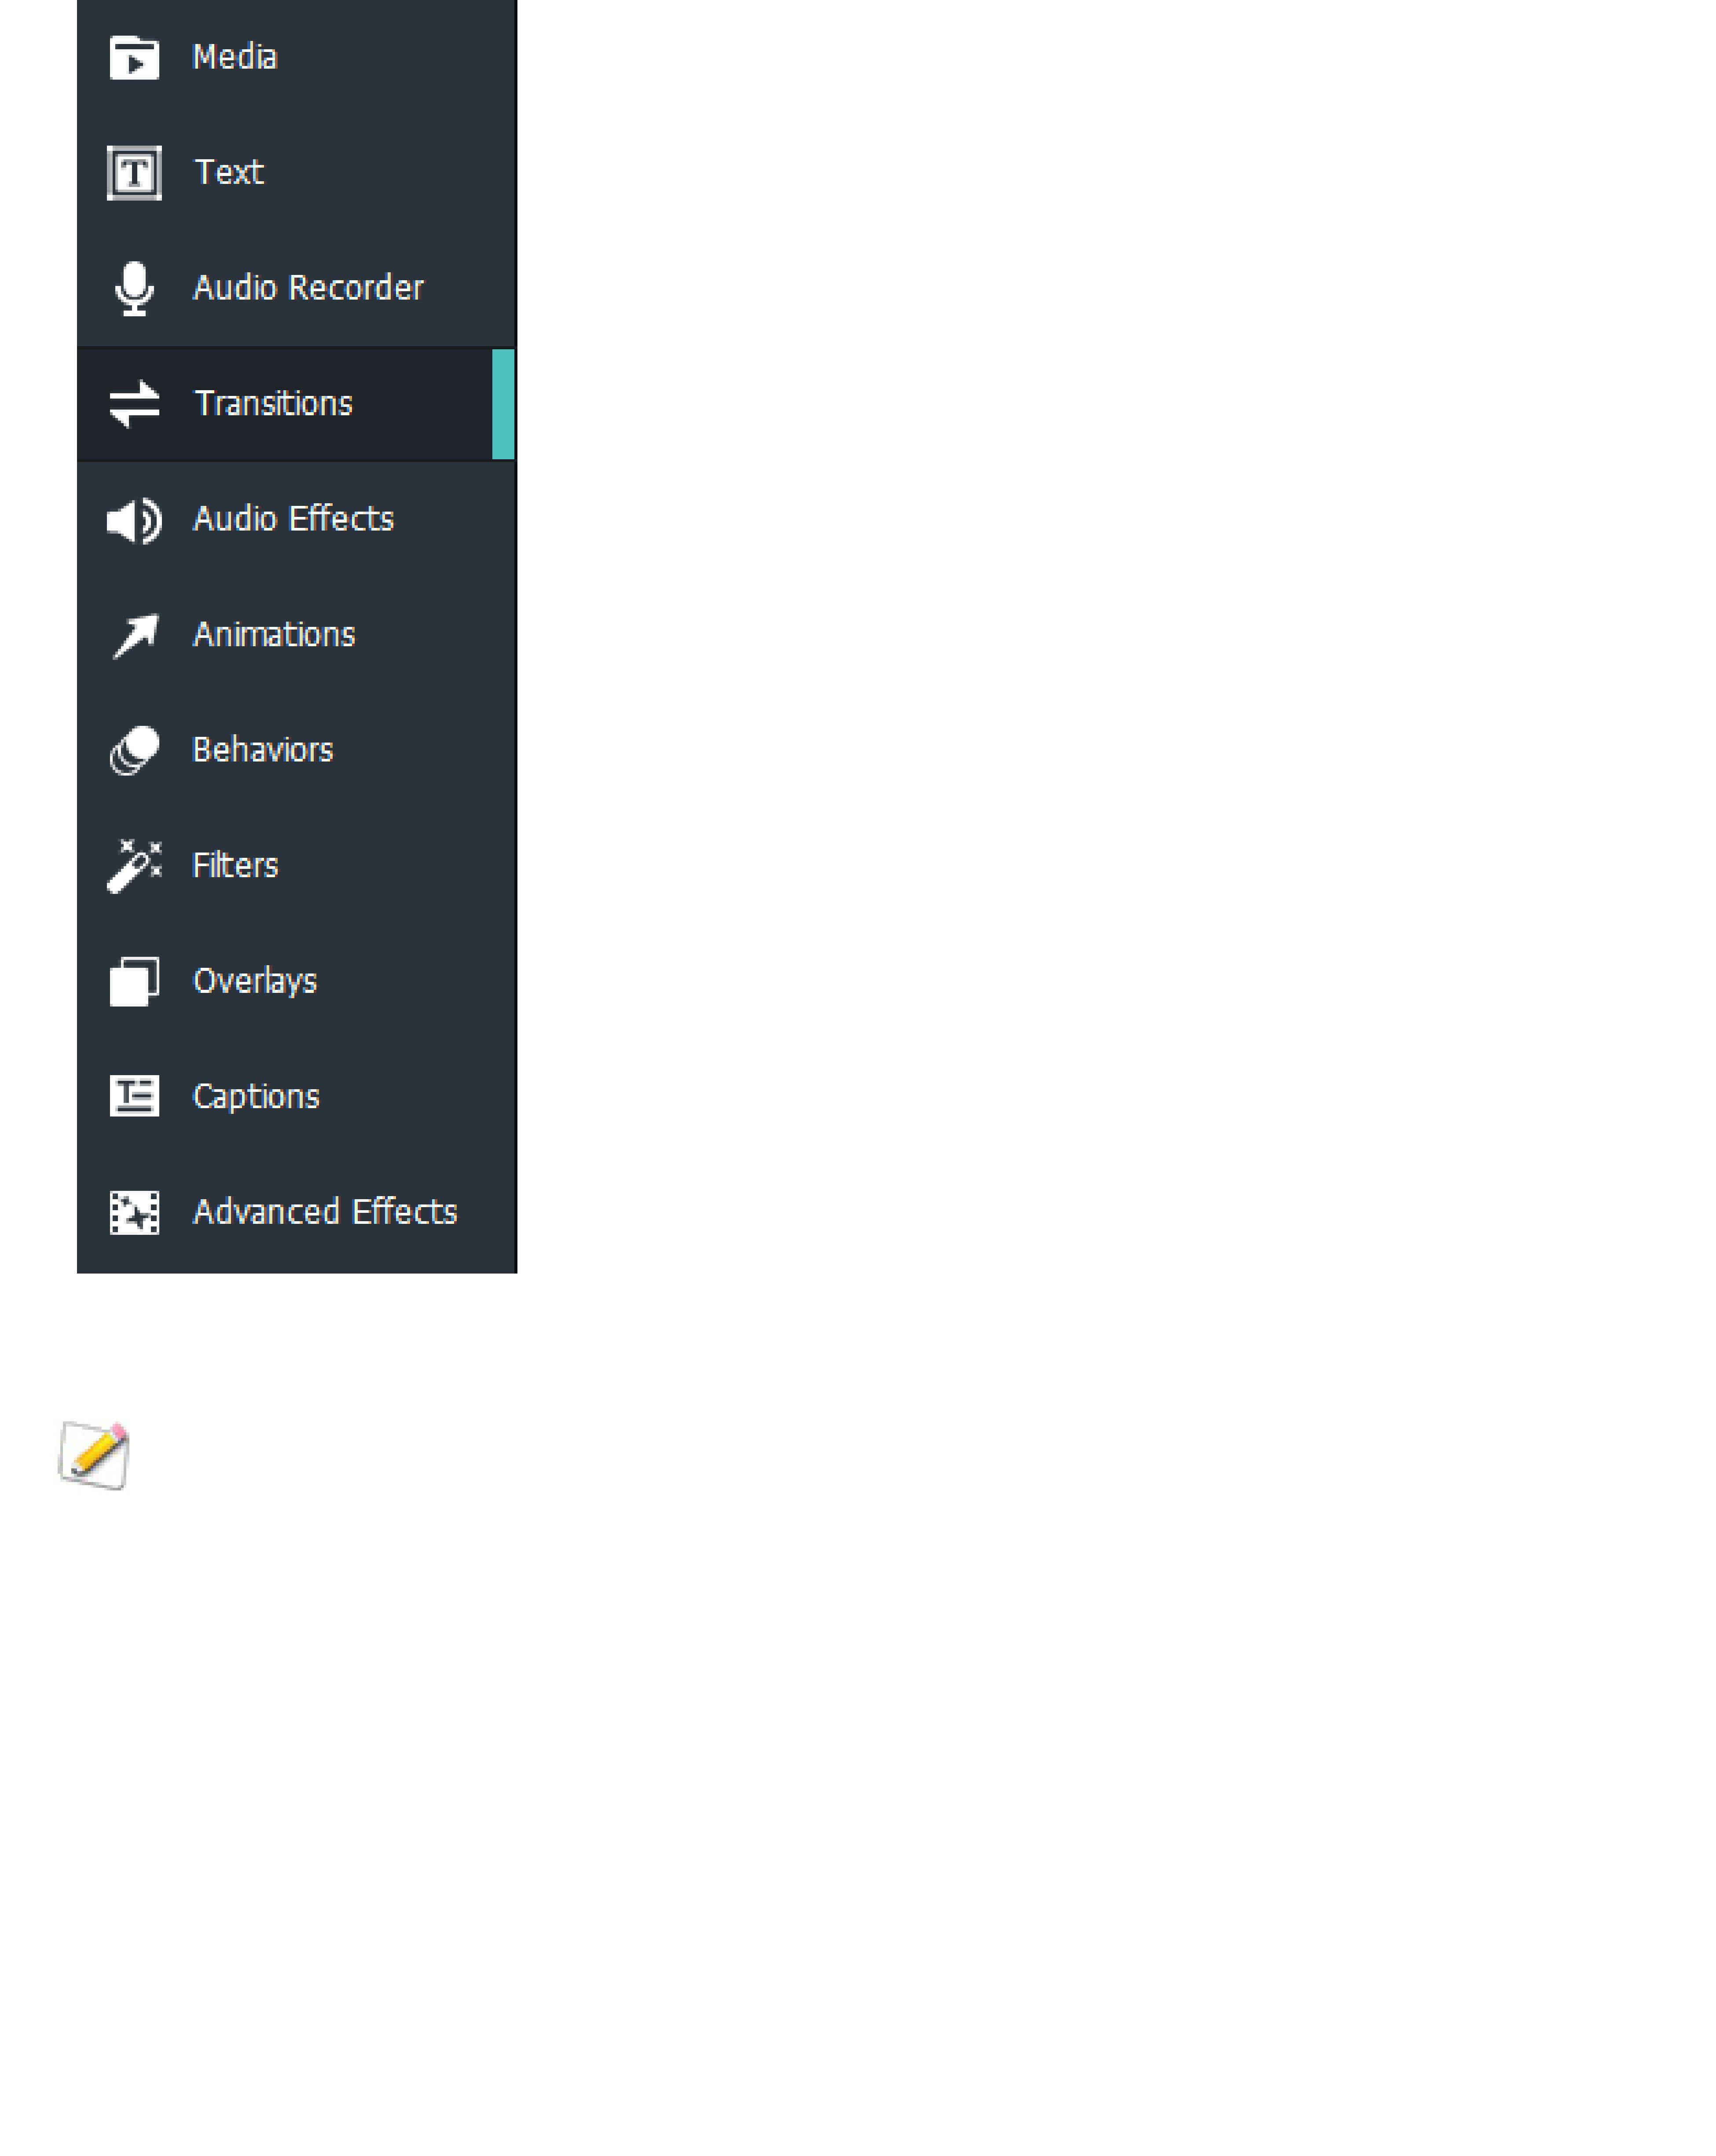
TRANSITIONS
Transitions are visual effects added between the end of one clip and the beginning of another. Use transitions to
indicate changes in a video's narrative or to transition between video and still images.
To add transitions between images or videos:
1. After two or more clips have been placed on the Timeline, select the Transitions tab, or pressS.
ACDSee Luxea Video Editor User Guide
Page 33 of 74
2. In the Transitions panel, select a transition and drag it to where the two clips meet on the Timeline.
Alternatively, drag the transition to the beginning or the end of a clip.
When adding a transition at the end of a single clip, and then trying to add a second clip, the transition
will only be visible during the end of the first clip and will not appear at all in the second.
To delete a transition:
Right-click the transition on the Timeline and select Delete.
To change the duration of a transition:
Click the edge of the transition on the clip and drag it to specify the desired duration.
To switch from one transition to another:
1. On the Timeline, select the transition on the clip and click the Properties button in the top right corner.
2. From the Type drop-down menu, select another transition.
ANIMATIONS
Animations transition media properties from one state to another by selecting pre-made animations or creating
custom animations. Custom animations are used to control which visual properties are transformed, such as blend
mode, opacity, rotation, position, and size. Restore animation is used to restore media to its previous settings prior
to any applied animations. Animations can also be added to text and used for editing size.
ACDSee Luxea Video Editor User Guide
Page 34 of 74
To add animations to media:
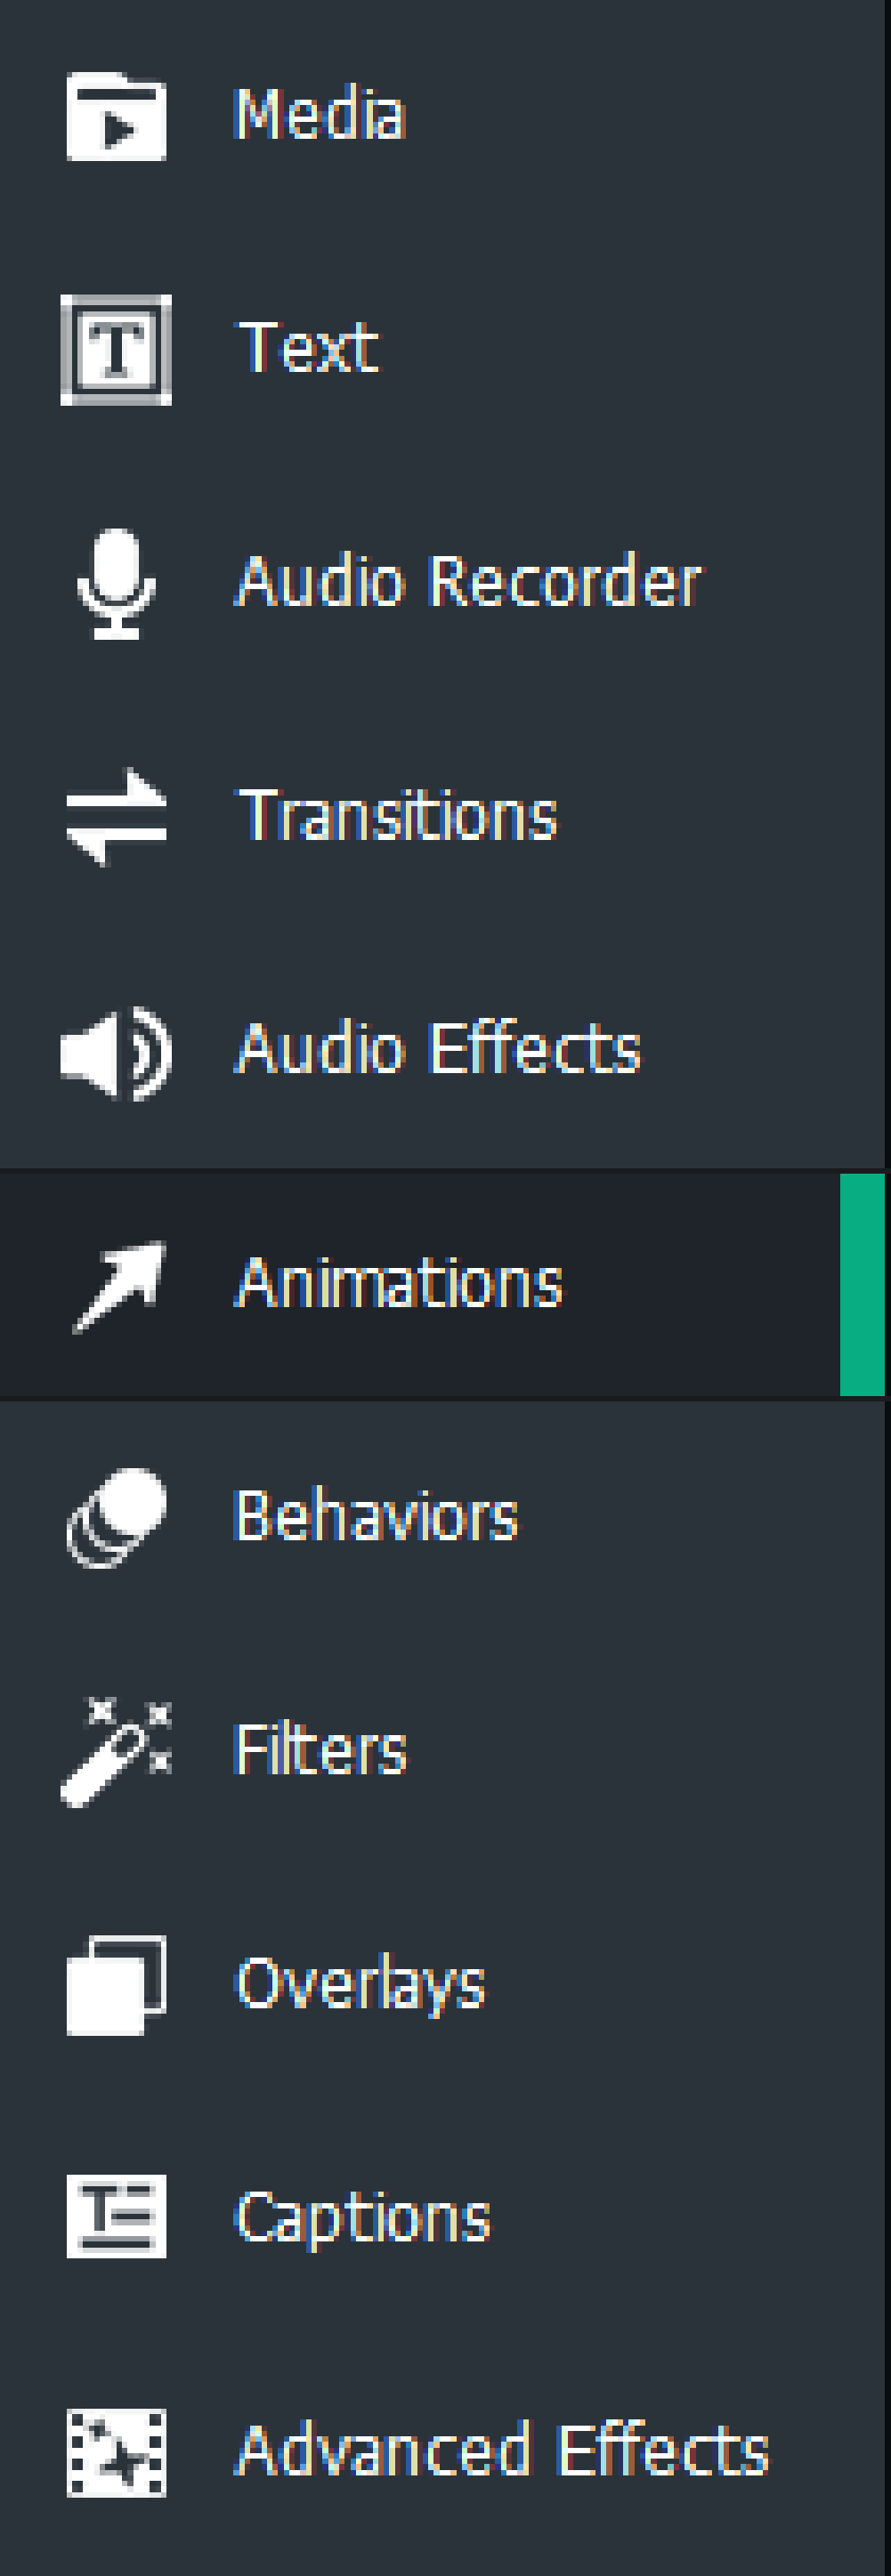
1. With clips added to the Timeline, select the Animations tab, or press A.
2. Drag an animation to a desired location on a clip residing on the Timeline. The animation will appear as an
arrow on the clip. Control the duration of the animation by dragging the arrow right or left. Media to the
right of the animation arrow will remain in this new state unless a Restore animation or another animation
is added.
To restore media:
1. After an animation has altered the visual properties of a clip, drag a Restore animation to a location to the
right of the animation. The destination will be the location where the visual properties are to be restored.
2. The Restore animation will appear as an arrow on the clip. Control the duration of the Restore animation by
dragging the arrow right or left. To the right of the Restore animation, the pre-animation settings will be
restored.
To add custom animations to media:
1. With clips added to the Timeline, select the Animations tab, or press A.
ACDSee Luxea Video Editor User Guide
Page 35 of 74
2. Drag a Custom animation to a desired location on a clip on the Timeline. The animation will appear as an
arrow on the clip. Control the duration of the animation by dragging the arrow right or left.
3. Place the Playhead to the right of the Custom animation.
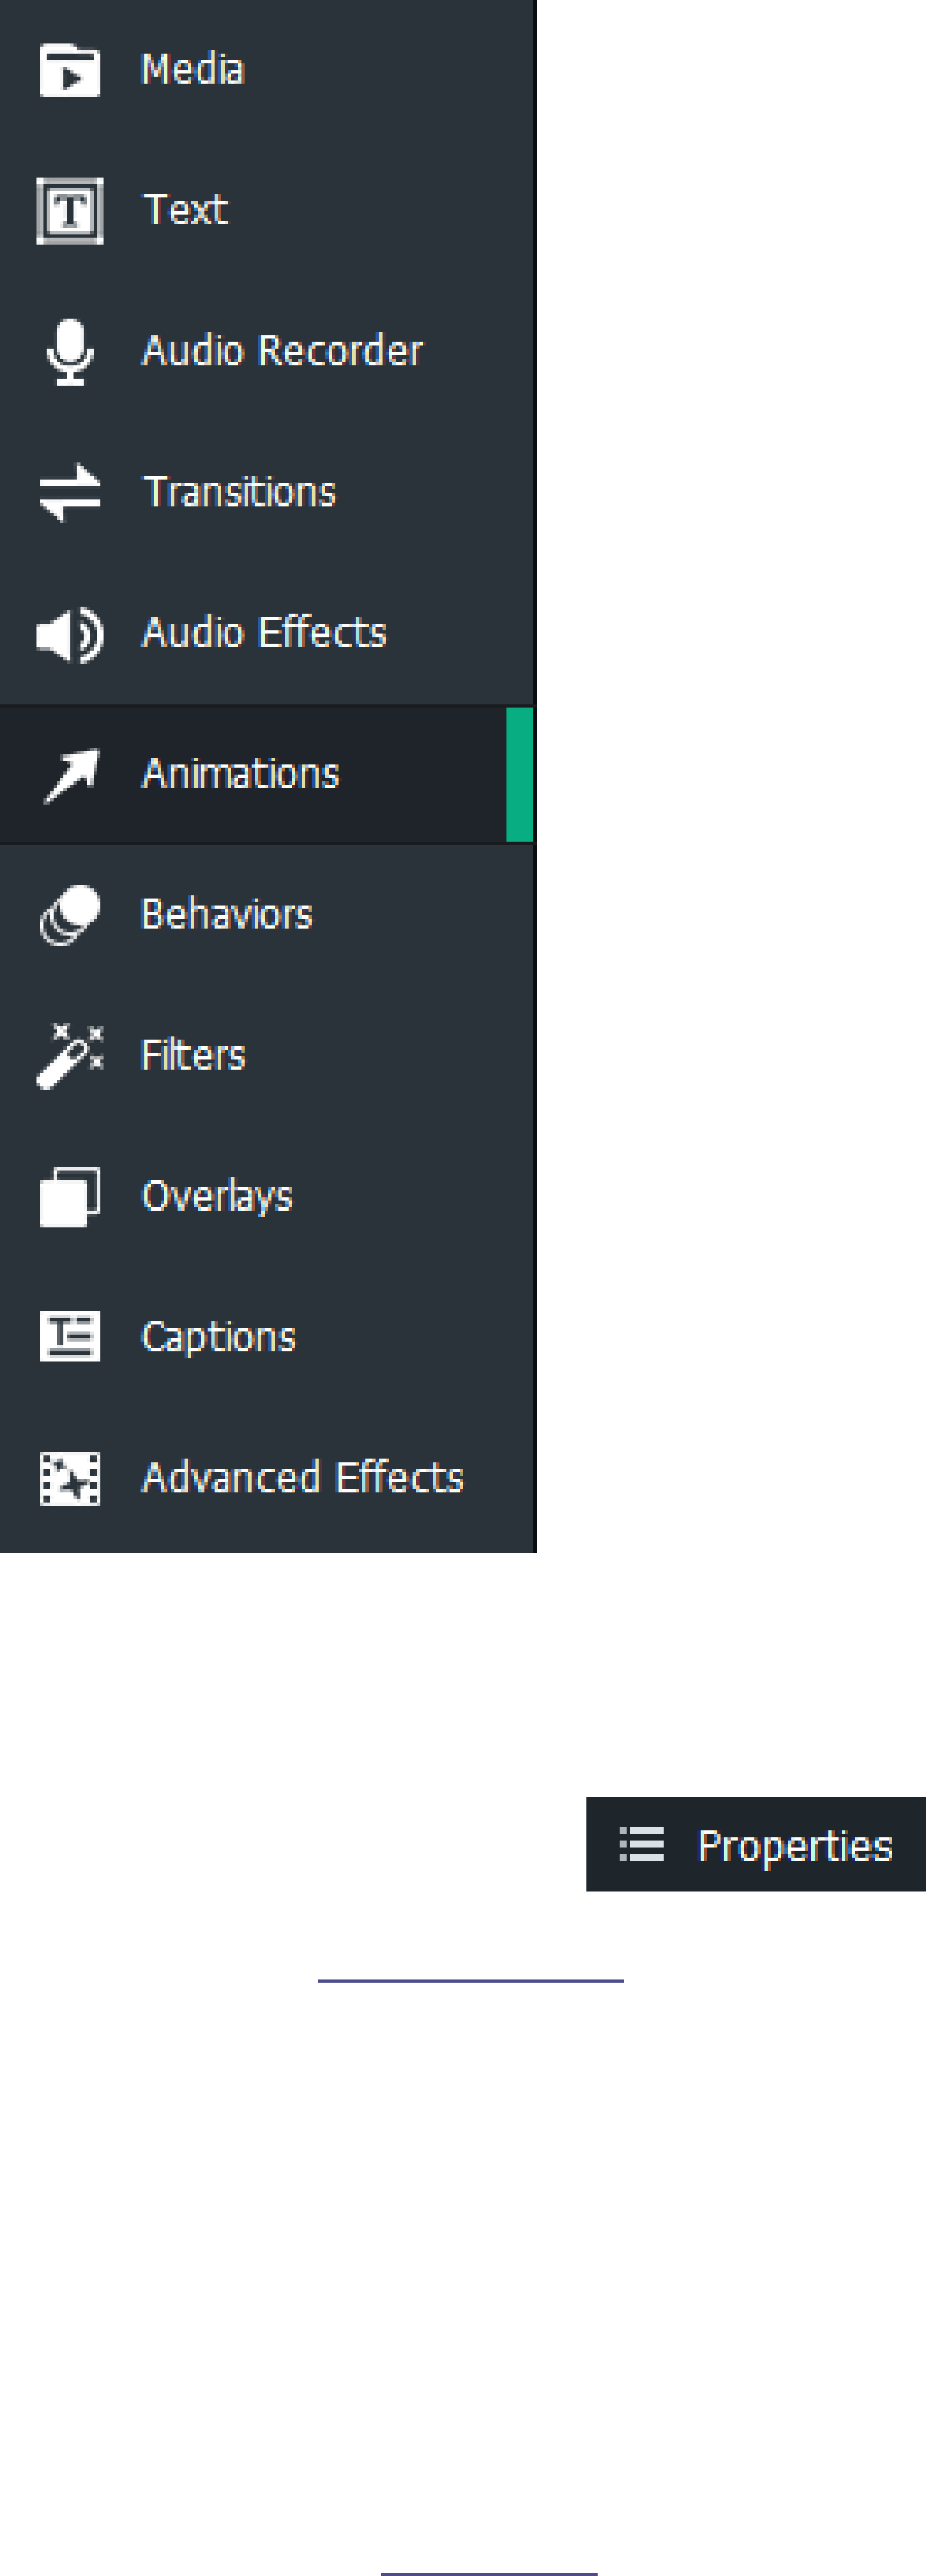
4.
Click the Properties button.
5. Configure the visual properties for the media's end state, which include properties such as blend mode,
opacity, rotation, and position.
6. To change the visual properties of media prior to the animation, place the Playhead to the left of the
custom animation and customize the settings in the Properties pane.
To add animations to text and edit their sizing:
1. With clips added to the Timeline, select the Text tab, or press T to see a list of Text Styles.
2. Select a Text Style and drag it to the desired location on the Timeline. Or, right-click the Text Style and
click Apply or press Alt + A.
3. In the resultant text box, edit the text displayed and its style. On the right-hand side, change the font,
color, size, style, Text Effects, direction, and alignment.
4. After the text has been finalized, select the Animations tab, or press A.
5. Drag the desired animation onto the text residing on the Timeline. The animation will appear as an arrow
on the clip. Control the duration of the animation by dragging the arrow right or left. Media to the right of
ACDSee Luxea Video Editor User Guide
Page 36 of 74
the animation arrow will remain in this new state unless a Restore animation or another animation is
added.
6. At either the start or end of the arrow, use the text bounding box to set the scale of the text for the
animation. To do this, click the edges of the bounding box and drag in or out to scale the box.
BEHAVIORS
Behaviors alter the look and feel of the beginning, middle, or end of media assets.
To add behaviors to media:
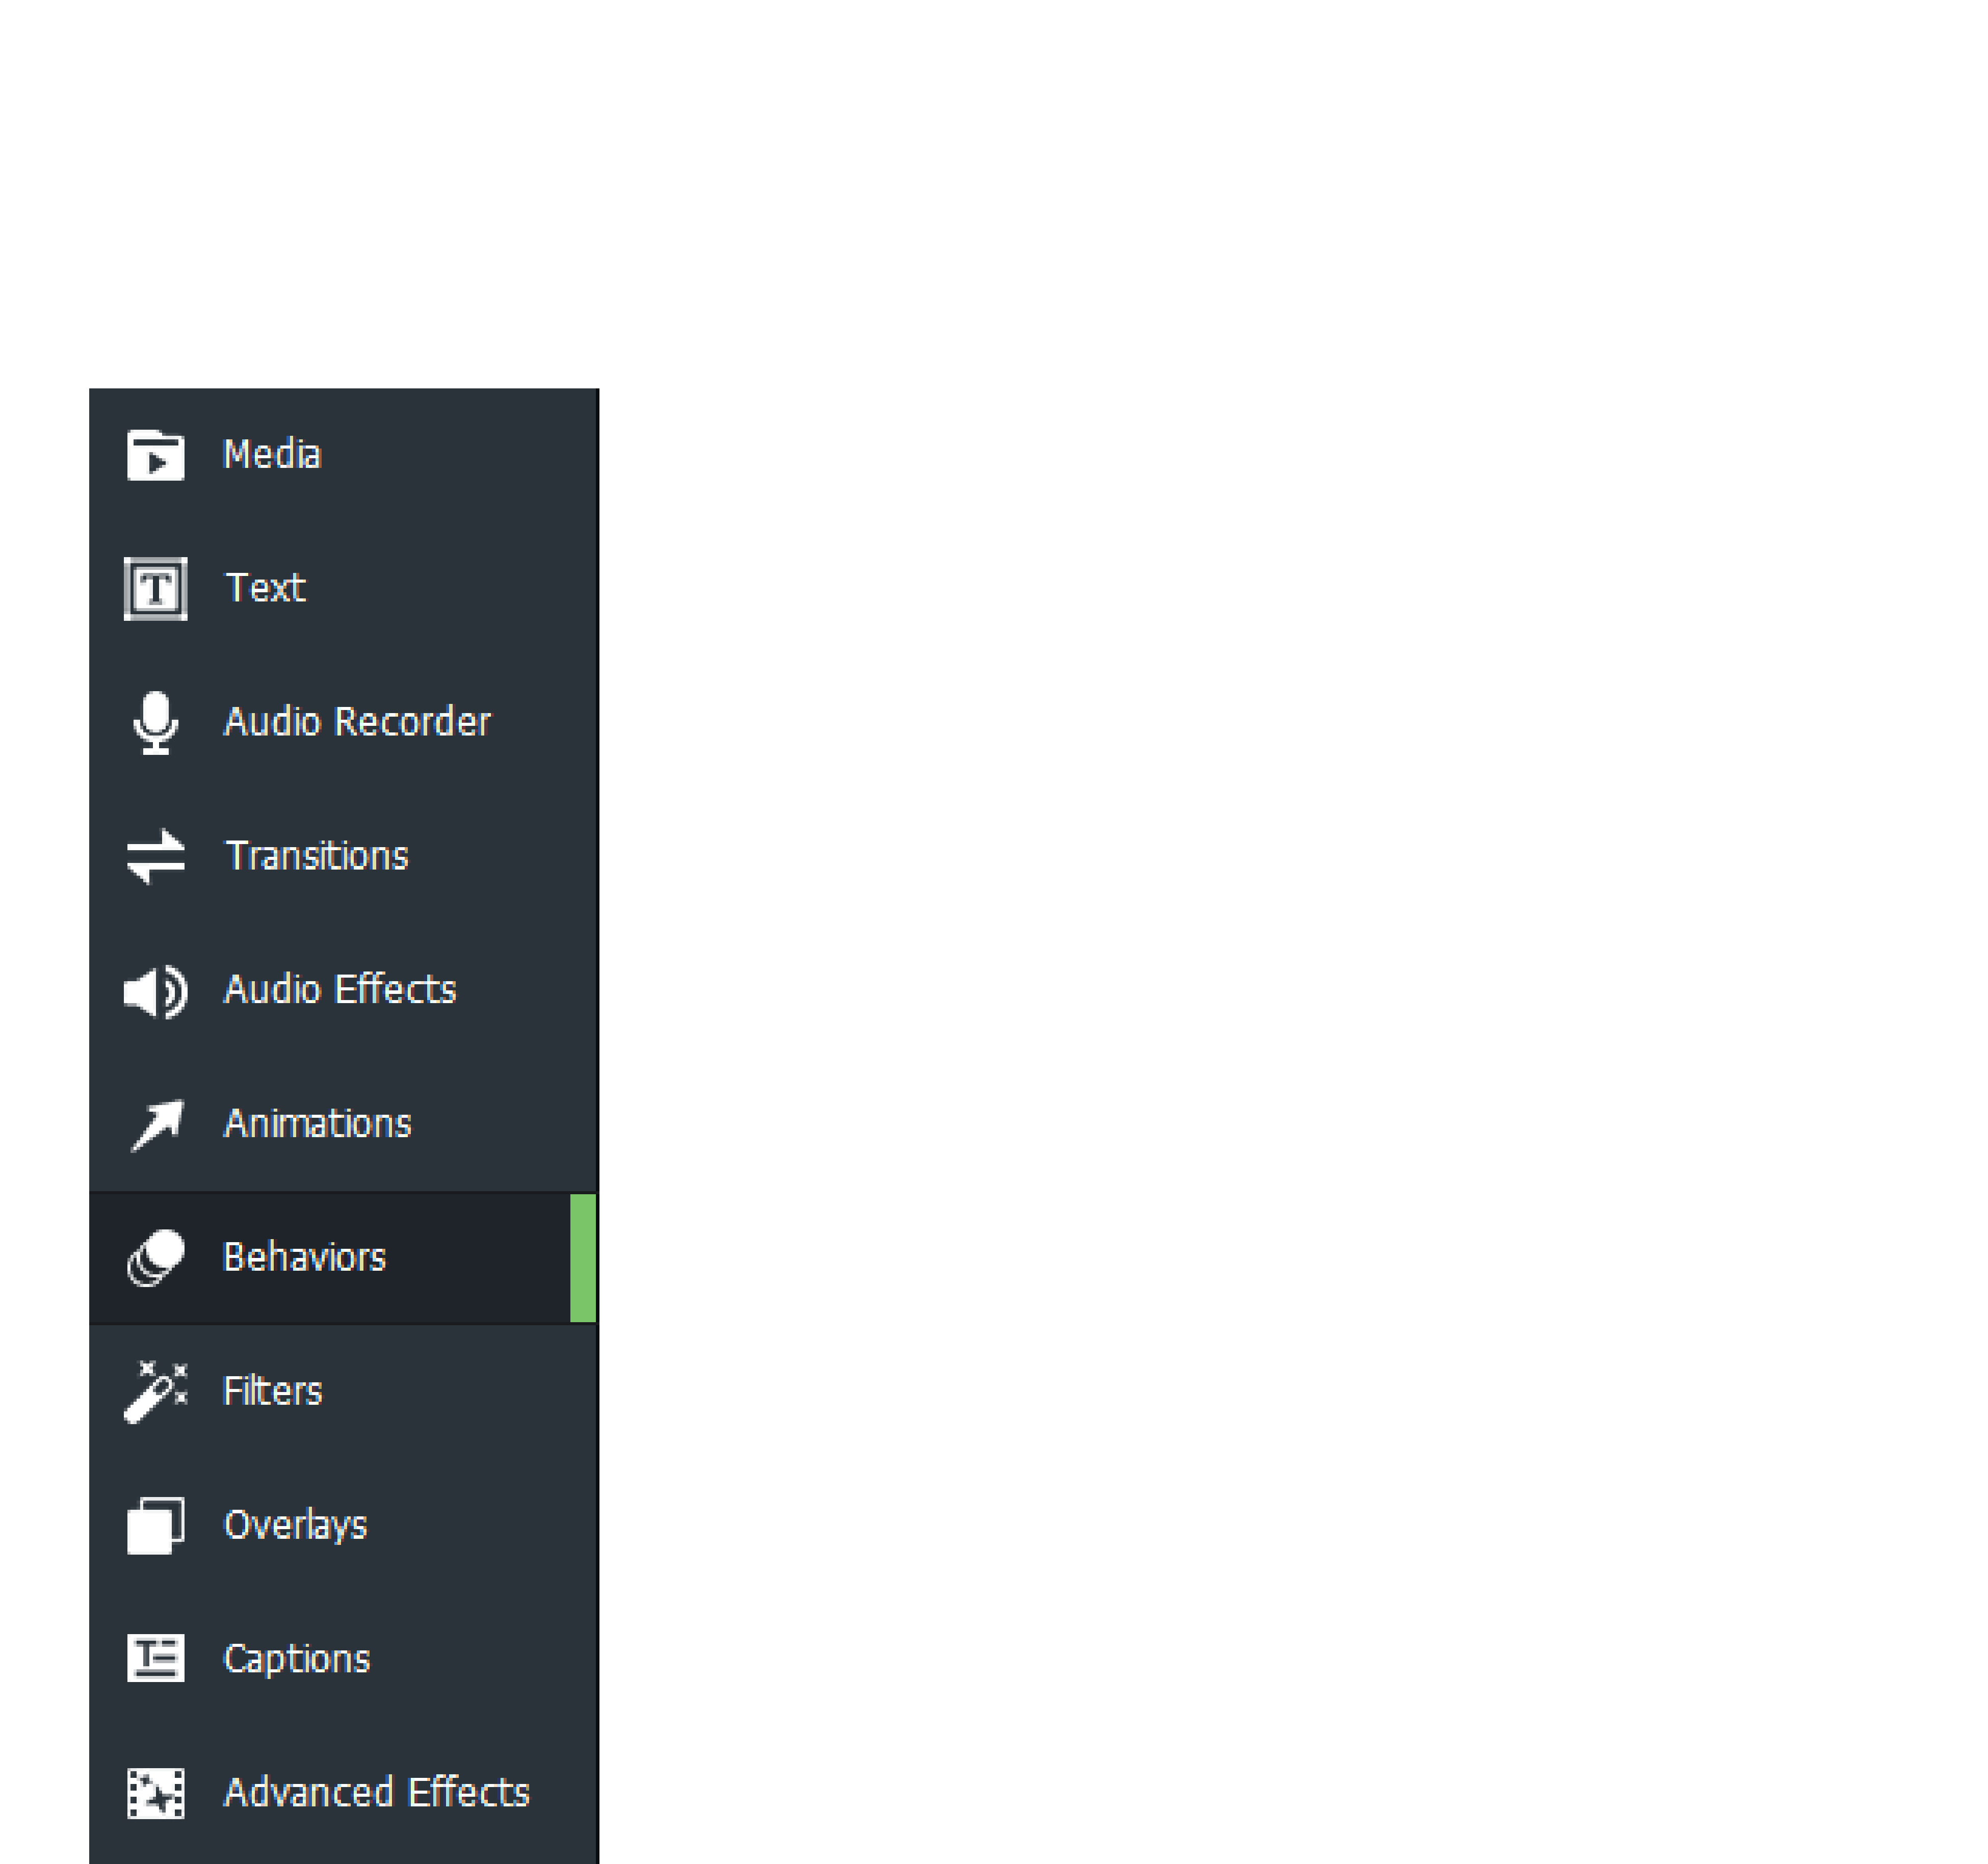
1. With clips added to the Timeline, select the Behaviors tab, or press B.
2. Select a behavior and drag it over a clip on the Timeline.
ACDSee Luxea Video Editor User Guide
Page 37 of 74
For a behavior that stylizes the entrance of a media asset, select from the In tab at the top
of the Behaviors section. Applied behaviors from the In tab are indicated on a clip using the
adjacent circle icon combination.
For a behavior that occurs during a media asset's run time, select from the During tab.
Applied behaviors from the During tab are indicated on a clip using the adjacent circle icon
combination.
For a behavior that stylizes the exit of a media asset, select from the Out tab. Applied
behaviors from the Out tab are indicated on a clip using the adjacent circle icon
combination.
Hover a cursor over the circle icons for a pop-up display of the behavior's start time and duration.
BEHAVIOR SETTINGS
Adjust the properties for each behavior applied to media assets.
To adjust behavior settings:
1. Display the behavior's properties by doing one of the following:
On the Timeline, select the clip and click the Properties button in the top right corner.
On the Timeline, right-click the clip and select Show Properties.
Select the clip and press Ctrl + 2 to open the Properties menu.
2. In the Properties pane, adjust the behavior settings as described below.
Behavior Properties Options
In/Out (Adjust settings for behaviors placed on the entrance and exits of your media.)
Style Use the Style drop-down menu to change the behavior's style.
Movement Use the Movement drop-down menu to customize the behavior's flow.
Speed Use the Speed slider to increase or decrease the behavior's speed.
During (Adjust settings for behaviors set to occur during your media.)
Style Use the Style drop-down menu to change the behavior's style.
Movement Use the Movement drop-down menu to customize the behavior's flow.
Loop Time Set the amount of time for which the behavior will loop.
Loops Drag the slider to set the behavior's number of loops.
Loop Forever Controls whether the behavior loops indefinitely.
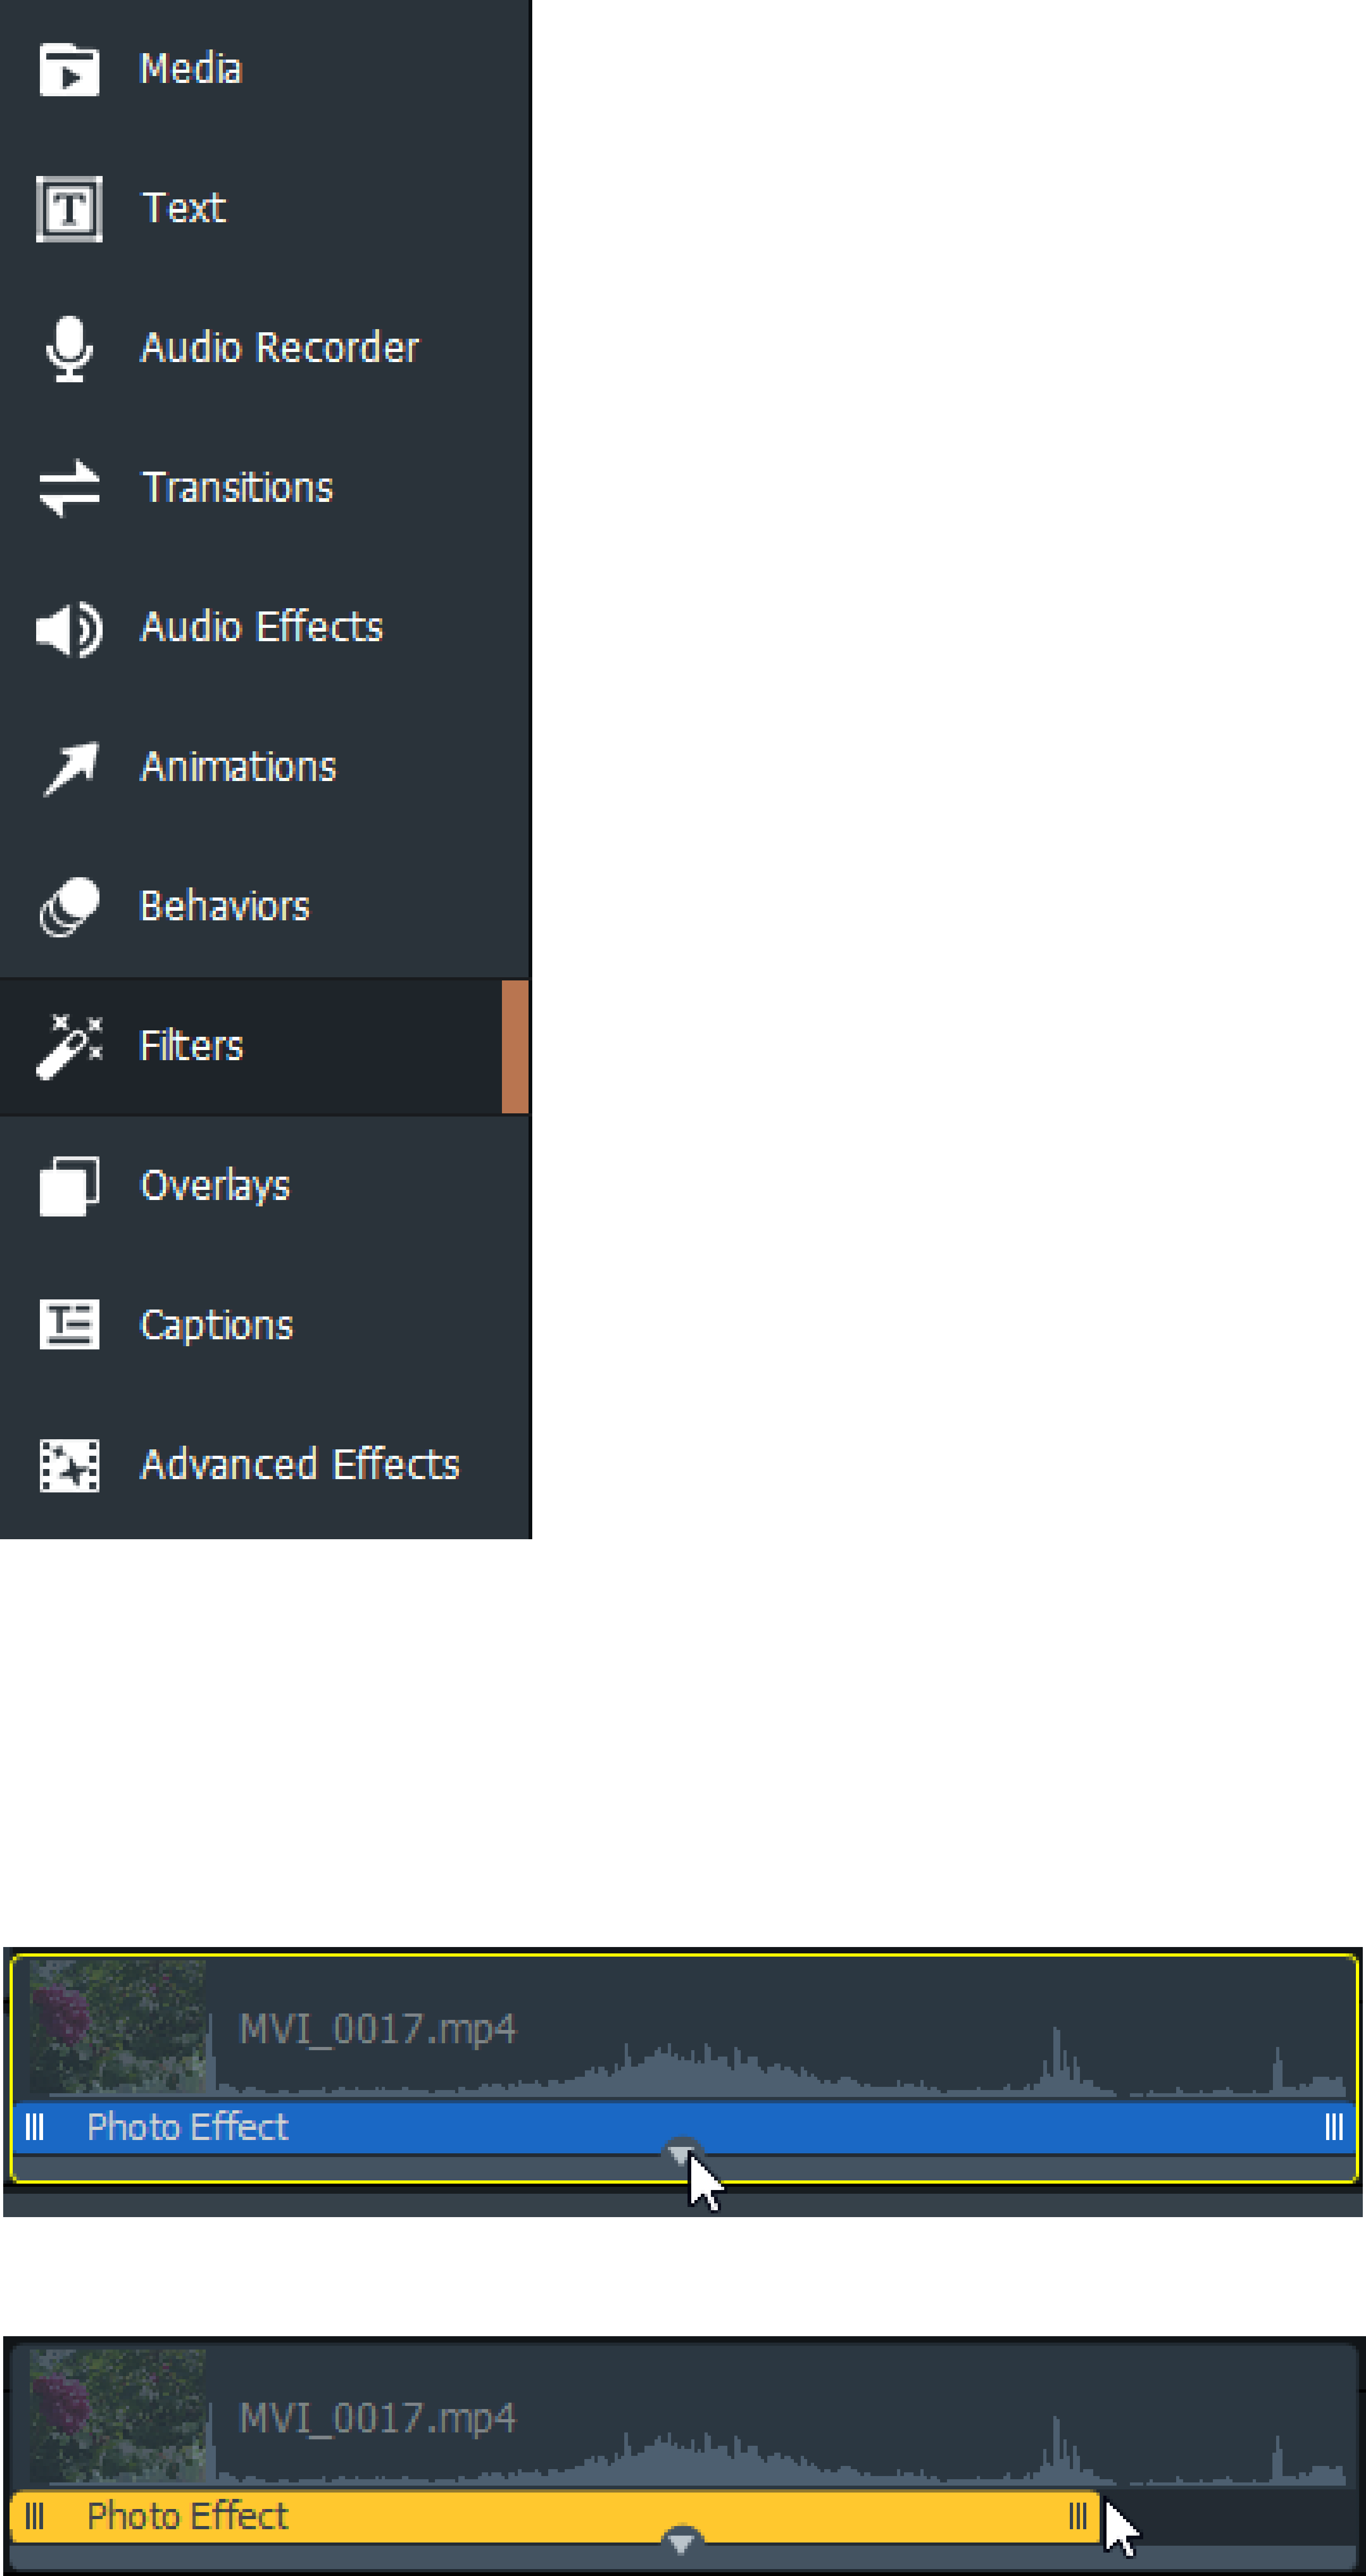
FILTERS
Filters alter the look of media assets.
ACDSee Luxea Video Editor User Guide
Page 38 of 74
To add filters to media assets:
1. With clips added to the Timeline, select the Filters tab, or press L.
2. Select a filter and drag it over a clip on the Timeline. A note stating "Effect Added" will temporarily appear
on the Timeline.
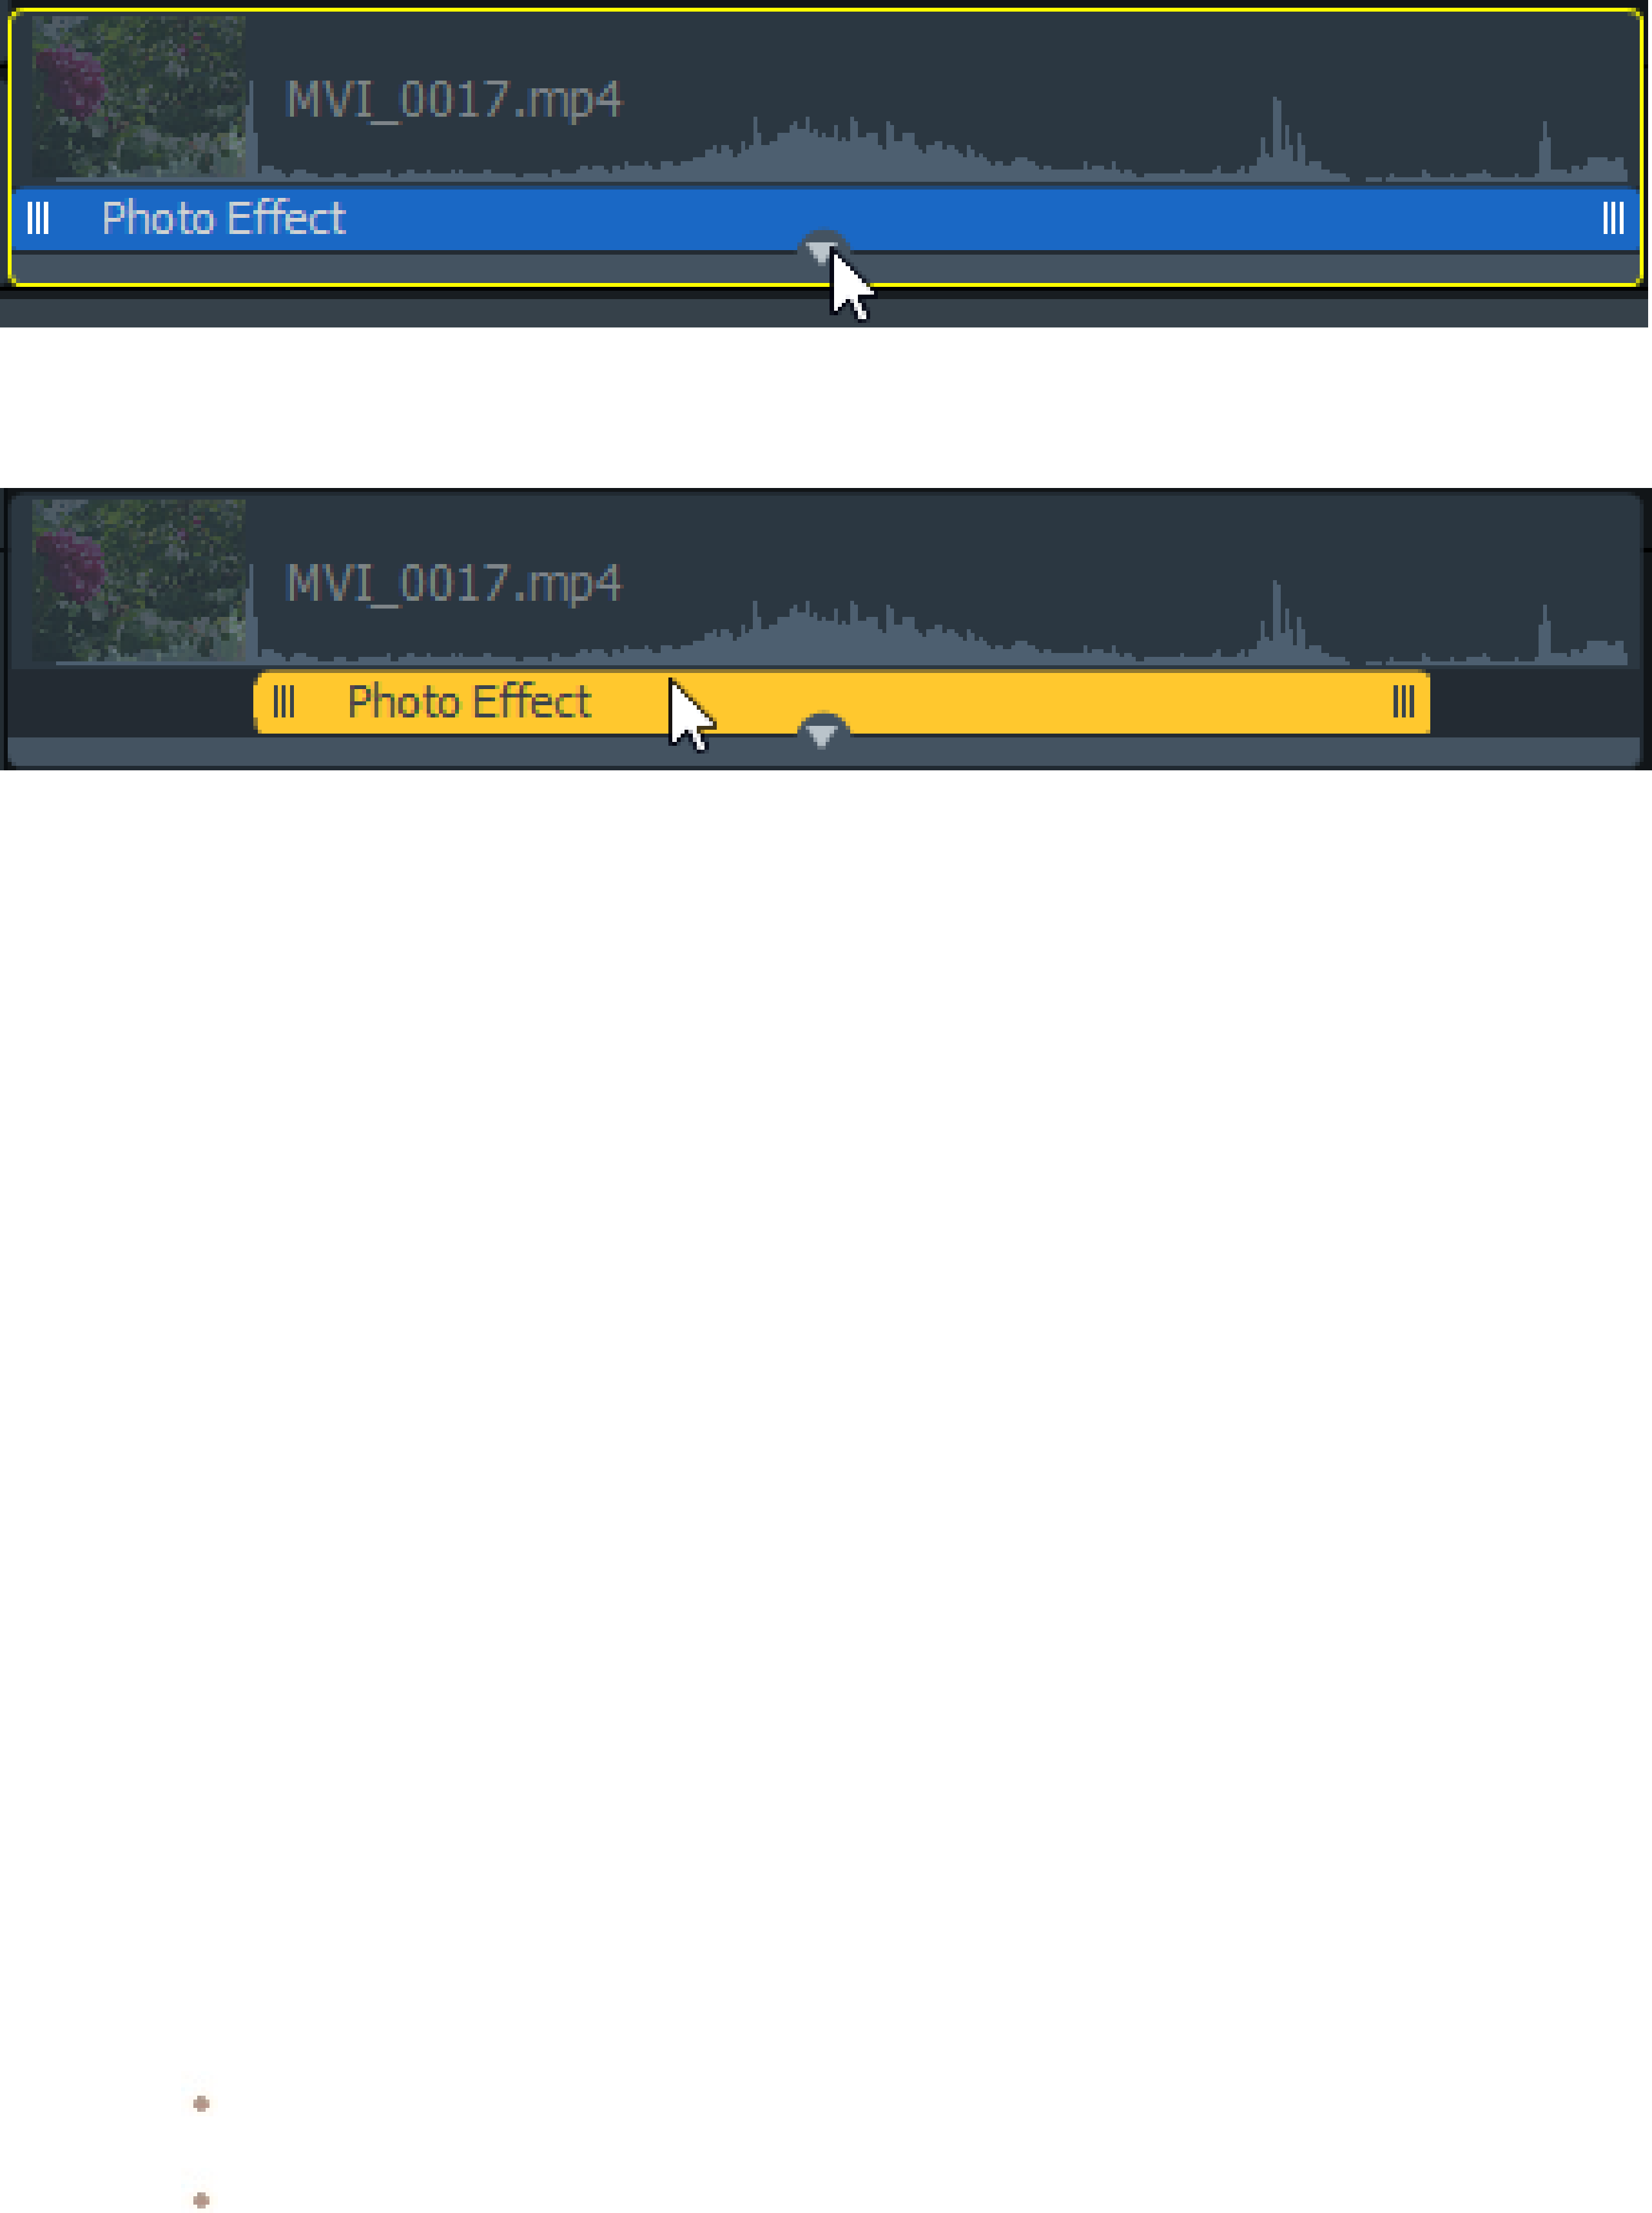
To adjust the duration of a filter:
Configure the amount of time a clip is affected by filters.
1. Select the clip on the Timeline with the filter applied and click the bar at the bottom of the clip.
2. Drag the edges of the filter on the clip to change its duration.
To adjust the timing of a filter:
ACDSee Luxea Video Editor User Guide
Page 39 of 74
Configure when a clip is affected by filters.
1. Select the clip on the Timeline with the filter applied and click the bar at the bottom of the clip.
2. Drag the edge of the filter on the clip to change its duration. Then drag the filter left or right to specify the
desired start and finish times.
To copy and paste a filter from one media asset to another:
1. With a filter selected on the Timeline, right-click and select Copy Selected Filter.
2. On the destination media asset, right-click and select Paste Filters. A note stating "Effect Added" will
temporarily appear on the Timeline.
Or:
1. With the media asset containing the filter selected on the Timeline, select Edit | Copy Filters from the
main menu.
2. Select the destination media asset, select Edit | Paste Filters from the main menu. A note stating "Effect
Added" will temporarily appear on the Timeline.
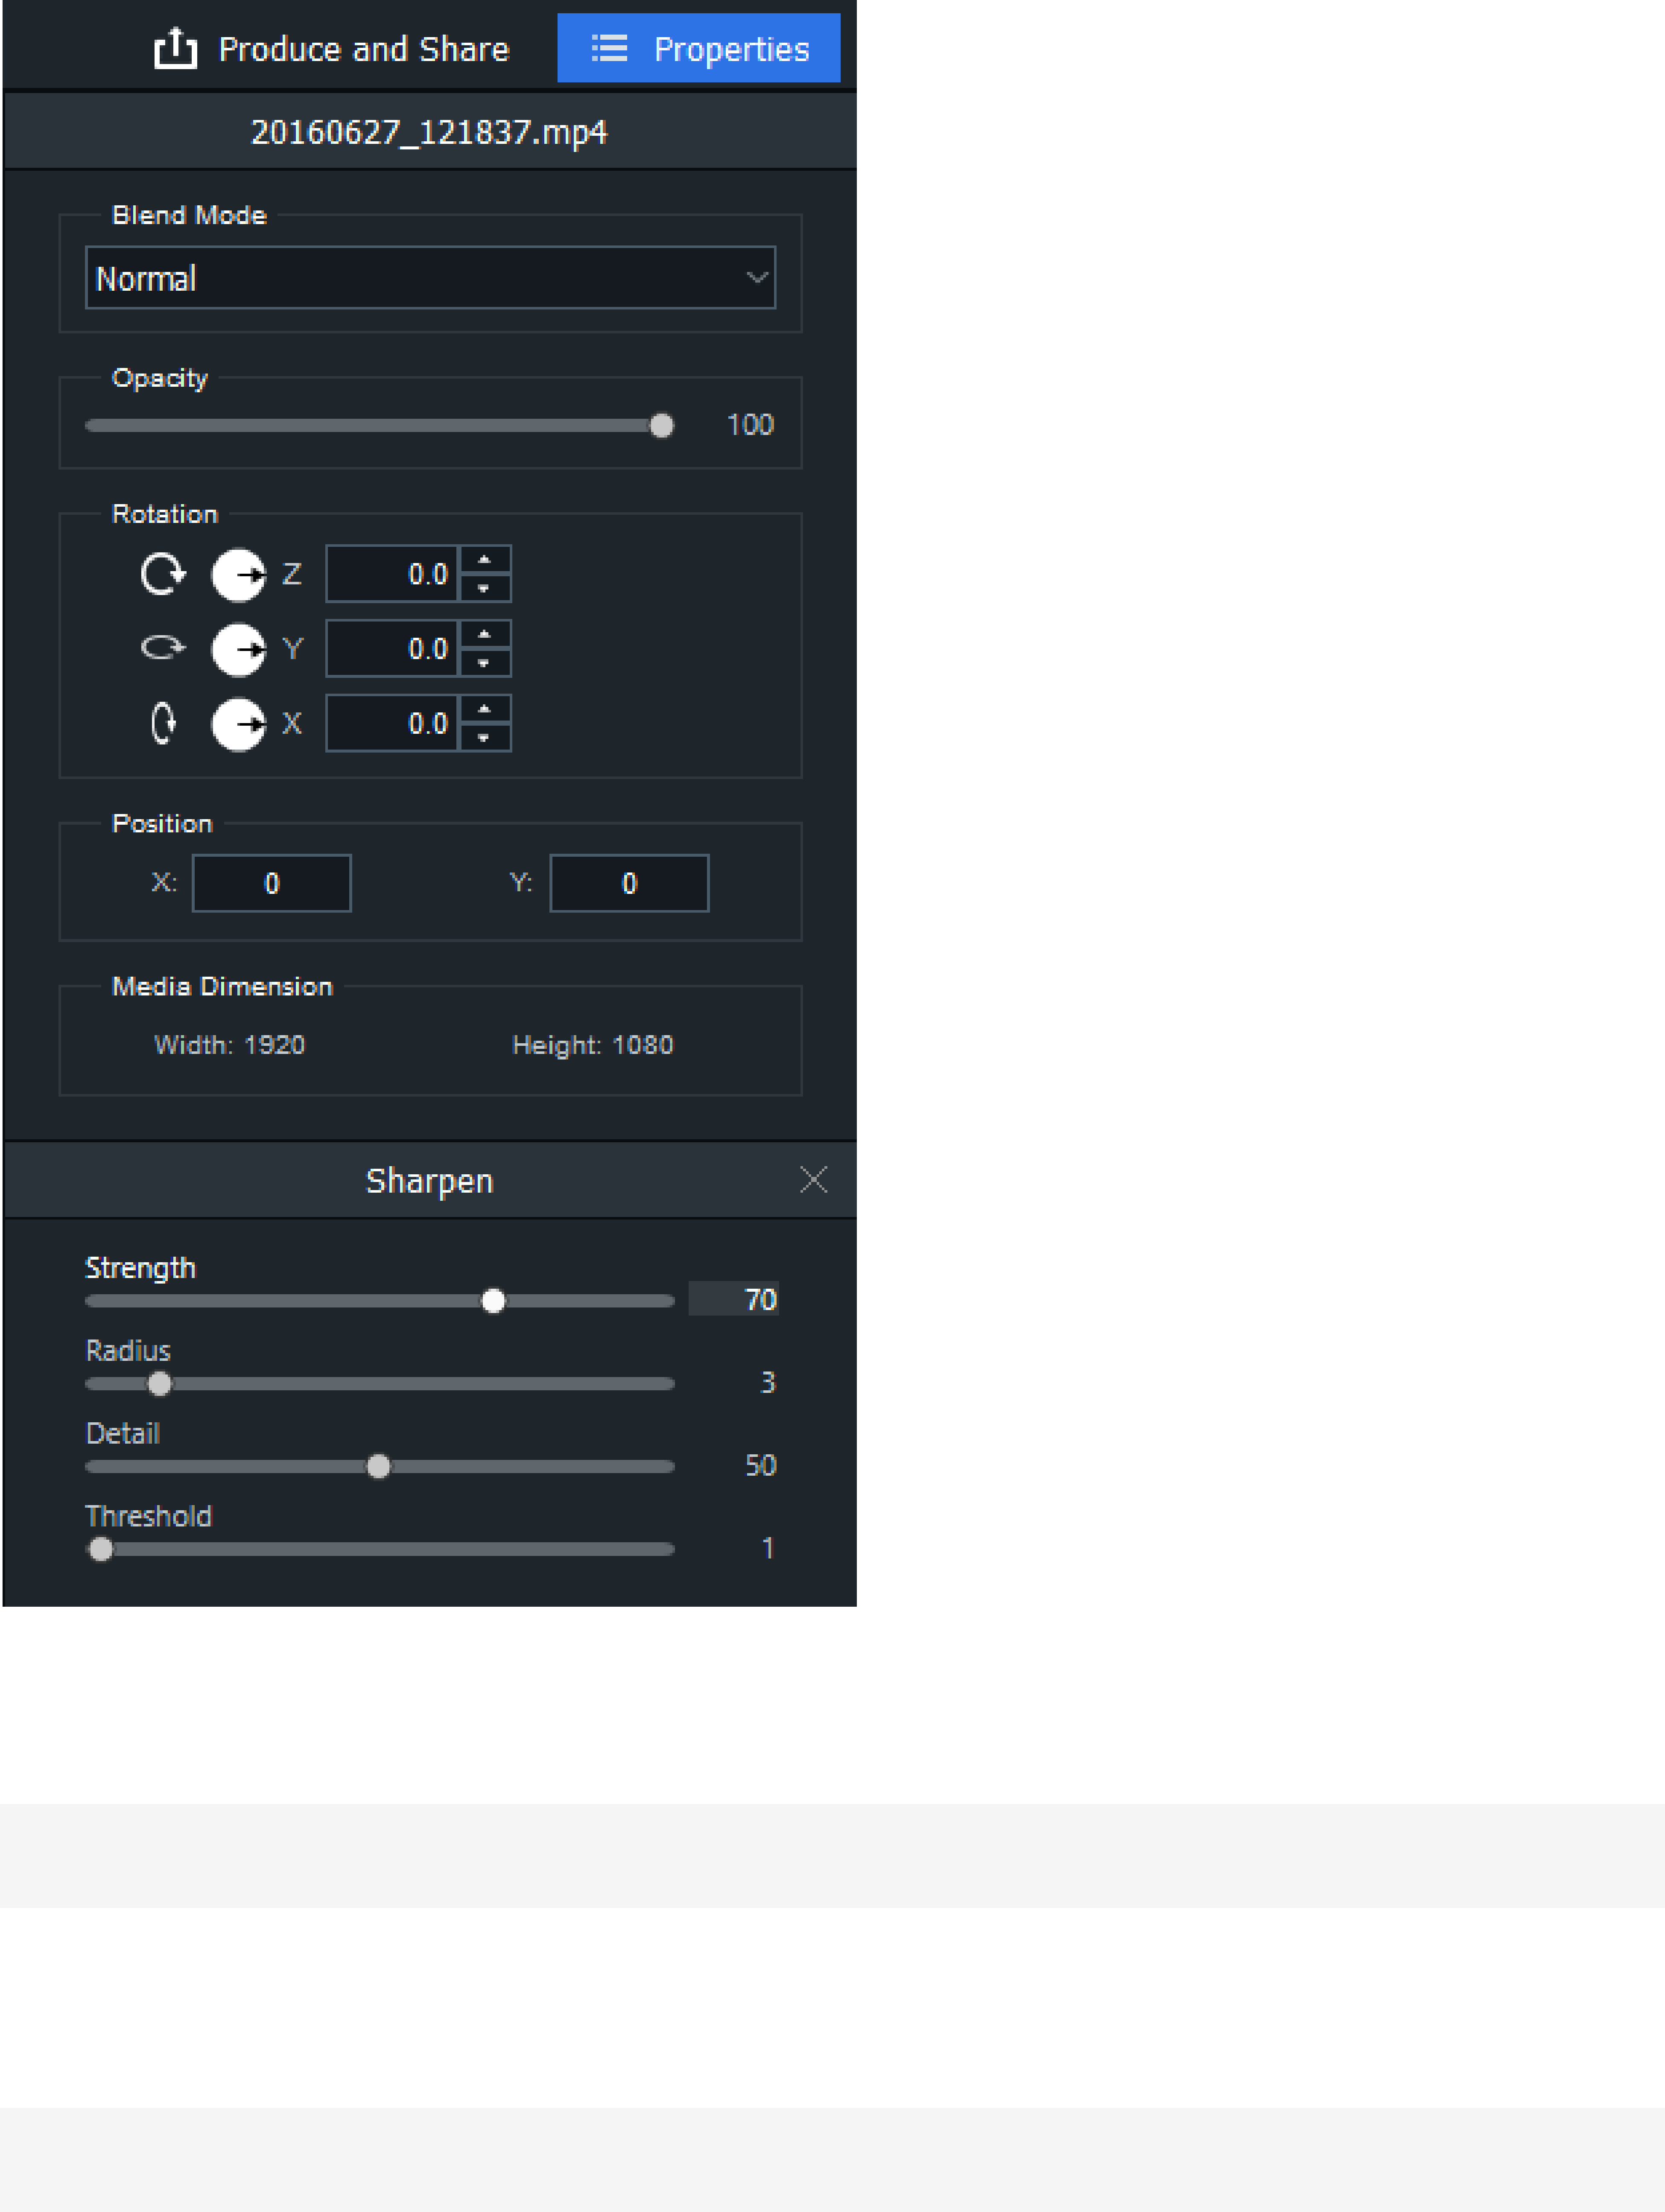
FILTER SETTINGS
Adjust the properties filters applied to media assets.
To adjust filter settings:
1. Display the filter's properties by doing one of the following:
On the Timeline, right-click the filter on the clip and select Show Properties.
On the Timeline, select the filter on the clip and click the Properties button in the top right
corner.
2. In the Properties pane, adjust the filter settings as described below.
ACDSee Luxea Video Editor User Guide
Page 40 of 74
Filter Settings Options
Black & White
Adjust the Red, Green, or Blue sliders to add color back into a black and
white media asset
Brightness Adjusts the brightness of the colors of a media asset.
RGB
Adjust the Red, Green, or Blue sliders to balance or heighten the RGB
channels of a media asset.

ACDSee Luxea Video Editor User Guide
Page 41 of 74
Exposure
Exposure Adjusts the brightness of the colors of a media asset.
Contrast Drag the slider to the right to increase contrast, or drag to the left to
decrease contrast.
Photo Effect
Select a photo effect from the drop-down menu to change the look and feel
of a media asset.
Blur Filter Options
Click the Gaussian Blur button or the Directional Blur button to select
the type of blur.
Gaussian Blur Produces an even, smooth blur.
Strength
Specifies the strength of the blur. Move the slider to the right to intensify
the effect.
Directional Blur Produces a blurring effect that gives the illusion of movement.
Strength
Specifies the strength of the blur. Move the slider to the right to
intensify the effect.
Angle Specifies the direction of the blur effect.
Light EQ
TM
Brighten Drag the slider to the right to increase the brightness of dark areas of a
media asset.
Darken Drag the slider to the right to decrease the brightness of light areas of a
media asset.

ACDSee Luxea Video Editor User Guide
Page 42 of 74
Sharpen
Strength Specifies the strength of the sharpening applied by increasing contrast
around edges.
Radius Controls the number of pixels to adjust around each edge. Higher values
increase the number of sharpened pixels and tend to bring out coarser
detail, while lower values reduce the number of sharpened pixels and
tend to bring out finer detail.
Detail Suppresses the halo, (the light border that forms around edges with
extreme sharpening), by reducing its intensity. The higher the value,
the stronger the reduction.
Threshold Specifies how different the pixel lightness values within an edge must
be before the pixels within the edge are sharpened. Higher values
sharpen only stronger edges but minimize the appearance of noise.
Lower values sharpen both strong and weaker edges, but can increase
the appearance of noise. We recommend you set the threshold to
enhance edges while keeping background noise to a minimum.
Vibrance
Vibrance Drag the slider to the right to increase vibrance, or to the left to
decrease vibrance. Increasing vibrance does not affect skin tone of a
media asset.
Saturation Drag the slider to the right to increase saturation, or to the left to
decrease saturation.
Hue Adjusts the hue of the image or video. Drag the slider to the right to
increase or drag to the left to decrease hue.
Lightness Adjusts the image or video brightness. Drag the slider to the right to
increase or drag to the left to decrease the media asset's brightness.
Vignette
Strength Specifies the size and intensity of the vignette.
Distance Specifies the size of the clear area around the focal point in the portrait.
Drag the slider to the left to reduce the size of the clear area. Drag the
slider to the right to increase the size of the clear area.
Shape Specifies the shape of the frame.

ACDSee Luxea Video Editor User Guide
Page 43 of 74
White Balance
Temperature Adjusts the warmth of the correction, from blue to yellow.
Tint Adjusts the tint of the correction, from green to magenta.
Reflection
Height Drag the slider to set the height of the reflection.
TV Wall
Number of TVs From the drop-down menu, select the number of "TVs" to display.
Vertical Divide
Divisions From the drop-down menu, select the number of times to divide a media
asset.
Partial Mosaics
Width As you increase the Width, the blocks will fill in from the left and right.
Height As you increase the Height, the blocks will fill in from the top and
bottom.
Degree Drag the slider to adjust the size of the blocks.
Emboss
Elevation Specifies the light source's elevation on the media asset. Lower values
produce more shadows and a darker media asset. Higher values
produce fewer shadows and a lighter media asset.
Azimuth Specifies the amount of relief added to the media asset. Higher values
increase the relief depth.
Weight Specifies the angle of shadows that extend from the edges of the media
asset details. A value of 0 adds shadows to the left side, while a value of
180 adds shadows to the right side.

ACDSee Luxea Video Editor User Guide
Page 44 of 74
Hue Shift
Hue Drag the slider to change the hues of the colors in a media asset.
Morphology
Width Specifies the width of each bar.
Height Specifies the height of each bar.
Mirror
Horizontal /
Vertical
Choose an orientation for the mirror's axis.
Axis Drag the slider to adjust the position of the mirror's axis.
Color Fense
Degree Drag the slider to change the number and relative width of color bars to
appear on the media asset.
Four Seasons
Horizontal /
Vertical
Choose an orientation for the color bars on the media asset.
Shake
Degree Specifies the strength of the pulse.
Pane
Width Specifies the width of the color bar that moves across the video.

ACDSee Luxea Video Editor User Guide
Page 45 of 74
Blur Background
Click the Gaussian Blur button or the Directional Blur button to select
the type of blur.
Gaussian Blur Produces an even, smooth blur.
Strength
Specifies the strength of the blur. Move the slider to the right to intensify
the effect.
Directional Blur Produces a blurring effect that gives the illusion of movement.
Strength
Specifies the strength of the blur. Move the slider to the right to
intensify the effect.
Angle Specifies the direction of the blur effect.
Linear Gradient
Start Color Use the Colors pop-up to select the precise color for the Linear
Gradient filter to start with. On the far right is a vertical color slider,
navigate to a color group. A selected color display its numerical values
in the Red, Green, and Blue fields, as well as the Hex field. Enter
precise values to get specific colors or use the Color Dropper tool to
pick specific colors for the media asset.
End Color As above, use the Colors pop-up to choose the color to end the gradient
with.
Horizontal
Vertical
Choose an orientation for the Start Color and End Color.
Jigsaw
Color 1, Color 2, Color 3,
Color 4
Use the Colors pop-up to select precise colors for each portion of a
media asset's changed hues. The far right vertical color slider is used to
navigate to a color group. A selected color displays its numerical values
in the Red, Green, and Blue fields, as well as the Hex field. Enter
precise values to get specific colors or use the Color Dropper tool to
pick specific colors for the media asset.
Opacity Use the Opacity slider to change the opacity of the Jigsaw effect.
Chromatic Aberration
Degree Drag the slider to adjust the amount the colors shift when playing a
project.

ACDSee Luxea Video Editor User Guide
Page 46 of 74
ADDING TEXT TO MEDIA
Adding text to a project is useful for providing additional information to viewers, such as introducing new scenes.
A variety of text effects make projects more compelling, such as Transitions, Animations, Behaviors, Filters,
Chroma Key, Color LUT and/or Color Pass. A popular transition is to allow text to fade in and out, from clip to clip
(see "Fading text in and out").
To add text to images or videos:
1. Select the Text tab, or press T to see a list of Text Styles.
2. Do one of the following:
l Select a Text Style and drag it to the desired location on the Timeline.
l Right-click a Text Style and select Apply, or press Alt + A.
3. A text box will open beneath the Display Area to edit the text displayed and its styles. On the right hand
side, change the font, color, size, style, Text Effects, direction, and alignment.
Within the Display Area, use the mouse to adjust the size and orientation of the Text.
CREATING CUSTOM TEXT STYLES
Customize and save Text Styles as presets for future use.
ACDSee Luxea Video Editor User Guide
Page 47 of 74
To create a custom text preset:
1. In the text settings, click the Save as Custom button.
2. In the New Preset dialog, enter a name for the text preset.
3. Click OK.
To delete a custom text preset:
Right-click the custom text preset in the Text tab and click Delete.
To delete text:
Right-click the text on the Timeline and select Delete.
Text Effects
Effects can be added to text.
To add Text Effects:
1. In the text settings, click the fx button.
2. In the Text Effects dialog, enable the desired checkboxes.
3. Configure the settings as described in the Text Effects options table below.
4. Click OK.
Batch Text Edit
Edit multiple pieces of media text at one time.
To use Batch Edit Text:
1. Select multiple pieces of Text on the Timeline by using Ctrl + Click or by clicking and dragging a box
around the media assets.
2. Right-click and select Batch Edit Text...
3. In the Batch Edit Text dialog, select the relevant edits you wish to apply to all selected text. In the Gen-
eral tab, edit fonts, color, size, style, direction, alignment and position. For advanced options, use the Text
Effects options table below as a guide.
Text Effects Options

ACDSee Luxea Video Editor User Guide
Page 48 of 74
Inner Glow
Blend Mode Specifies how the effect blends with the text. Select a blend mode from the
drop-down menu.
Color Specifies the color of the glow. Click the color picker to select a different
color.
Thickness Specifies the thickness of the glow effect. Drag the slider to set the
thickness.
Blur Blurs the edges of the glow. Drag the slider to determine how much blur is
applied.
Opacity Specifies the opacity of the glow. Drag the slider to adjust the opacity of the
glow. The higher the opacity, the more visible the glow is.
Inner Shadow
Blend Mode Specifies how the effect blends with the text. Select a blend mode from the
drop-down menu.
Color Specifies the color of the shadow. Click the color picker to select a different
color.
Rotation Specifies the angle of the shadow. Type a number from 0 to 359.9 or drag
the arrow to adjust the angle.
Blur Blurs the edges of the shadow. Drag the slider to determine how much blur
is applied.
Distance Specifies the size of the shadow according to the rotation setting. Drag the
slider to adjust how far the shadow encroaches on your text.
Opacity Specifies the opacity of the shadow. Drag the slider to adjust the opacity of
the shadow. The higher the opacity, the more visible the shadow is.
Bevel
Elevation Specifies the visibility of the bevel effect. As you reduce the Elevation slider,
the text darkens, making the effect stand out more.
Radius Specifies how spread out the bevel is.
Light Source Specifies an imaginary light source. Click and drag the glow on the ball to
reposition the imaginary light source.
Outline
Color Specifies the color of the outline. Click the color picker to select a different
color.
Thickness Specifies the thickness of the outline effect. Drag the slider to set the
thickness.
Blur Blurs the edges of the outline. Drag the slider to determine how much blur
is applied.
Opacity Specifies the opacity of the outline. Drag the slider to adjust the opacity of

ACDSee Luxea Video Editor User Guide
Page 49 of 74
the outline. The higher the opacity, the more visible the outline is.
Blur
Strength Specifies the strength of the blur. Move the slider to the right to intensify
the effect.
Shadow
Color Specifies the color of the shadow. Click the color picker to select a different
color.
Rotation Specifies the angle of the shadow. Type a number from 0 to 359.9 or drag
the arrow to adjust the angle.
Blur Blurs the edges of the shadow. Drag the slider to determine how much blur
is applied.
Distance Specifies the size of the shadow according to the rotation setting. Drag the
slider to adjust how far the shadow encroaches on your text.
Opacity Specifies the opacity of the shadow. Drag the slider to adjust the opacity of
the shadow. The higher the opacity, the more visible the shadow is.
Fading Text In and Out
Text can be set to fade in and out with clips by adding transitions to the text.
To add fading transitions to text:
1. With a clip added to the Timeline, select the Text tab, or press T to see a list of Text Styles.
2. Select the Text Style you would like to use and drag it to your desired location on the Timeline. You can
also right-click on the Text Style you would like to use and select Apply or press Alt + A.
3. Select the Transitions tab or pressS.
4. Select either Fade, Fade to Black or Fade to White transition, and drag it on to the text on your Timeline so it
lines up with the start and end of the text.
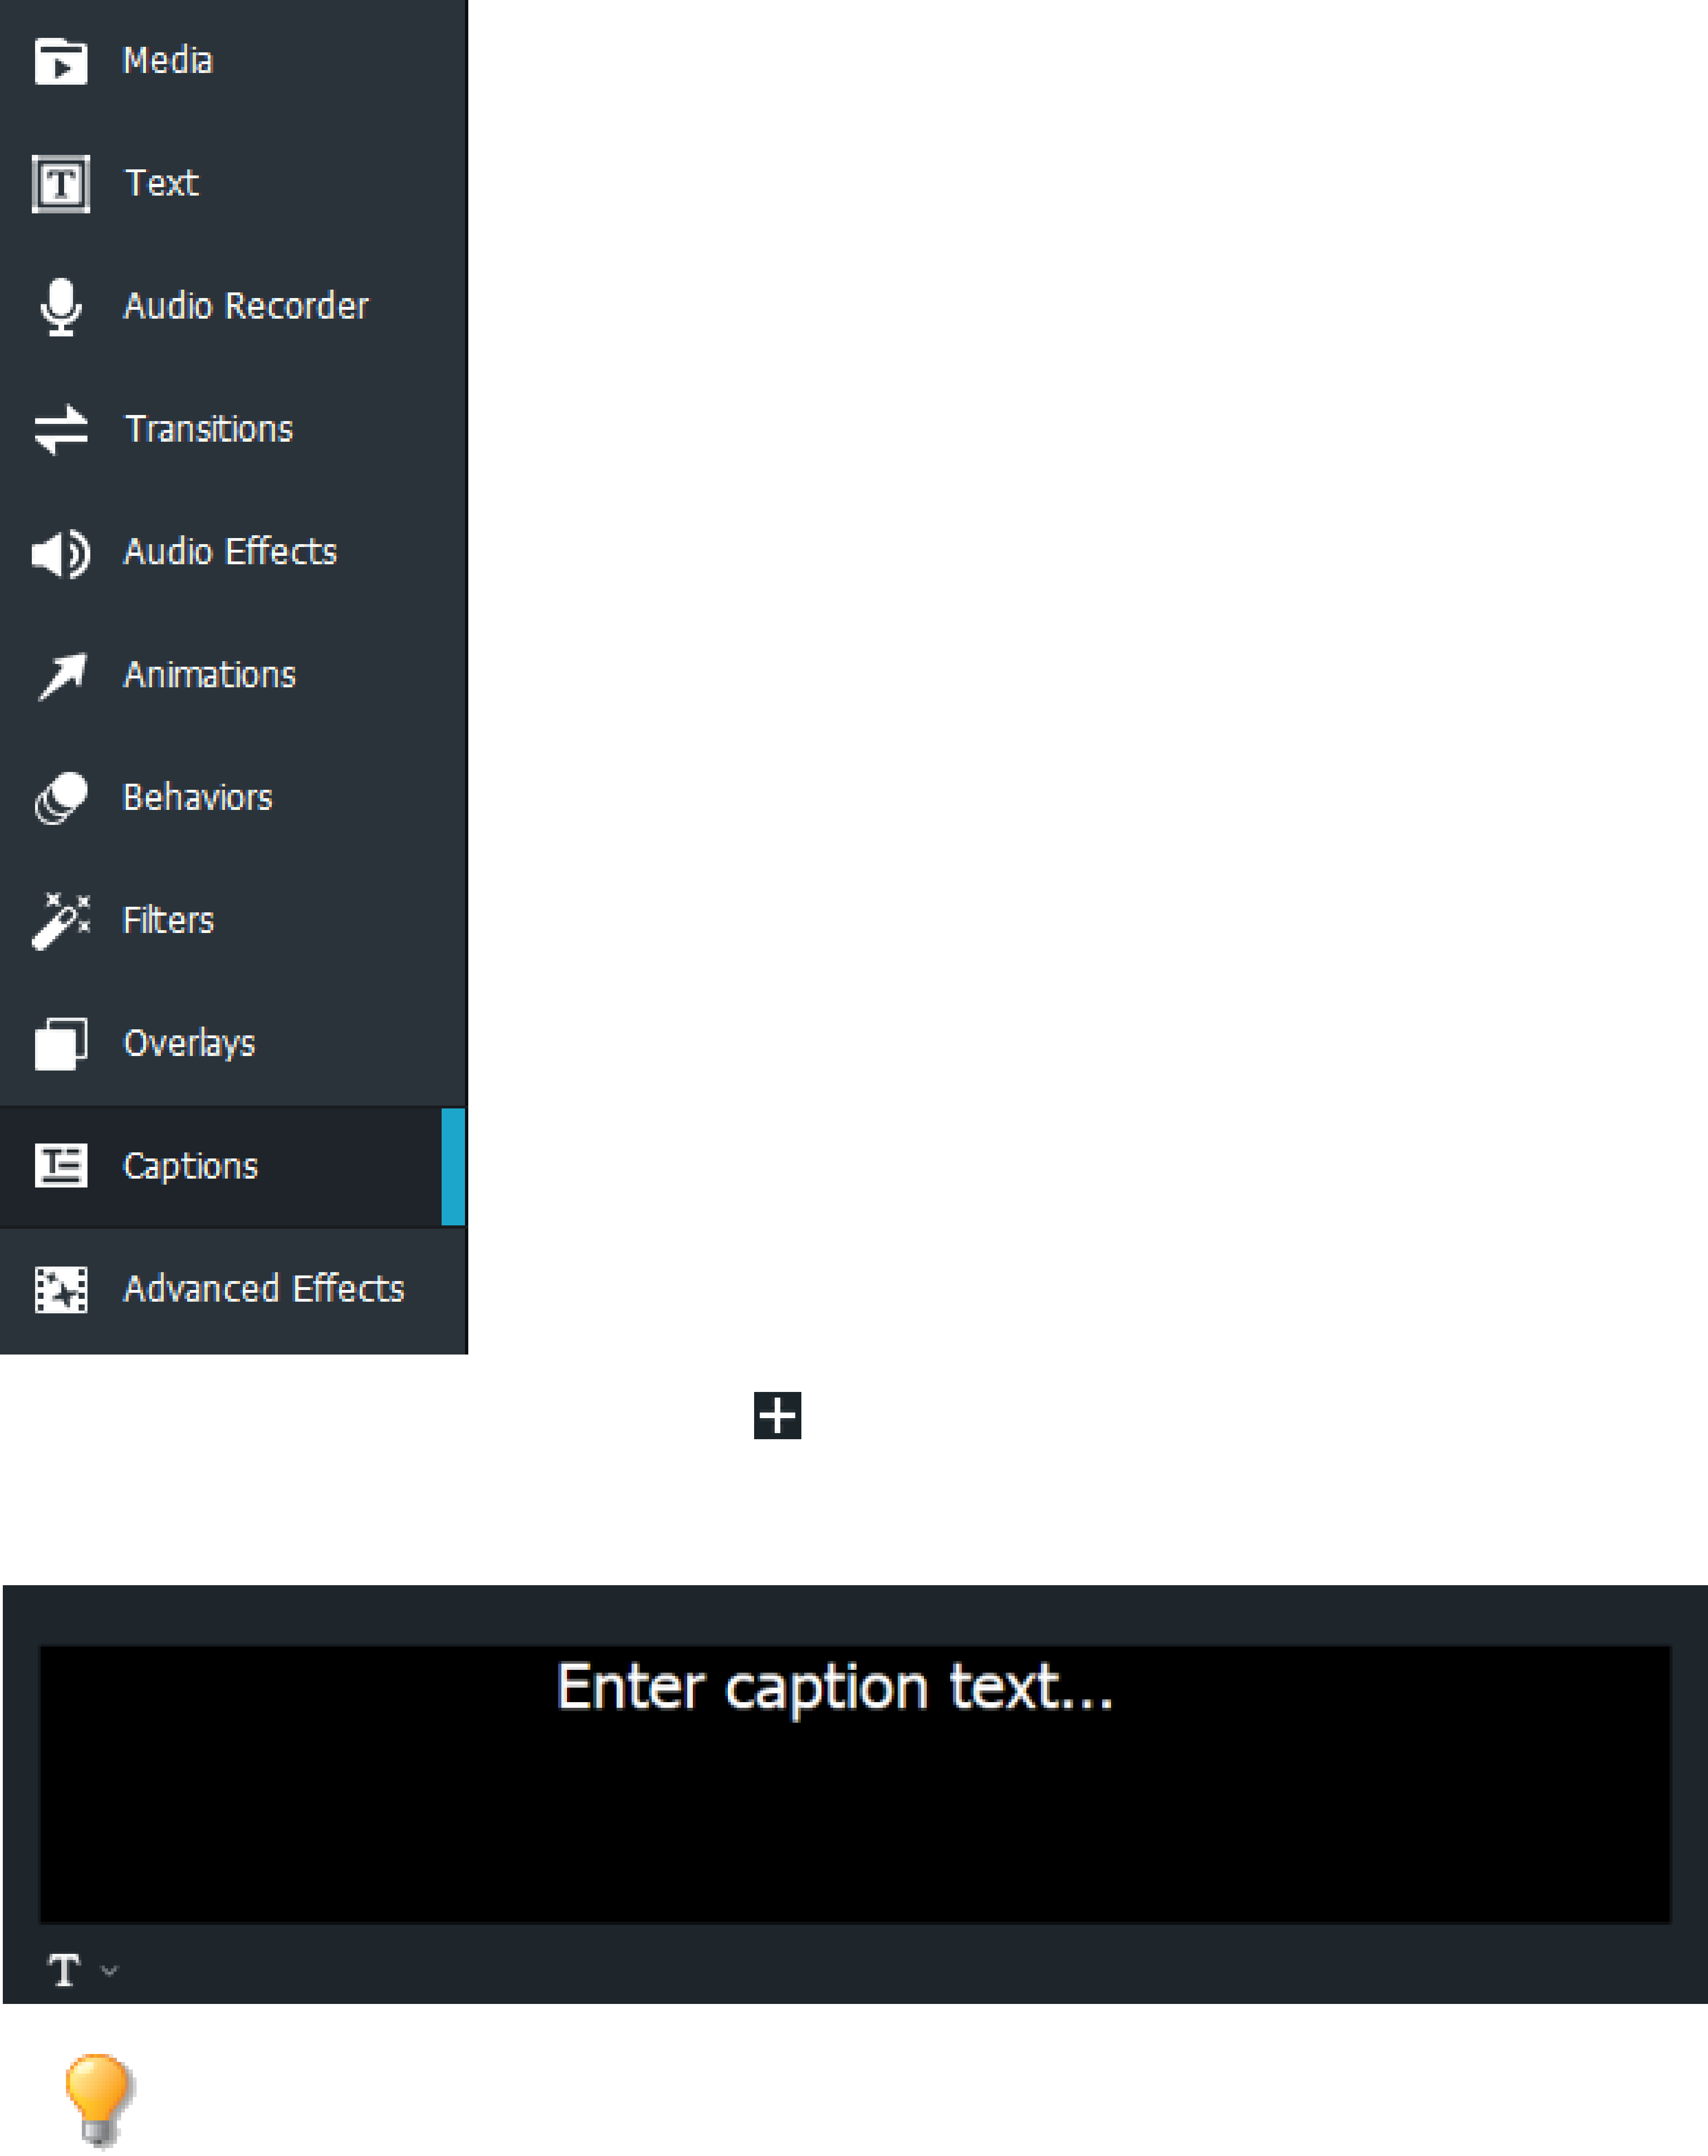
ADDING CAPTIONS
Captions added to a video are useful for including information, subtitling, adding comments, and much more.
To add a caption to a video:
1. Select the Captions tab, or press C.
ACDSee Luxea Video Editor User Guide
Page 50 of 74
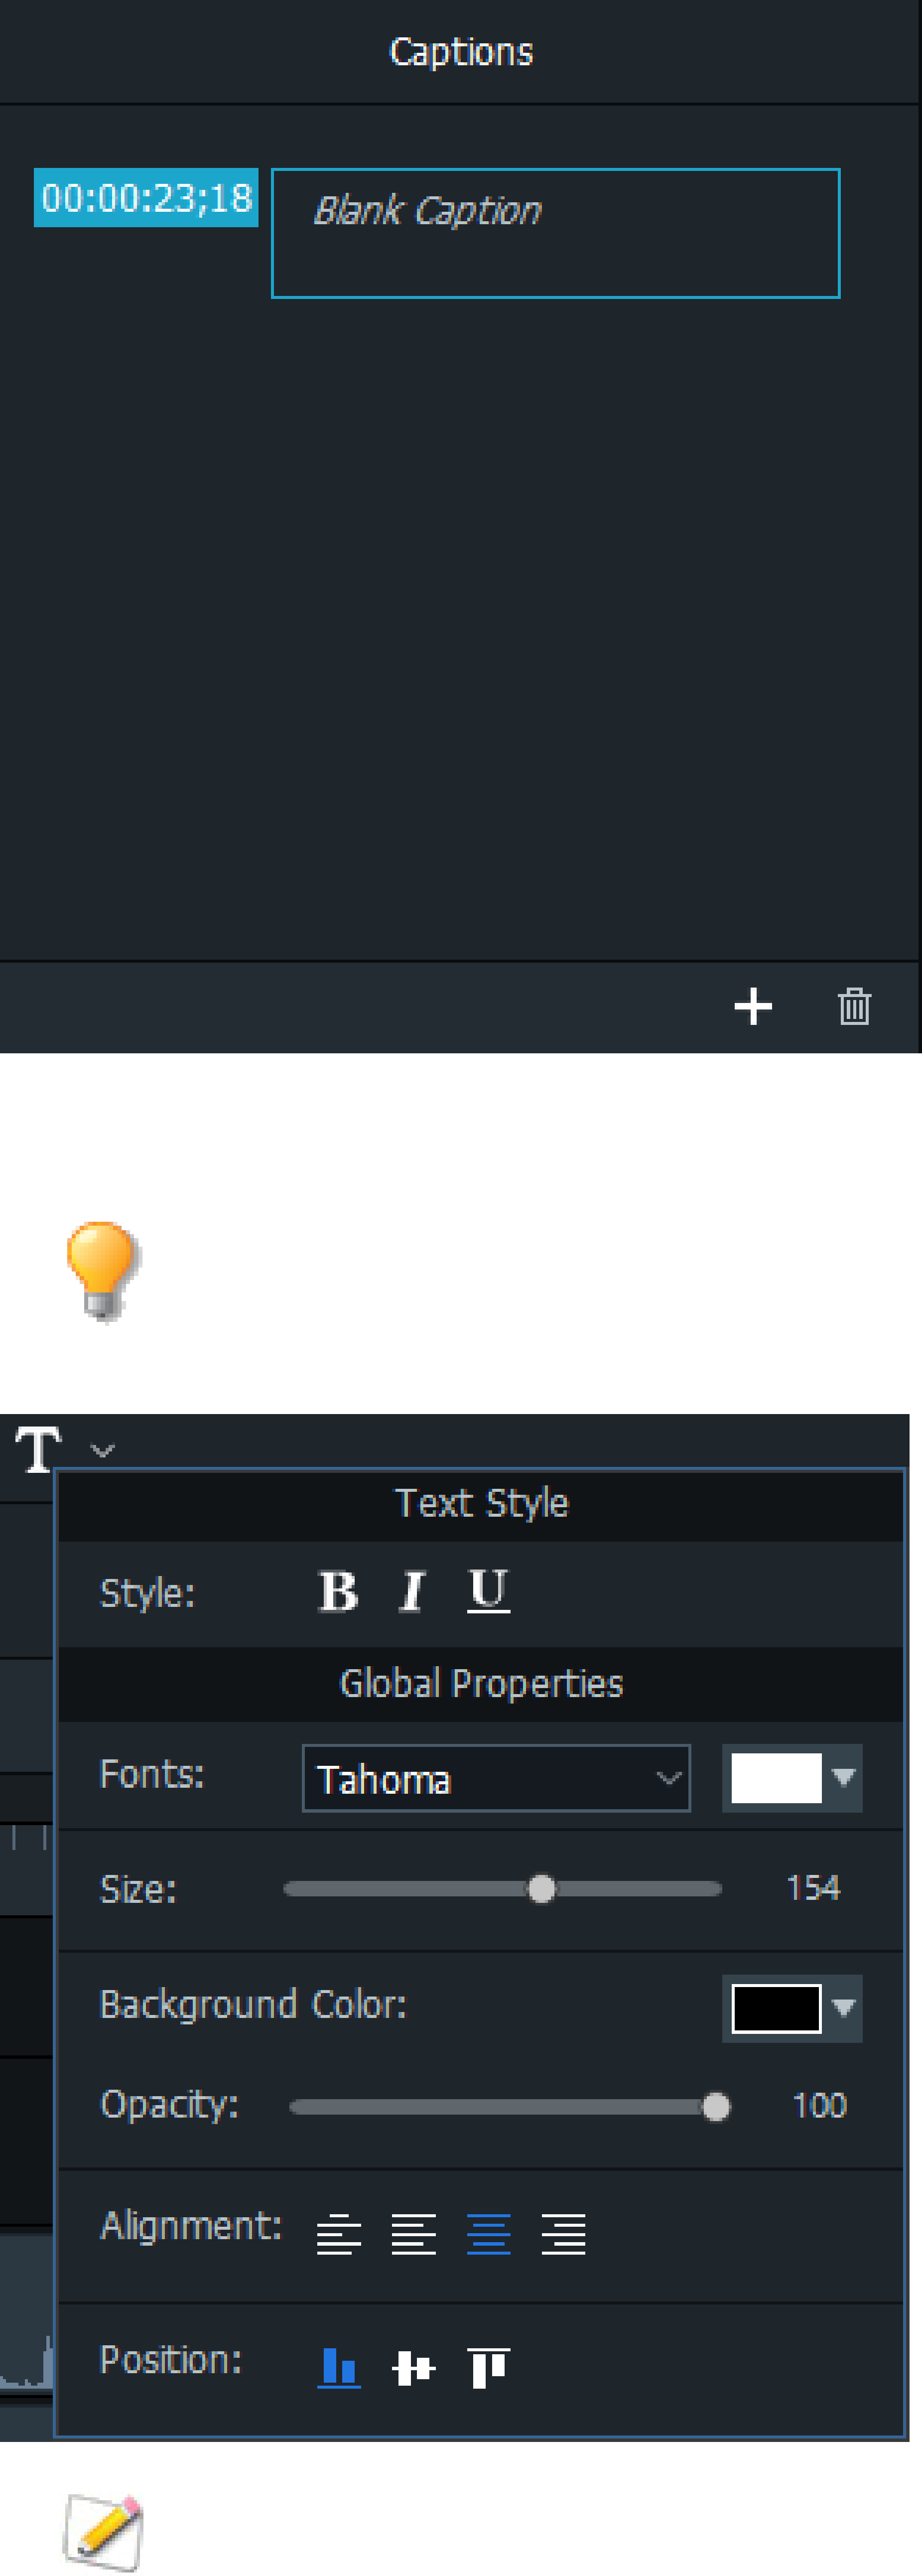
2.
In the Captions panel, click the Add button or press Shift + C. The caption will be added at the
Playhead on the Timeline.
3. Enter text in the display area field.
The box on the left of the Text field indicates the time that the text will appear. Move the text on the
Timeline as desired.
ACDSee Luxea Video Editor User Guide
Page 51 of 74
4. Click the Text Style drop-down menu to adjust the text style options. Configure options, such as font,
background color, text alignment, and any bold or italics.
Changes made to the Text Style only affect the selected text. Changes made to Global Properties
affect captions throughout the project. For example, italicizing individual words won't affect
otherwords, but changing the Caption font will affect all captions.
To bold, italicize, or underline a particular section of a caption, select the text in the Text field and
click the Bold, Italics, or Underline button(s).
ACDSee Luxea Video Editor User Guide
Page 52 of 74
5. On the Timeline, move or extend the caption by clicking and dragging it.
To remove a caption from the Timeline:
To remove a caption from the Timeline, right-click the caption on the Timeline and select Delete from the context
menu.
To remove all captions from the Timeline:
Select Edit | Remove all Captions from the main menu, or click Ctrl + Alt + S.
OVERLAYS
Overlays are visual effects added on top of or after a media asset.
To add overlays to a media asset:
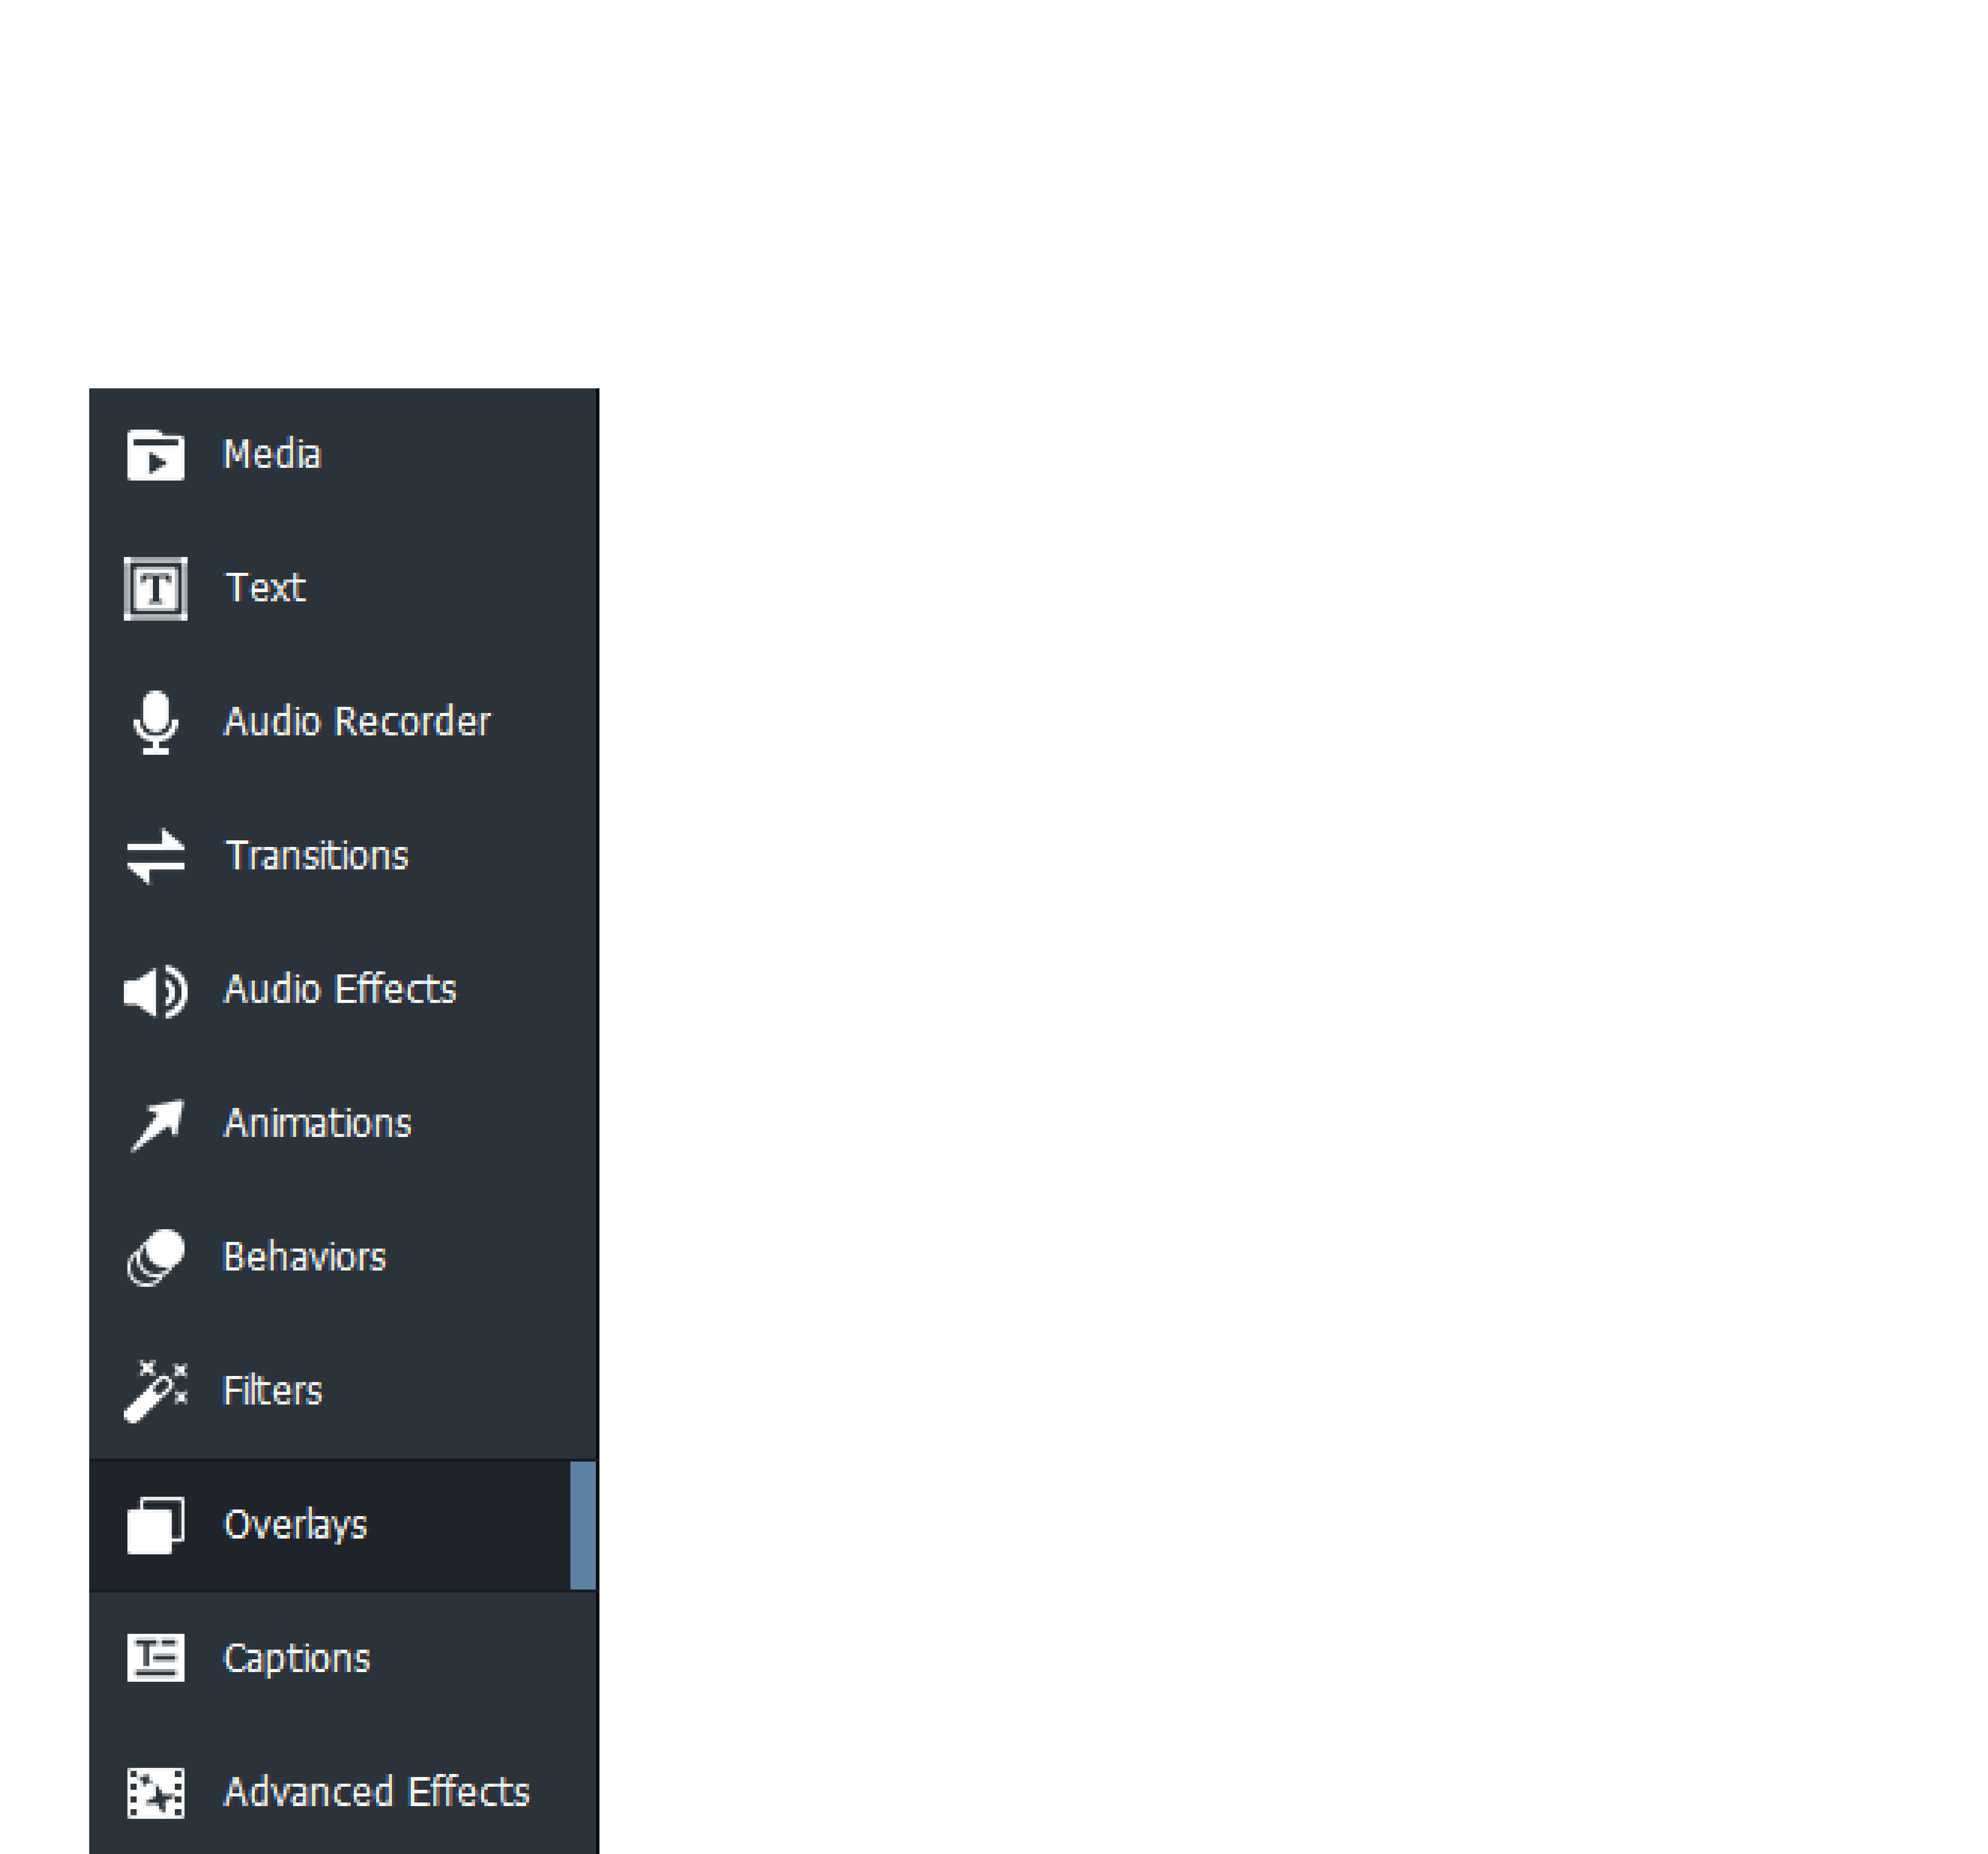
1. With clips added to the Timeline, select the Overlays tab, or press O.
2. Drag and drop a desired overlay to a location on the Timeline. Place the overlay before or after the media
file in the Timeline, or during the media asset by adding the overlay to another track above the media.
To delete an overlay:
Right-click the overlay on the Timeline and select Delete.
To change the duration of an overlay:
ACDSee Luxea Video Editor User Guide
Page 53 of 74
Click and drag the edge of the overlay to a desired duration.
ADVANCED EFFECTS
The tools in the Advanced Effects tab are used to fine-tune and further customize media assets.
CHROMA KEY
Chroma Key removes a solid color from the background, most often used on videos shot with a green screen.
To remove a color from a media asset:
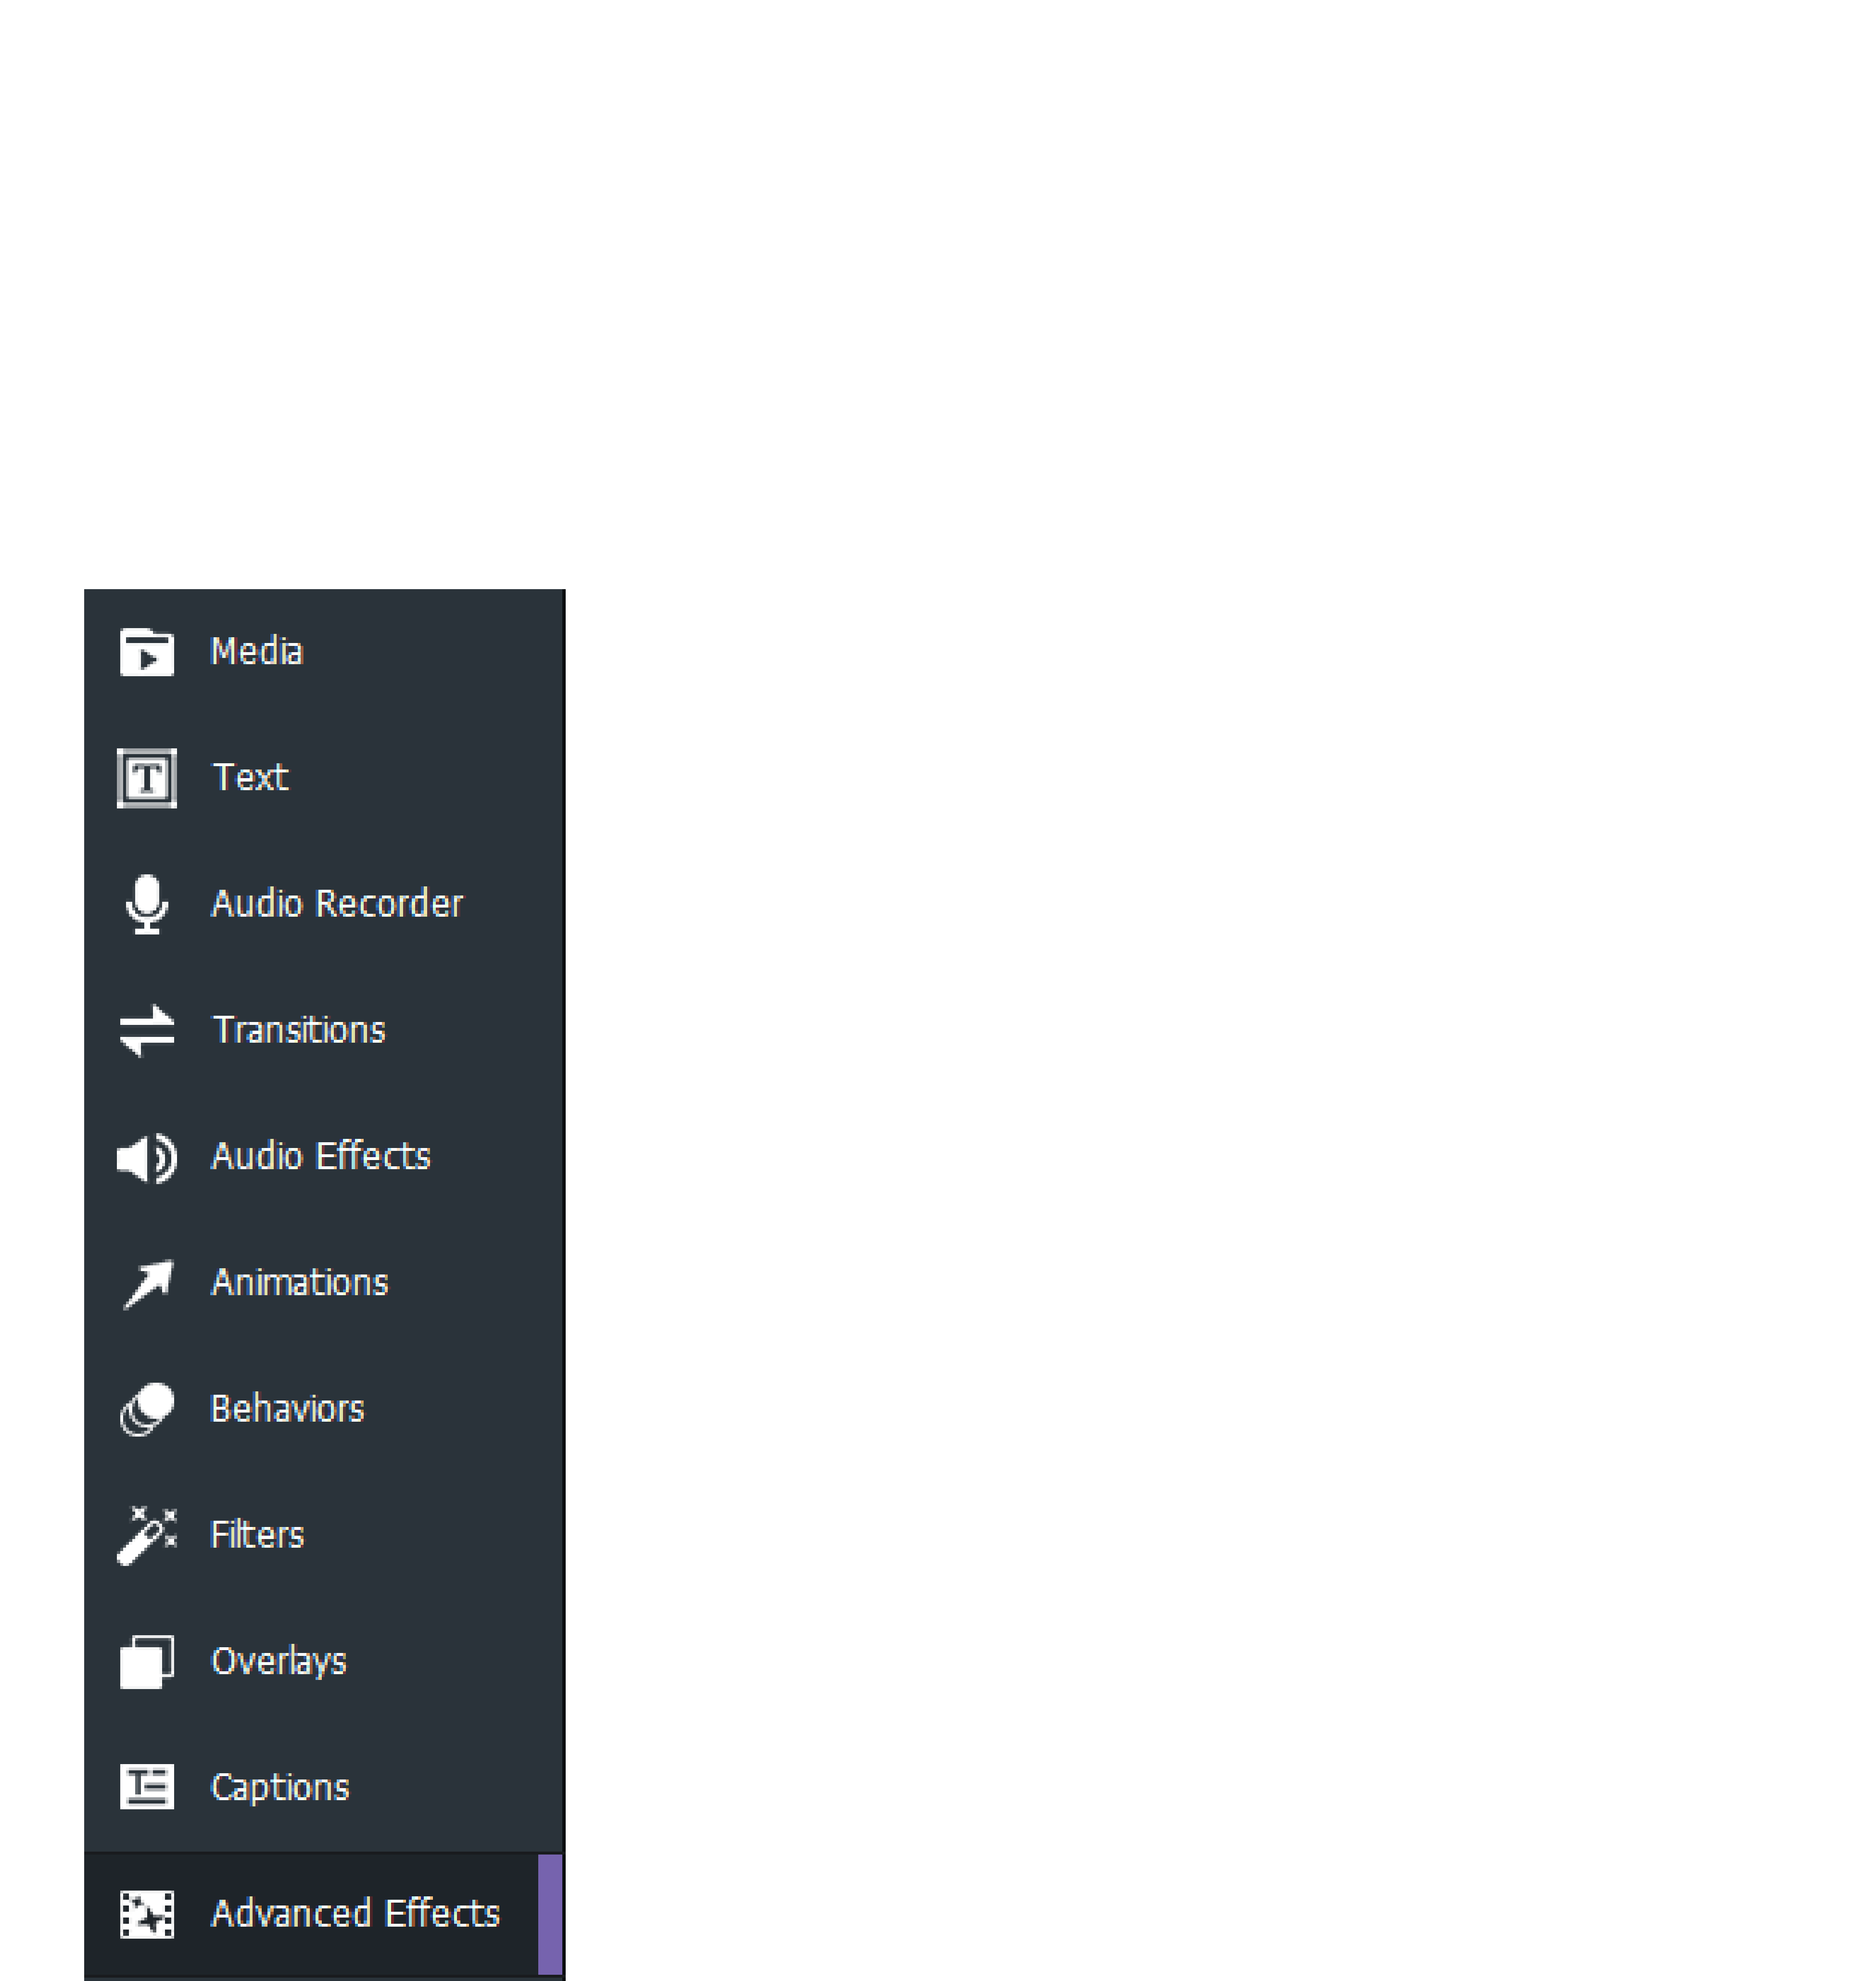
1. With clips added to the Timeline, select the Advanced Effects tab, or press E.
2. Select Chroma Key and drag it onto a clip residing on the Timeline. A note stating "Effect Added" will
temporarily appear on the Timeline.
3. With the clip selected, in the Chroma Key section of the Properties pane, adjust the settings as
described below.
Chroma Key Options
ACDSee Luxea Video Editor User Guide
Page 54 of 74
Color Use the Colors pop-up to select the precise color to remove from the media
asset. To open the Colors pop-up, make a selection from the Color drop down
menu.
Use the far right vertical color slider to navigate to a color group. The selected
color displays its numerical values in the Red, Green, and Blue fields, as well
as the Hex field. Enter precise values to get specific colors, or use the Color
Dropper tool to pick specific colors from the media asset.
Tolerance
Adjust the slider to define how similar a color must be to the selected color in
order to be removed.
Softness Adjust the slider to soften the edge between the color being removed and what
is left. Softness also reduces the overall opacity of the image.
Invert Settings
Enable the Invert Settings checkbox to remove every color except the
selected color.
COLOR LUTS
"Color LUT" stands for Color Lookup Table. Color LUTs are lists that instruct Luxea to map specific RGB values to
other specific color values. Iimport LUTs and use them as filters in Luxea. Color LUT supported file types are .3dl
and .cube.
To apply a Color LUT to a media asset:
1. With clips added to the Timeline, select the Advanced Effects tab, or press E.
2. Select Color LUTs and drag it onto your clip on the Timeline. A note stating "Effect Added" will
temporarily appear on the Timeline.
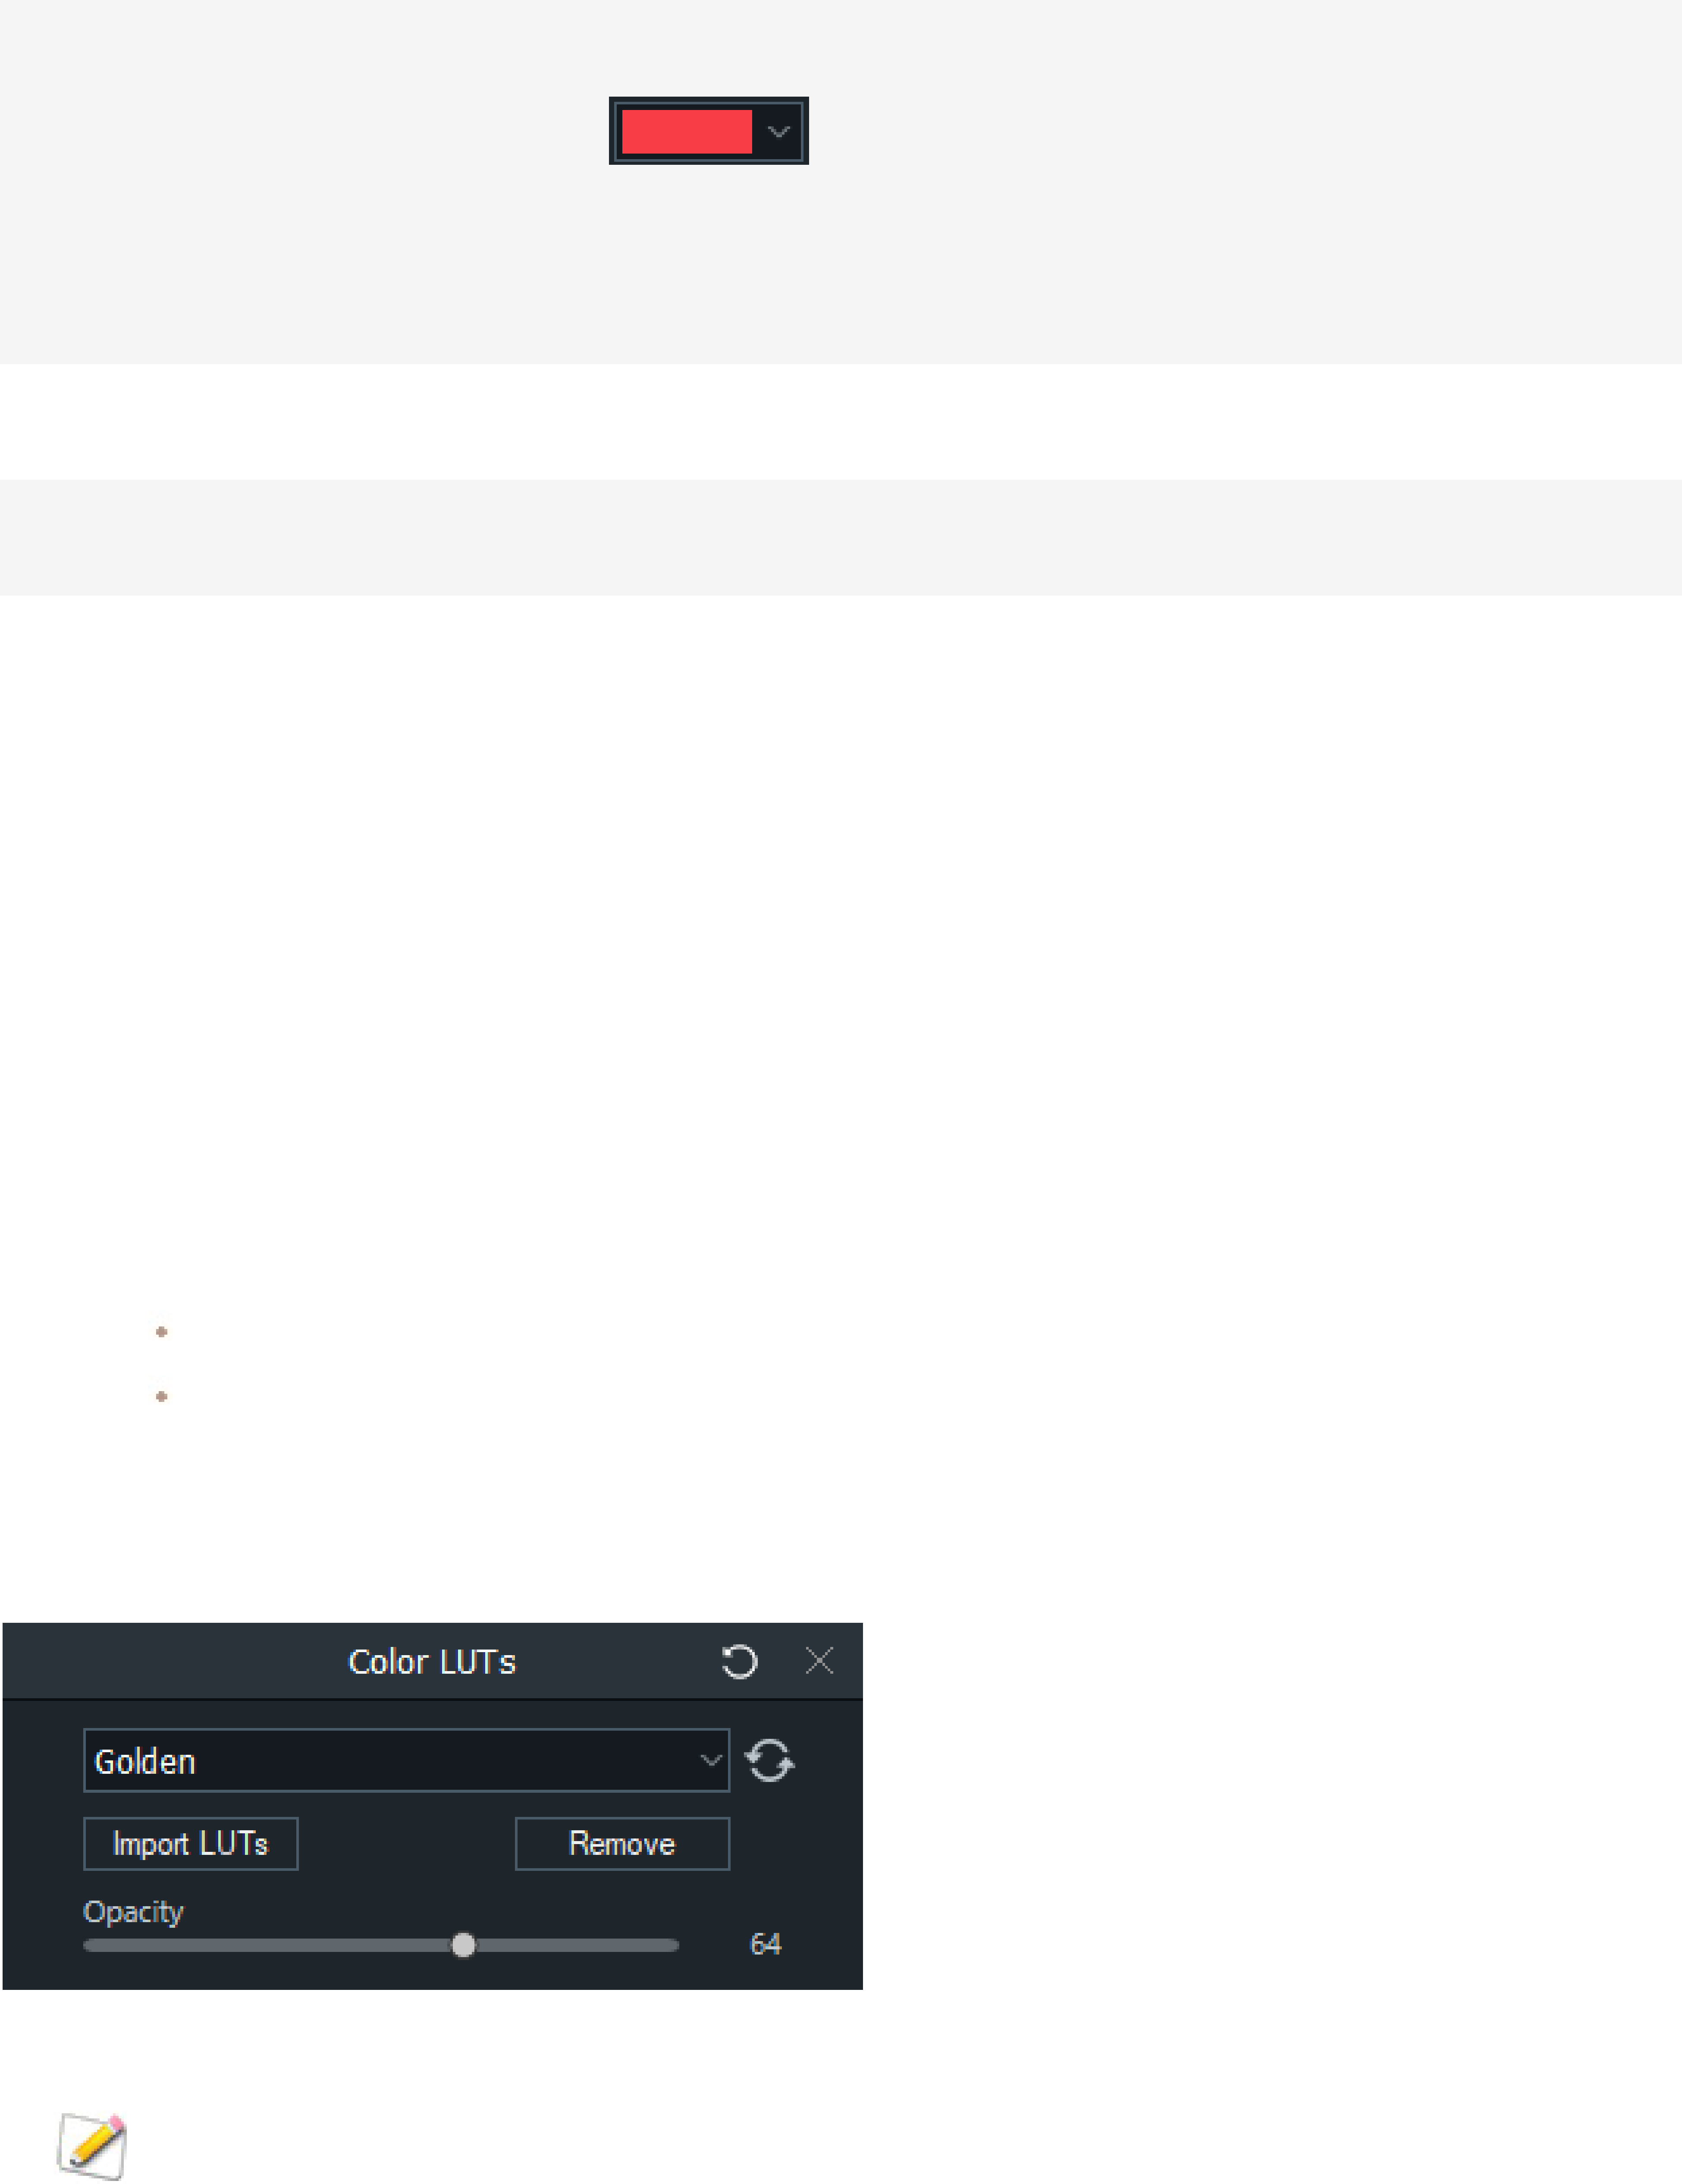
3. With the clip selected, in the Color LUTs section of the Properties pane, do one of the following:
Select a LUT from the Color LUTs drop-down menu in the Properties pane.
Click the Import LUTs button. In the Open dialog, browse to the location of the LUT files, and click
the Open button. The LUT is immediately applied.
4. Optionally, use the slider to adjust the opacity of the Colour LUT.
To remove Color LUTs from the Color LUTs drop-down menu:
In order to remove a Color LUT from the list of available LUTs, a LUT must first be applied.

ACDSee Luxea Video Editor User Guide
Page 55 of 74
1. In the Color LUTs section of the Properties pane, select the LUTto be removed from the list.
2. Click Remove.
3. Click Yes to confirm.
CLIP SPEED
The Clip Speed effect controls the speed and overall duration of media assets.
To speed up or slow down a media asset:
1. With clips added to the Timeline, select the Advanced Effects tab, or press E.
2. Select Clip Speed and drag it onto your clip on the Timeline or select the clip and press Alt + C. A note
stating "Effect Added" will temporarily appear on the Timeline.
3. With the clip selected, in the Clip Speed section of theProperties pane, configure the settings as
described below.
Clip Speed Options
Speed Decrease a clip's speed by reducing the value below 1.00. Increase a clip's
speed by increasing the value above 1.00.
Minutes/Seconds Set a clip's desired duration using minutes or seconds.
Frames Use the Frames field to fine-tune the speed and duration of media assets.
AUDIO SPEED
Use the Clip Speed effect to control the speed and overall duration of audio only.
To speed up or slow down an audio track:
1. Right-click a clip on the Timeline and select Separate Audio and Video from the context menu, or press
Alt + S.
2. Select the Advanced Effects tab, or press E.
3. Select Clip Speed and drag it onto your audio clip on the Timeline, or select the clip and press Alt + C.
4. With the audio clip selected, in theClip Speed section of the Properties pane, configure the settings
described in the "Clip Speed Options" on page 55.
MOSAIC
Blur out specific areas of your media for covering sensitive information, or providing anonymity to individuals in a
media asset.
To add a mosaic effect to a media asset:
1. With clips added to the Timeline, select the Advanced Effects tab, or press E.
2. Select Mosaic and drag it onto a track on the Timeline.
3. With Mosaic selected, in the Mosaic section of the Properties pane, configure the settings as described
below.
Mosaic Options

ACDSee Luxea Video Editor User Guide
Page 56 of 74
Blend Mode Controls how the Mosaic effect impacts the final image when the opacity is
changed.
Opacity The Opacity slider changes the opacity of the Mosaic effect, providing control
over how distinct the Mosaic effect appears in the media. Finally, use a blend
mode to customize the Mosaic effect further.
Rotation Enter a value in the field or drag the arrow handles to rotate the Mosaic effect
by the X, Y, or Z axes.
Degree You can use the Degree slider to control how blurred the Mosaic effect is.
COLOR PASS
Color Pass is used to isolate certain colors within a media asset and revert all others to black and white. Color Pass
helps draw the eye to a certain part of a clip, for example, the pink cherry blossoms on a tree. The cherry blossom
flowers will show up as pink, and the rest of the image would be black and white.
To add Color Pass:
1. With clips added to the Timeline, select the Advanced Effects tab, or press E.
2. Select Color Pass and drag it onto a clip on the Timeline. A note stating "Effect Added" will temporarily
appear on the Timeline.
3. With the clip selected, in the Color Pass section of the Properties pane, adjust the settings as described
below.
Color Options
Color Use the Colors pop-up to select precise colors to focus on or invert within a
media asset. The far right vertical color slider navigates to a color group. The
selected color displays its numerical values in the Red, Green, and Blue
fields, as well as the Hex field. Enter precise values to get specific colors, or
use the Color Dropper tool to pick specific colors from the media asset.
Similarity
Adjust the slider to define how similar a color must be to the selected color in
order to be affected.
Invert Settings Enable the Invert Settings checkbox to remove a selected color and leave
every other color.
REPLACE COLOR
The Replace Color effect is used to select certain colors within a media asset and replace the selected colors with a
different color.
To add the Replace Color effect to a media asset:
1. With clips added to the Timeline, select the Advanced Effects tab, or press E.
2. Select Replace Color and drag it onto a clip on the Timeline.
3. With the clip selected, in the Replace Color section of the Properties pane, configure the settings as
described below.
Replace Color Options

ACDSee Luxea Video Editor User Guide
Page 57 of 74
Target Color Use the Colors pop-up to select precise colors to replace. The far right vertical
color slider navigates to a color group. The selected color displays its numerical
values in the Red, Green, and Blue fields, as well as the Hex field. Enter
precise values to get specific colors, or use the Color Dropper tool to pick
specific colors for your media.
Replace Color As above, choose a color to replace a target color with.
Similarity Adjust the slider to define how similar a color must be to be the selected color
in order to be affected.
Solid Colors Enable this box to change the Target Colors to the Replace Color and remove
any light/dark shadows. When this box is disabled, the target color will be
replaced, but the light/dark image variations will remain.
MEDIA DURATION AND FREEZE FRAMES
When media is added to the Timeline, the assets will automatically be placed at certain intervals and at set
durations. It is possible to change the duration of media assets and the gaps between media assets by changing
the duration settings. Changing duration allows images to be blended into one another without the screen going
black in between, or changing duration can create an end to a scene that employs a black screen for a pre-
determined duration before the next media asset begins to play.
ADJUSTING DURATION
To change media duration:
1. Select the media to edit on the Timeline.
2. Hover over the start or end of the media, click and drag the double arrows to adjust the length. The format
is (hours:minutes:seconds;frames).
Adjusting the Duration of Text, Images, Overlays, Captions and Mosaics
To change media duration:
1. Select the media to edit on the Timeline.
2. Right-click and select Duration... from the context menu to open the Duration dialog.
3. Choose a Duration using the up or down arrows or by entering a duration in the Duration field. The
format is (hours:minutes:seconds;frames).
4. Click OK.
Using Ripple Edit Duration
Ripple Edit duration is a setting that maintains gaps between media. By default, Ripple Edit duration is enabled,
allowing for the duration of media to be changed without changing the gaps created after the media asset. For
example, in the case where an image is followed by a four second gap, then a video clip, lengthening the duration
of the image, with Ripple Edit duration enabled, will not reduce the four second gap that resides between the
image and video. Without Ripple Edit duration enabled, by extending the duration of the image the duration of the
following gap would be reduced.
To disable Ripple Edit when making changes to duration, disable the Ripple Edit checkbox in the Duration
dialog.
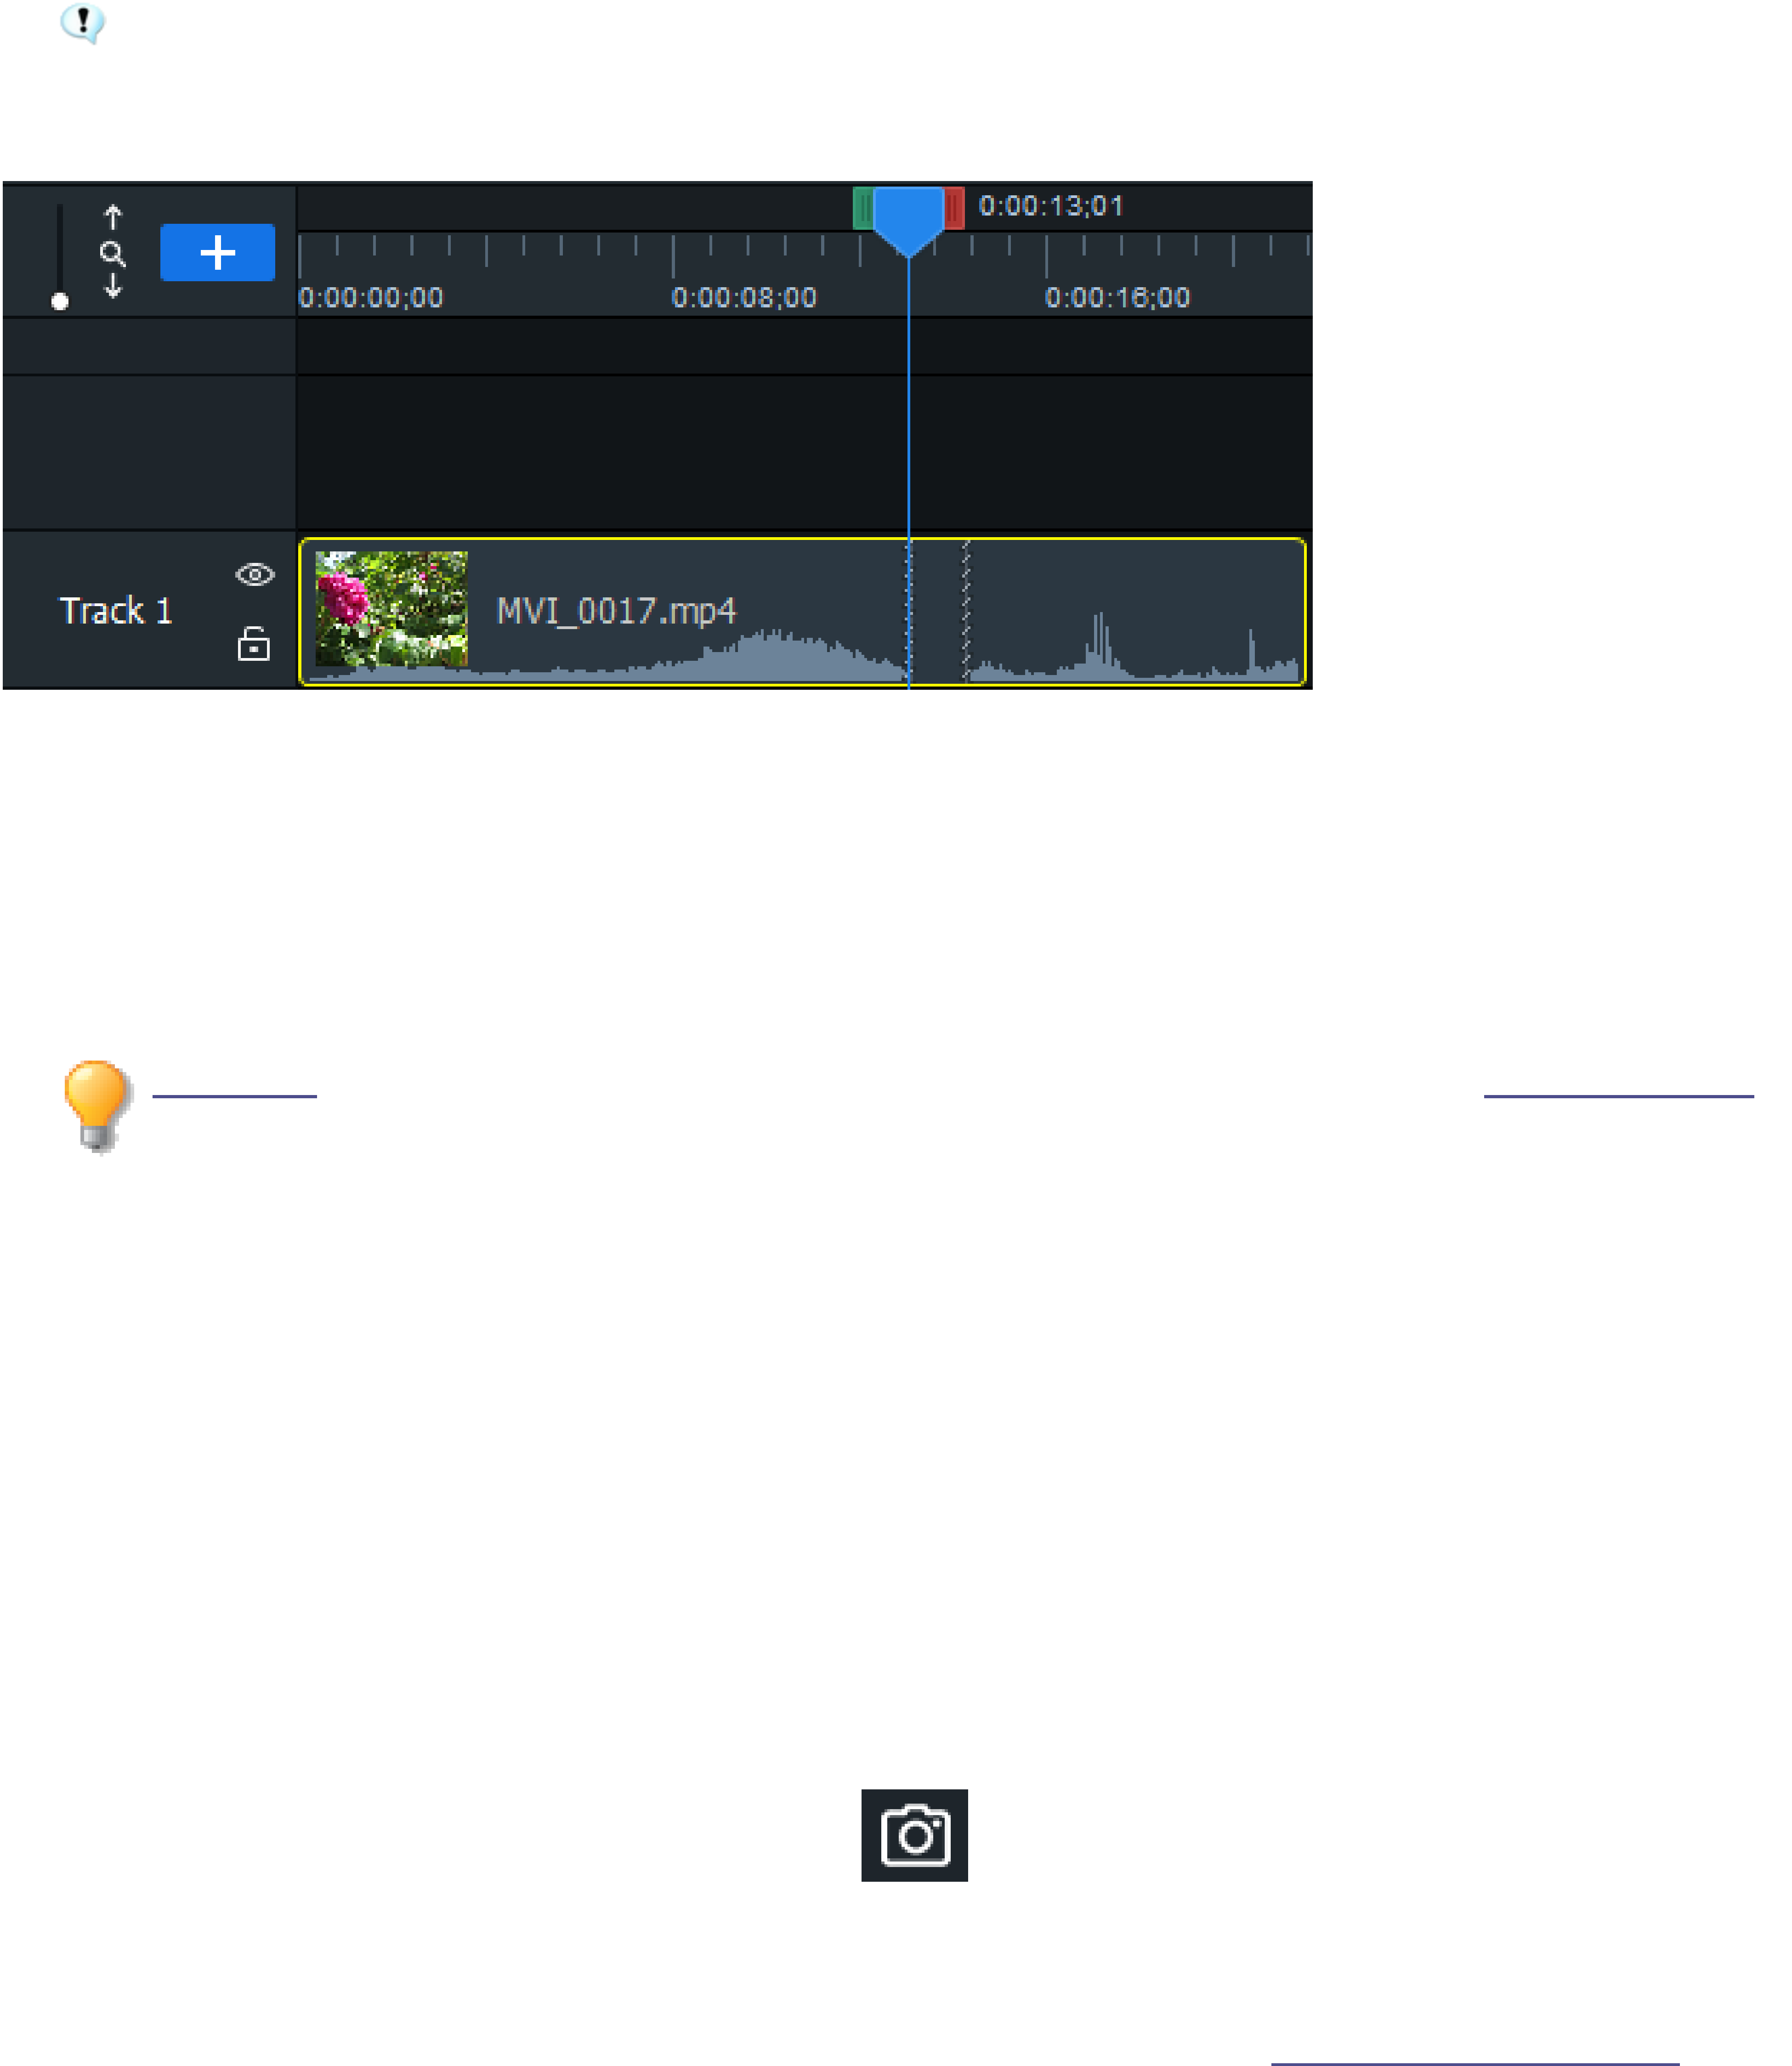
ACDSee Luxea Video Editor User Guide
Page 58 of 74
FREEZE FRAMES
Freeze frames are used to extend the duration of specific frames of a media asset.
When adding a freeze frame to a media asset, the selected clip will expand to the chosen duration. If
there is not enough space on the Timeline to the right of the clip to accommodate the expansion, Freeze
Frame will not be enabled in the context menu.
To create a freeze frame:
1. With clips added to the Timeline, place the Playhead on the frame of the target video, right-click and select
Freeze Frame from the context menu, or press Alt + F.
2. From the Freeze Frame dialog, set how many seconds the freeze frame will last.
3. Click OK. The freeze frame is added to the target media on the Timeline.
Clip Speed can also be adjusted as well as clip duration. Find more information in the Advanced Effects
topic.
CREATING SNAPSHOTS FROM VIDEO
Snapshots taken from a video's playback can be added to the My Media tab.
SNAPSHOTS
Snapshots of a video's playback can be taken at any time.
To create a snapshot:
1. With clips added to the Timeline, click the Play button located below the Project Display Area.
2.
At a desired frame, click the Snapshot button , or press Shift + S. A dialog box appears noting
the hard drive location where the snapshot has been saved.
3. Click OK.
To change the location of saved snapshots, and configure snapshot settings, see Options and Configuration.
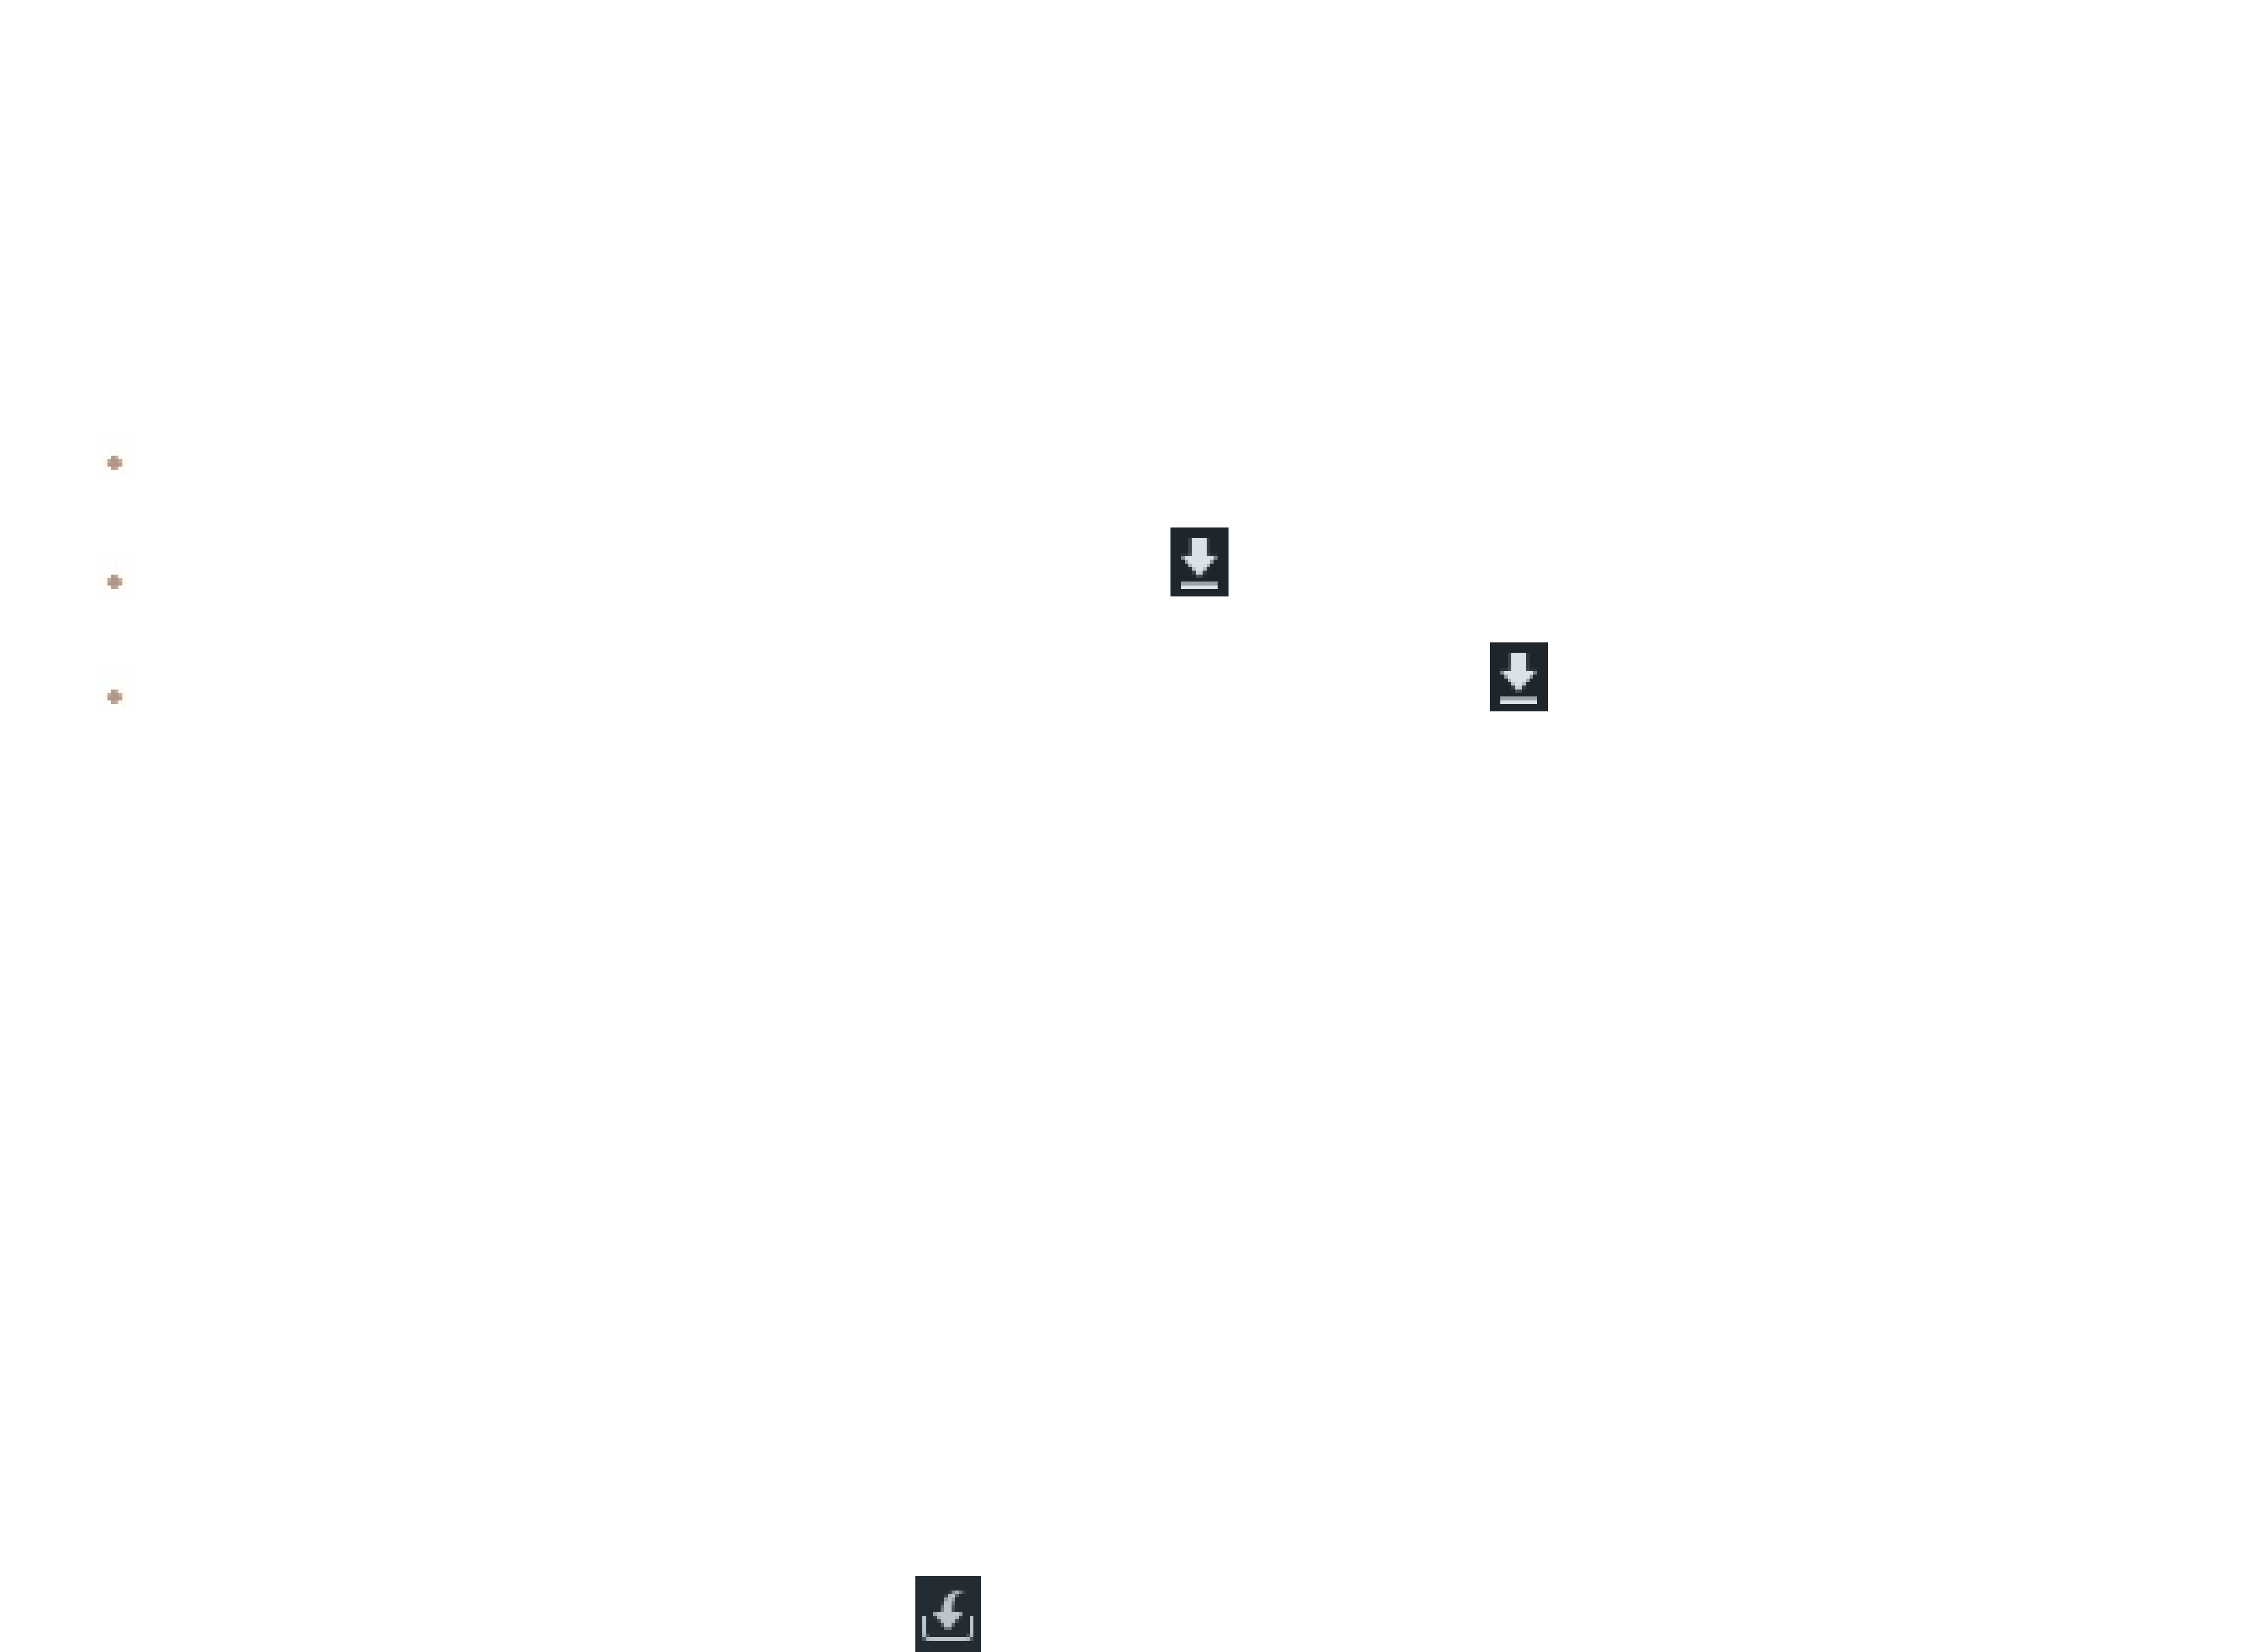
ACDSee Luxea Video Editor User Guide
Page 59 of 74
CONTENT PACKS
Download Content Packs from ACDSee to further enhance media assets. Content Packs contain images, video,
audio, Text Style presets, fonts, behaviors, and overlays. Downloaded Content Packs from the ACDSee website
reside in the Library tab.
To download Content Packs, do one of the following:
Visit the ACDSee website.
Click the download button in the top right of Luxea.
Click on the download button in the bottom right of the Library tab.
To add Content Packs to a library:
1. Select File | Import | Content Pack... from the main menu.
2. In the Add Content Packs dialog, choose the Content Pack files (.alcp) to import.
3. Click OK.
Or:
1. Navigate to a folder containing downloaded Content Packs.
2. Double-click the Content Pack files (.alcp) to open the packs in Luxea.
Or:
1. Open the Library tab.
2.
Click the Import Content Pack icon.
To add Content Packs to a library with Luxea closed:
1. Navigate to a folder containing downloaded Content Packs.
2. Right-click the Content Pack files (.alcp). Select Open with ACDSee Luxea from the menu.
To add content from Content Packs to the Timeline:
1. With clips added to the Timeline, open the Library tab.
2. Drag the relevant enhancement from the Library to the chosen point on the Timeline.

ACDSee Luxea Video Editor User Guide
Page 60 of 74
OPTIONS AND CONFIGURATION
Configure options to customize and automate Luxea's functionality.
To configure options:
1. Select Tools | Options... from the main menu, or press Alt + O.
2. Configure the options as described in the table below.
3. Click OK.
Options Dialog Box
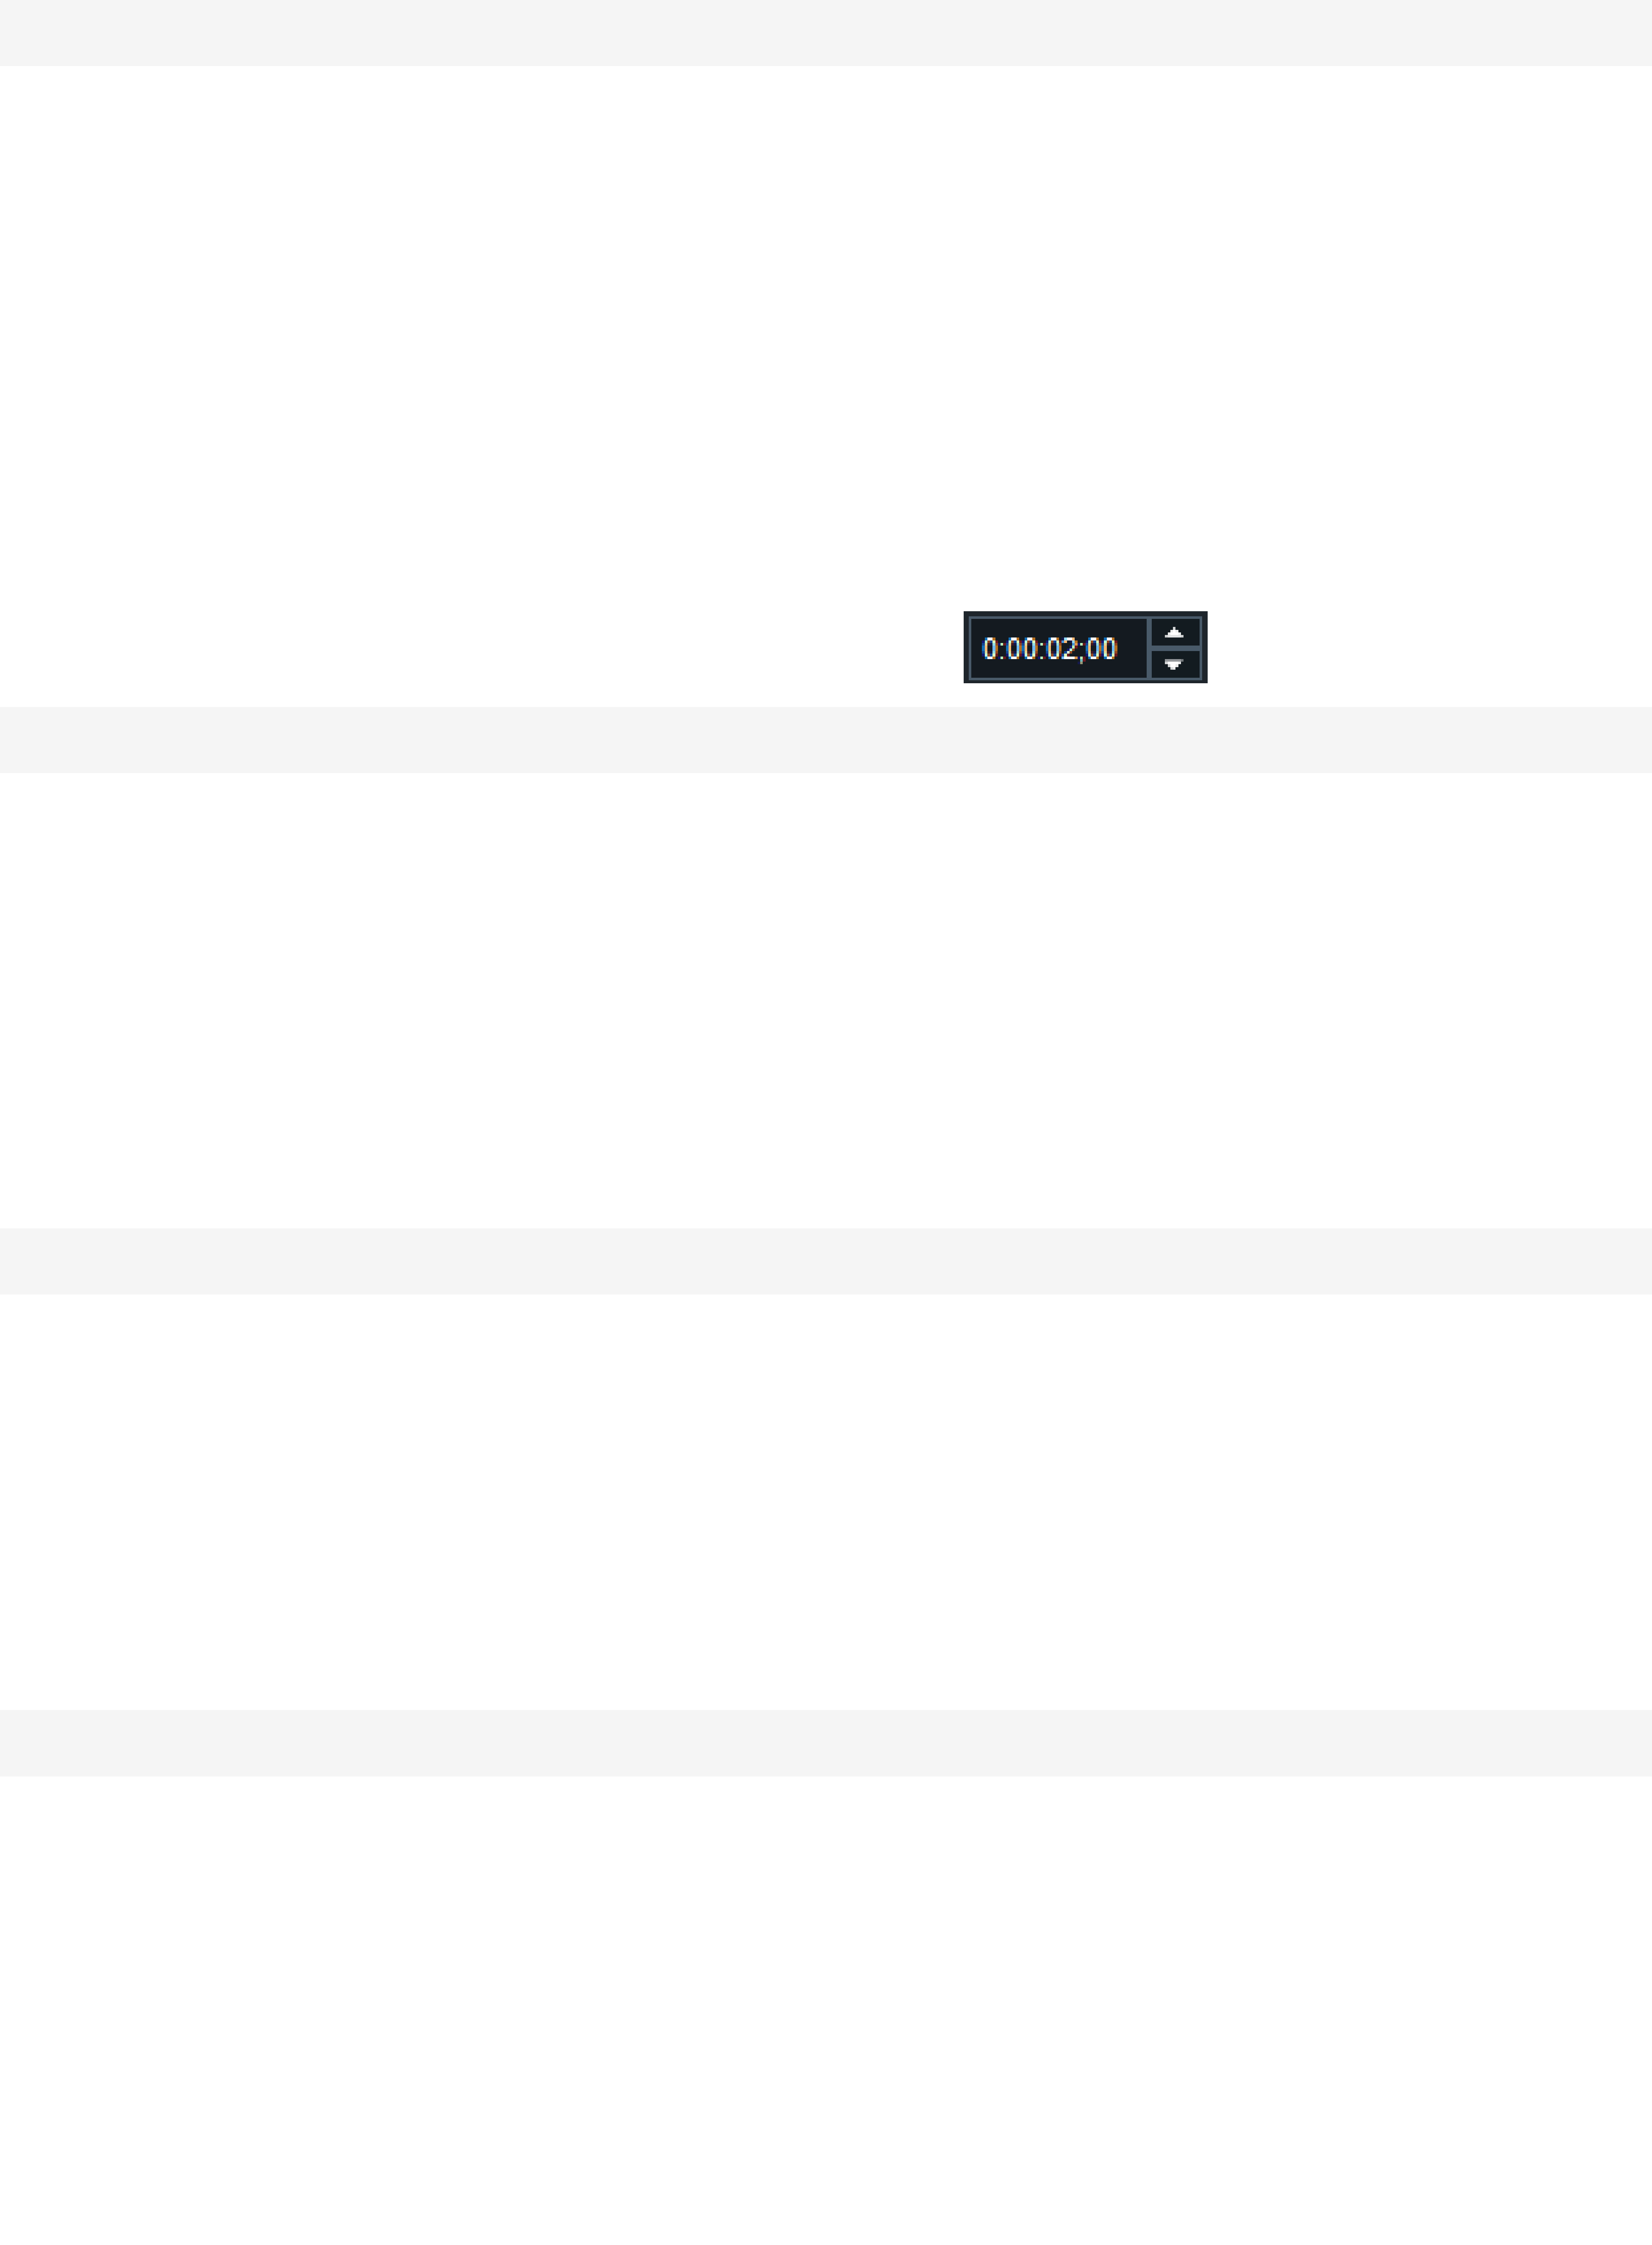
ACDSee Luxea Video Editor User Guide
Page 61 of 74
General
Duration
Transitions Set transition display duration.
Images Set image display duration.
Captions Set caption display duration.
Animations Set animation display duration.
Freeze Frames Set freeze frame display duration.
Mosaics Set mosaic display duration.
Text Set text display duration.
The format for the duration is hours, minutes, seconds; frames.
Watermark
Enable
watermark
Enable to include a watermark on a video.
Watermark Browse to find an image to use as a watermark.
Position Select a square to indicate a desired watermark position in the media asset.
Opacity Use the slider to change the watermark opacity. By default, a watermark is 100%
opaque, which means it is visual and solid. By reducing the opacity, the watermark
becomes gradually transparent. A watermark with an opacity of zero is completely
transparent.
Snapshots
Snapshot
Location
Displays the location of saved snapshots. Click the Browse button to specify a new
hard drive location.
Add snapshots
to My Media
Enabled by default, this option automatically adds snapshots to the available media in
the My Media tab. Screenshots residing in the My Media tab can be dragged onto the
Timeline.
Enable
snapshot
sound
Enabled by default, this option plays a sound whenever a snapshot is taken.
Advanced
Temporary
Storage Folder
While working on a project, the Temporary Storage Folder stores the project's media in
the Library. The Temporary Storage Folder is emptied after saving and producing a
project.
Hardware Accel-
eration | Enable
Hardware Accel-
eration
Enabled by default, this option ensures that the encoding process will be undertaken by a
graphics card, rather than the CPU. This option accelerates the media rendering process.
If presented with multiple graphics cards, Luxea will prioritize hardware acceleration
options using the following hierarchy: NVIDIA, Intel® Quick Sync.
AutoSave |
Enable AutoSave
Automatically saves projects as often as indicated. When restarting Luxea after an unex-
pected shutdown, this option will recover the project and open it in its state as of the most
recent save point.
ACDSee Luxea Video Editor User Guide
Page 62 of 74
AutoSave | Inter-
val ... minute(s)
Indicate how often to automatically save.
Default
playback
quality
Select a playback quality from Full to 1/16. This option can speed up the editing
process when working with high quality videos, or the host computer is slowly
processing the video.
Load project to
fit Timeline.
Load project zoomed out so all elements are visible on the Timeline.
Display
Default Project Settings
Display Area
Dimensions
Set the Display Area size that Luxea loads as default on every open event. Choose
preset dimensions for TikTok and Instagram here.
Width Enter a custom width for the Display Area, which Luxea will open as default.
Height Enter a custom height for the Display Area, which Luxea will open as default.
Frame Rate Select a frame rate from 23.97 frames per second (fps) to 60 fps.
Prompt if
media
dimensions or
frame rate do
not match
project
settings.
Luxea will prompt if media dimensions or frame rate do not match the Display Area
dimensions or project frame rate.
Always match
project
settings to
imported
media
dimensions
and frame
rate.
Set Luxea to automatically adjust the Display Area size to match the dimensions of the
media asset and the project frame rate to match the media frame rate.
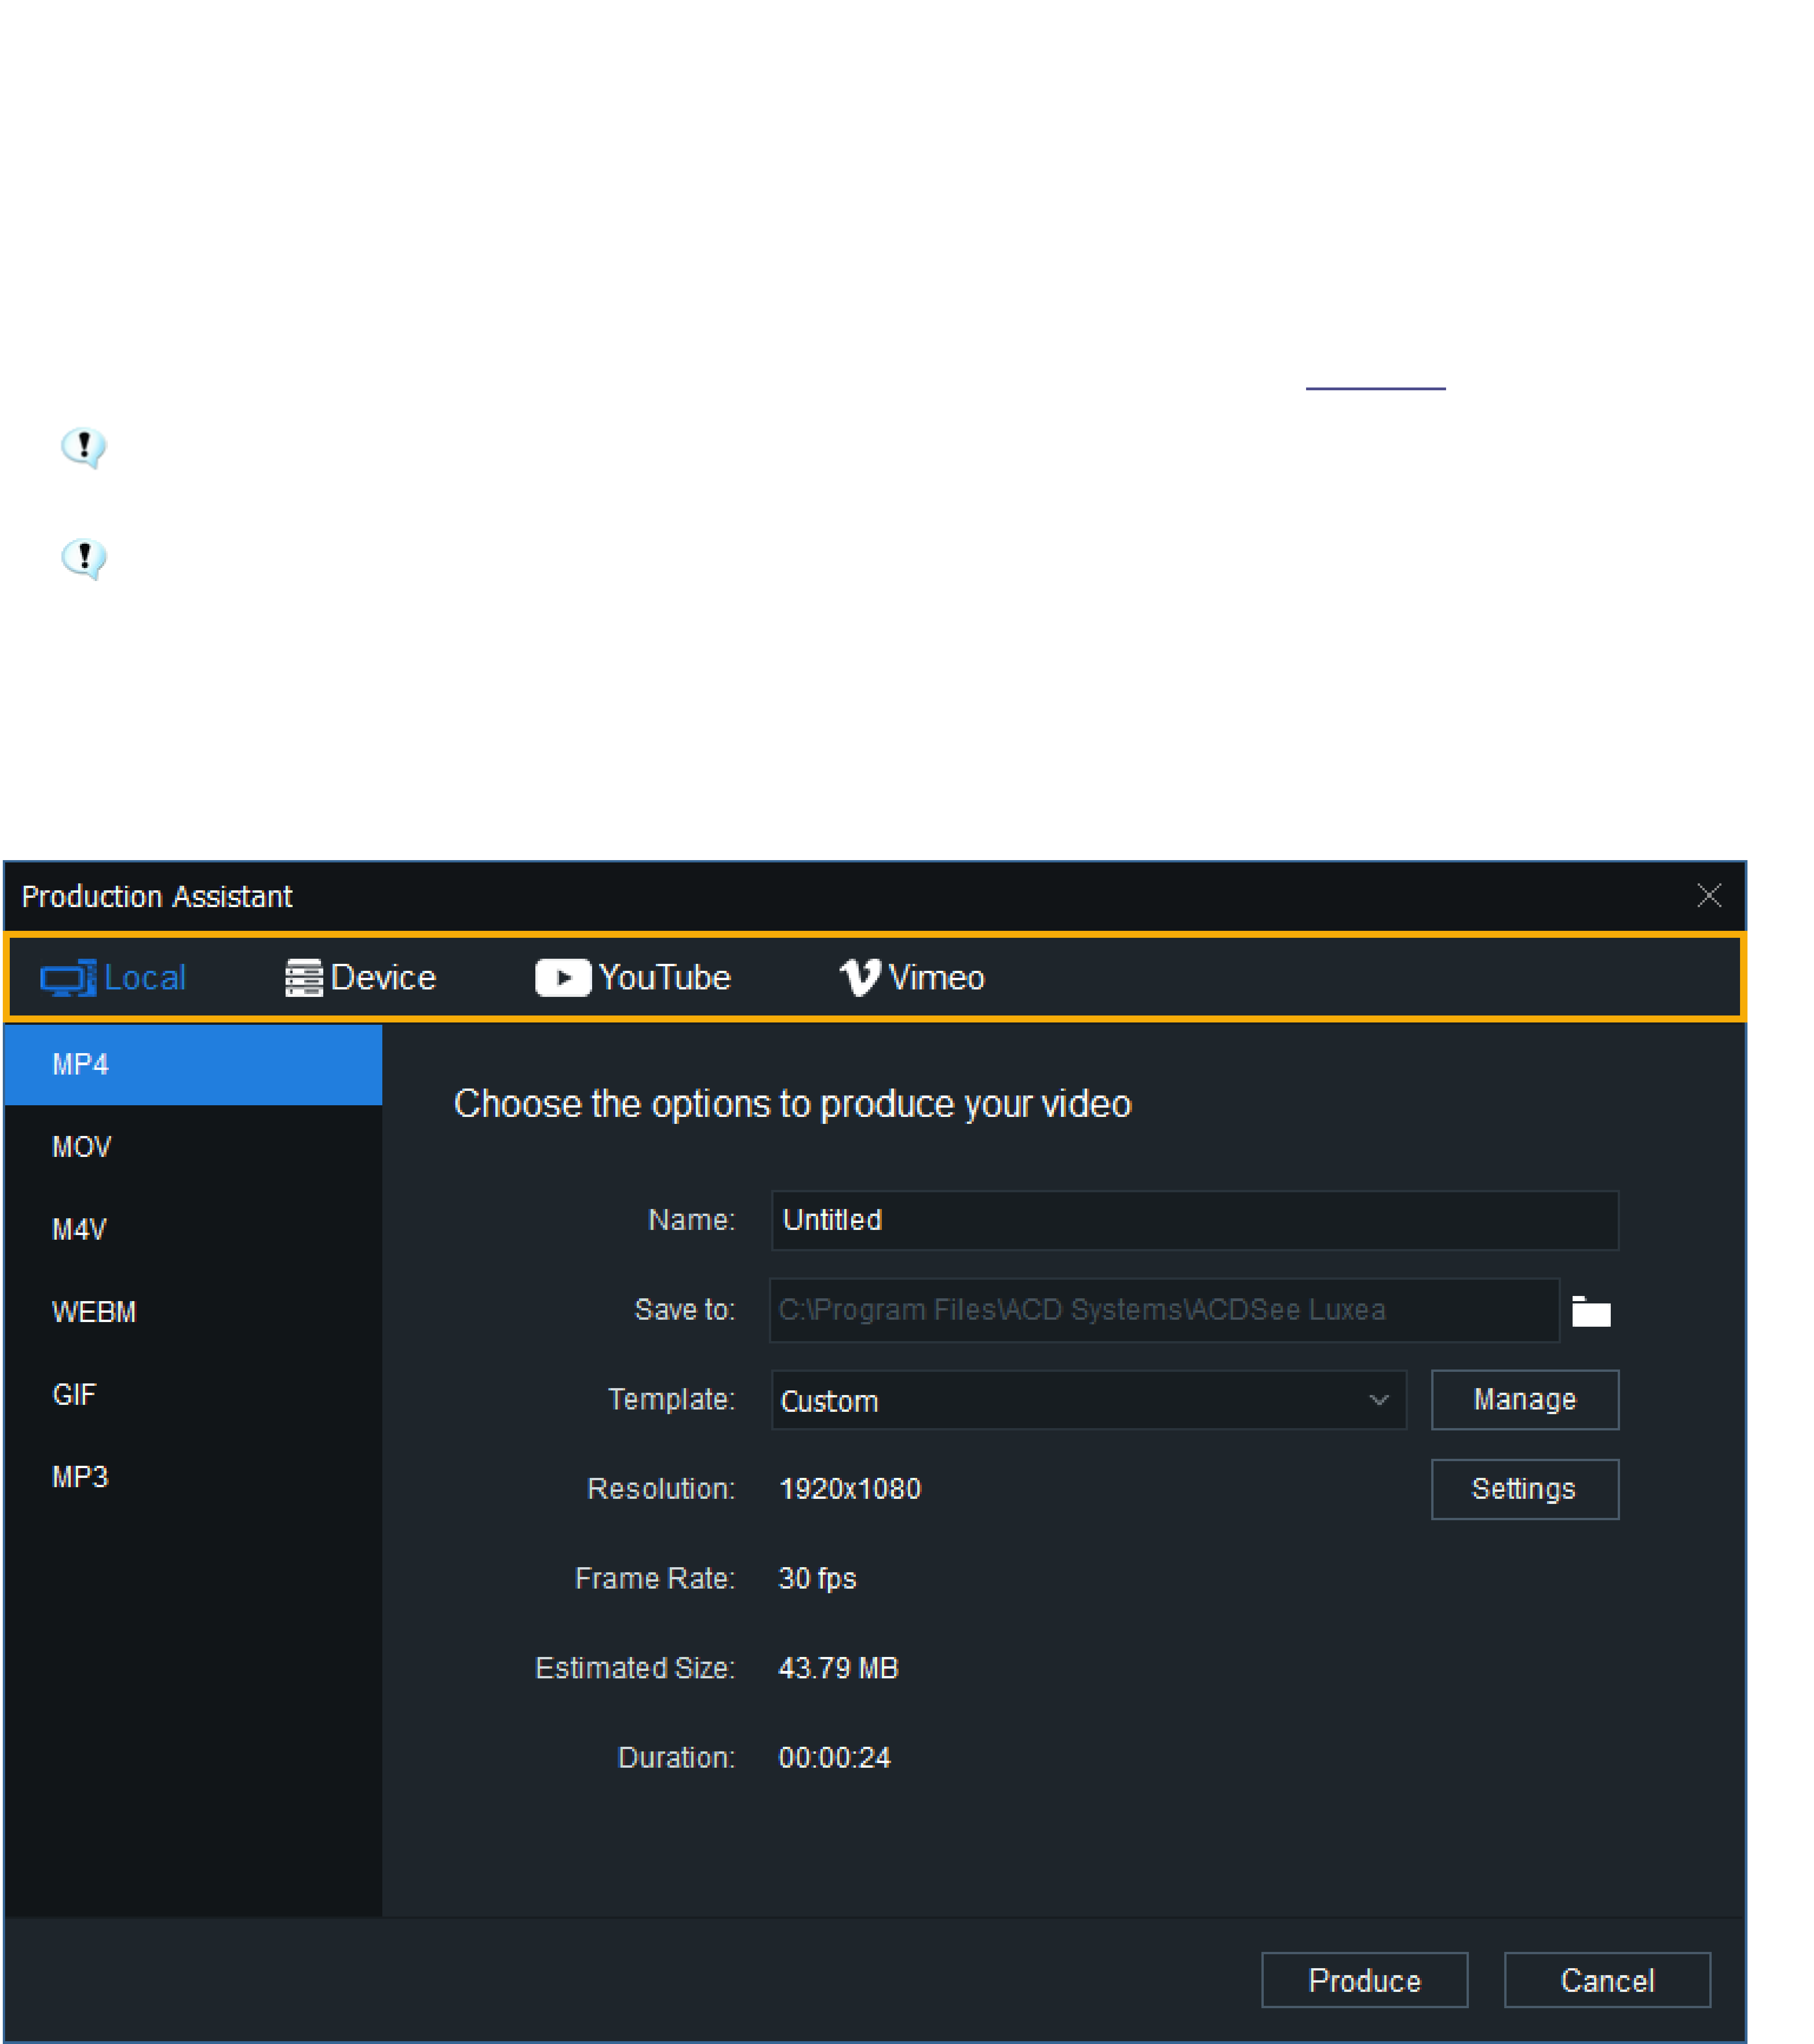
ACDSee Luxea Video Editor User Guide
Page 63 of 74
OVERVIEW
The Production Assistant is a versatile design wizard used to craft unique project outputs. After the editing
portion of the project is finished, use the Production Assistant to finalize and distribute videos. The final stage
of the production process, Producing and Sharing, creates an output file from the arranged media and effects on
the Timeline. The production process allows for the selection of video and audio parameters for the output file, as
well as the option to share the output to YouTube, Vimeo, Facebook, and Twitter.
An output file can be produced from the entirety of the media on the Timeline, or a selection.
Video productions will not include media on tracks that are disabled.
Video productions will not include media moved outside of the Display Area.
The Production Assistant contains four main tabs, each representing a unique work-flow and associated
parameters for each project output type.
Production Assistant Tabs

ACDSee Luxea Video Editor User Guide
Page 64 of 74
Local The Local tab is used for crafting media assets destined to reside on the local host com-
puter.
Device
The Device tab is used for crafting media assets destined to reside on dedicated
devices.
YouTube The YouTube tab is used for crafting media assets destined to reside on YouTube.
Vimeo The Vimeo tab is used for crafting media assets destined to reside on Vimeo.
To access the Production Assistant:
1. Add a media asset to the Timeline.
2. Click the Produce and Share button, located in the top-right corner of the Luxea interface.
LOCAL TAB
The Local tab in the Production Assistant is used to craft media assets destined to be output and stored on the
local host computer.
The Local tab is divided into two sections: the left-hand "Output Type" section and the right-hand "Options"
section.
OUTPUT TYPE SECTION
The Local tab's Output Type section contains six output types for selection:
l MP4,
l MOV,
l M4V,
l WEBM,
l GIF, and
l MP3.
OPTIONS SECTION
The Options section is used to customize a project's output for each output type.
To produce an output:
1. With media assets added to the Timeline, click the Produce and Share button located in the upper right-
hand corner of the Luxea interface.
2. In the Production Assistant dialog, select the Local tab.
3. In the Output Type section, select one of the MP4, MOV, M4V, WEBM, GIF, or MP3 tabs.
4. In the Options section, enter a project name.
5. Use the default value for the Save To field, or click the adjacent file folder icon to select a new location.
6. Make a selection from the Template drop-down list. To add custom templates, see Custom Templates.
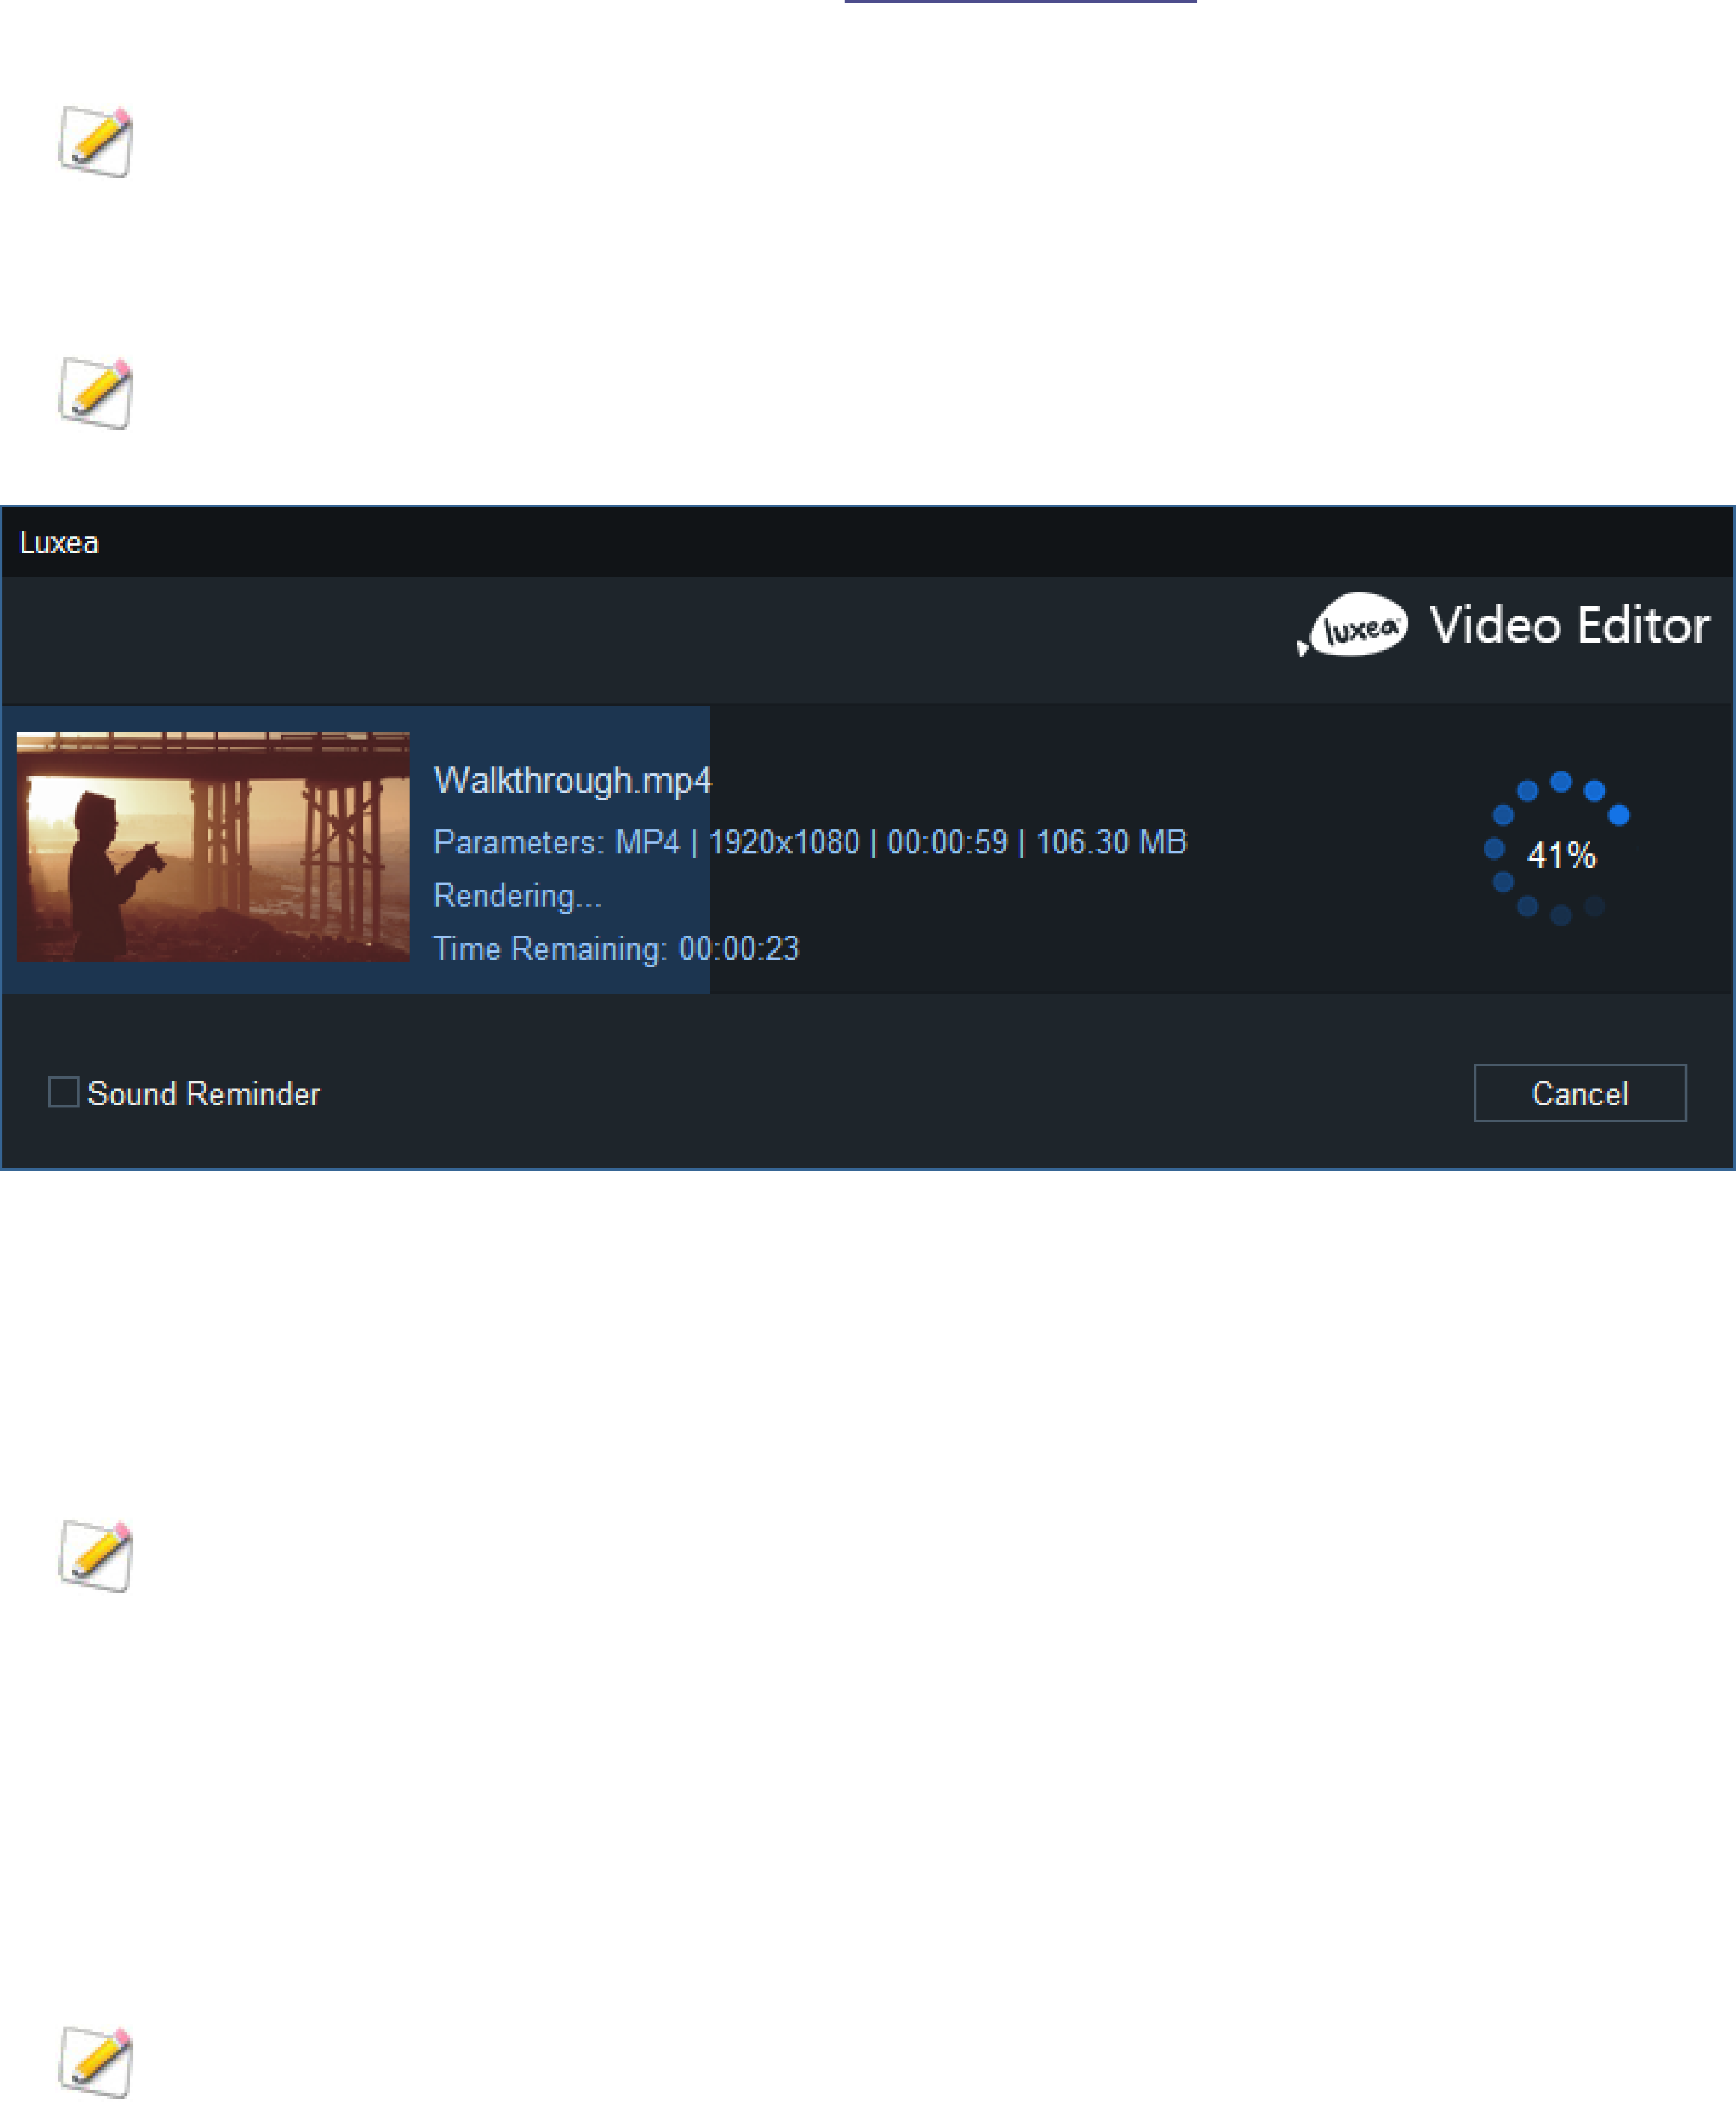
ACDSee Luxea Video Editor User Guide
Page 65 of 74
7. Accept the default values for the Resolution field and Frame Rate field, or if selecting "Custom" from the
Template drop-down list, click the adjacent Settings button to set new size and rate parameters. For
more information on the Settings button, see Setting Custom Values.
Note that the Estimated Size field value is calculated by the values selected in the Settings dialog.
8. Click the Produce button to complete the project.
The Produce dialog features a progress preview of the project and a Sound Reminder checkbox for
sounding a reminder when rendering completes.
Custom Templates
To add custom templates:
1. With the Production Assistant open, navigate to the Options section and click the Manage button adja-
cent to the Template field.
The Format field is auto-populated based on the selection made in the Output Type section.
2. In the Template Manager dialog's Video Parameters heading, make selections for the Encoder, Res-
olution, Frame Rate, and Bitrate drop-down lists.
3. In the Audio Parameters field set, make selections for the Encoder, Channel, Sample Rate, and
Bitrate drop-down lists.
4. Click the Save As... button to enter a template name and exit the Template Manager dialog. Click the
Save button to overwrite the current template.
Note that in the Production Assistant, saved templates from either the Template Manager or
Settings dialogs appear in the Template field's drop-down list.
Setting Custom Values
To change the output file settings:

ACDSee Luxea Video Editor User Guide
Page 66 of 74
1. With the Production Assistant open, navigate to Output Options section and select "Custom" from the
Template drop-down list.
2. Click the Settings button adjacent to the Resolution field.
3. In the resultant Settings dialog, enable one of the Normal, Better, or Best radio buttons.
4. Under the Video Parameters heading, make selections for the Encoder, Resolution, Frame Rate, and
Bitrate drop-down lists.
5. Under the Audio Parameters heading, make selections for the Encoder, Channel, Sample Rate, and
Bitrate drop-down lists.
6. Click the Save As Template button to produce the New Template dialog.
7. Enter a name for the template and click the OK button.
Video Parameters Options
Field Description
Encoder Specifies the video data compression type.
Resolution By default, the resolution will reflect the current settings of the Display Area
Dimensions. To change the resolution, select a resolution from the drop-down, or select
"Custom" from the drop-down list and specify new dimensions in the adjacent Width
and Height fields.
Frame Rate Determines the frequency of picture refreshes.
Bitrate Select the bitrate to determine how much data will go to the screen per second of play-
back. A higher bitrate allows for a higher quality picture, however, it also increases the
file size.
Loops Sets how many times a GIF will loop.
Loop Forever Enable/disable to control whether the GIF loops indefinitely.
Audio Parameters Options
Field Description
Encoder Specifies the audio data compression type.
Channel From the drop-down menu, select "Mono" to have the same sound produced from the
left and right speakers, or, select "Stereo" to produce different sounds from the left and
right speakers.
Sample Rate Sampling describes the data rate of a sound recording. A higher sample rate allows for
higher quality sound, however, it also increases the file size.
Bitrate Determines how much audio data will go to the speakers per second of playback. A
higher bitrate allows for a higher quality sound, however, it also increases the file size.
DEVICE TAB
The Device tab in the Production Assistant is used to craft media assets destined to be output and stored on
external devices.

ACDSee Luxea Video Editor User Guide
Page 67 of 74
The Device tab is divided into two sections: the left-hand "Device Type" section and the right-hand "Options"
section.
DEVICE TYPE SECTION
The Device tab's Device Type section contains 13 output types for selection:
l iPhone,
l iPad,
l Apple TV,
l Apple TV 4k,
l iPod,
l Samsung Galaxy,
l Smart Phone,
l Android Generic,
l Google Pixel,
l Xbox One,
l PlayStation 4,
l PSP, and
l Smart TV.
OPTIONS SECTION
The right-hand Options section is used to customize a project's output for each output type.
To produce with settings optimized for a specific device:
1. Add media assets added to the Timeline.
2. Click the Produce and Share button located in the upper right-hand corner of the Luxea interface.
3. In the Production Assistant dialog, select a tab in the Device Type section.
4. In the Options section, enter a project name.
5. Use the default value for the Save To field, or click the adjacent file folder icon to select a new location.
6. Make a selection from the Template drop-down list. To add custom templates, see Custom Templates.
7. Accept the default values for the Resolution field and Frame Rate field, or if selecting "Custom" from the
Template drop-down list, click the adjacent Settings button to set new size and rate parameters. For
more information on the Settings button, see Setting Custom Values.
Note that the Estimated Size field value is calculated by the values selected in the Settings dialog.
8. Click the Produce button to complete the project.
The Produce dialog features a progress preview of the project and a Sound Reminder checkbox for
sounding a reminder when rendering completes.

ACDSee Luxea Video Editor User Guide
Page 68 of 74
Custom Templates
To add custom templates:
1. With the Production Assistant open, navigate to the Options section and click the Manage button adja-
cent to the Template field.
The Format field is auto-populated based on the selection made in the Output Type section.
2. In the Template Manager dialog's Video Parameters heading, make selections for the Encoder, Res-
olution, Frame Rate, and Bitrate drop-down lists.
3. In the Audio Parameters field set, make selections for the Encoder, Channel, Sample Rate, and
Bitrate drop-down lists.
4. Click the Save As... button to enter a template name and exit the Template Manager dialog. Click the
Save button to overwrite the current template.
Note that in the Production Assistant, saved templates from either the Template Manager or
Settings dialogs appear in the Template field's drop-down list.
Setting Custom Values
To change the output file settings:
1. With the Production Assistant open, navigate to the Options section and select "Custom" from the Tem-
plate drop-down list.
2. Click the Settings button adjacent to the Resolution field.
3. In the resultant Settings dialog, enable one of the Normal, Better, or Best radio buttons.
4. Under the Video Parameters heading, make selections for the Encoder, Resolution, Frame Rate, and
Bitrate drop-down lists.
5. Under the Audio Parameters heading, make selections for the Encoder, Channel, Sample Rate, and
Bitrate drop-down lists.
6. Click the Save As Template button to produce the New Template dialog.
7. Enter a name for the template and click the OK button.
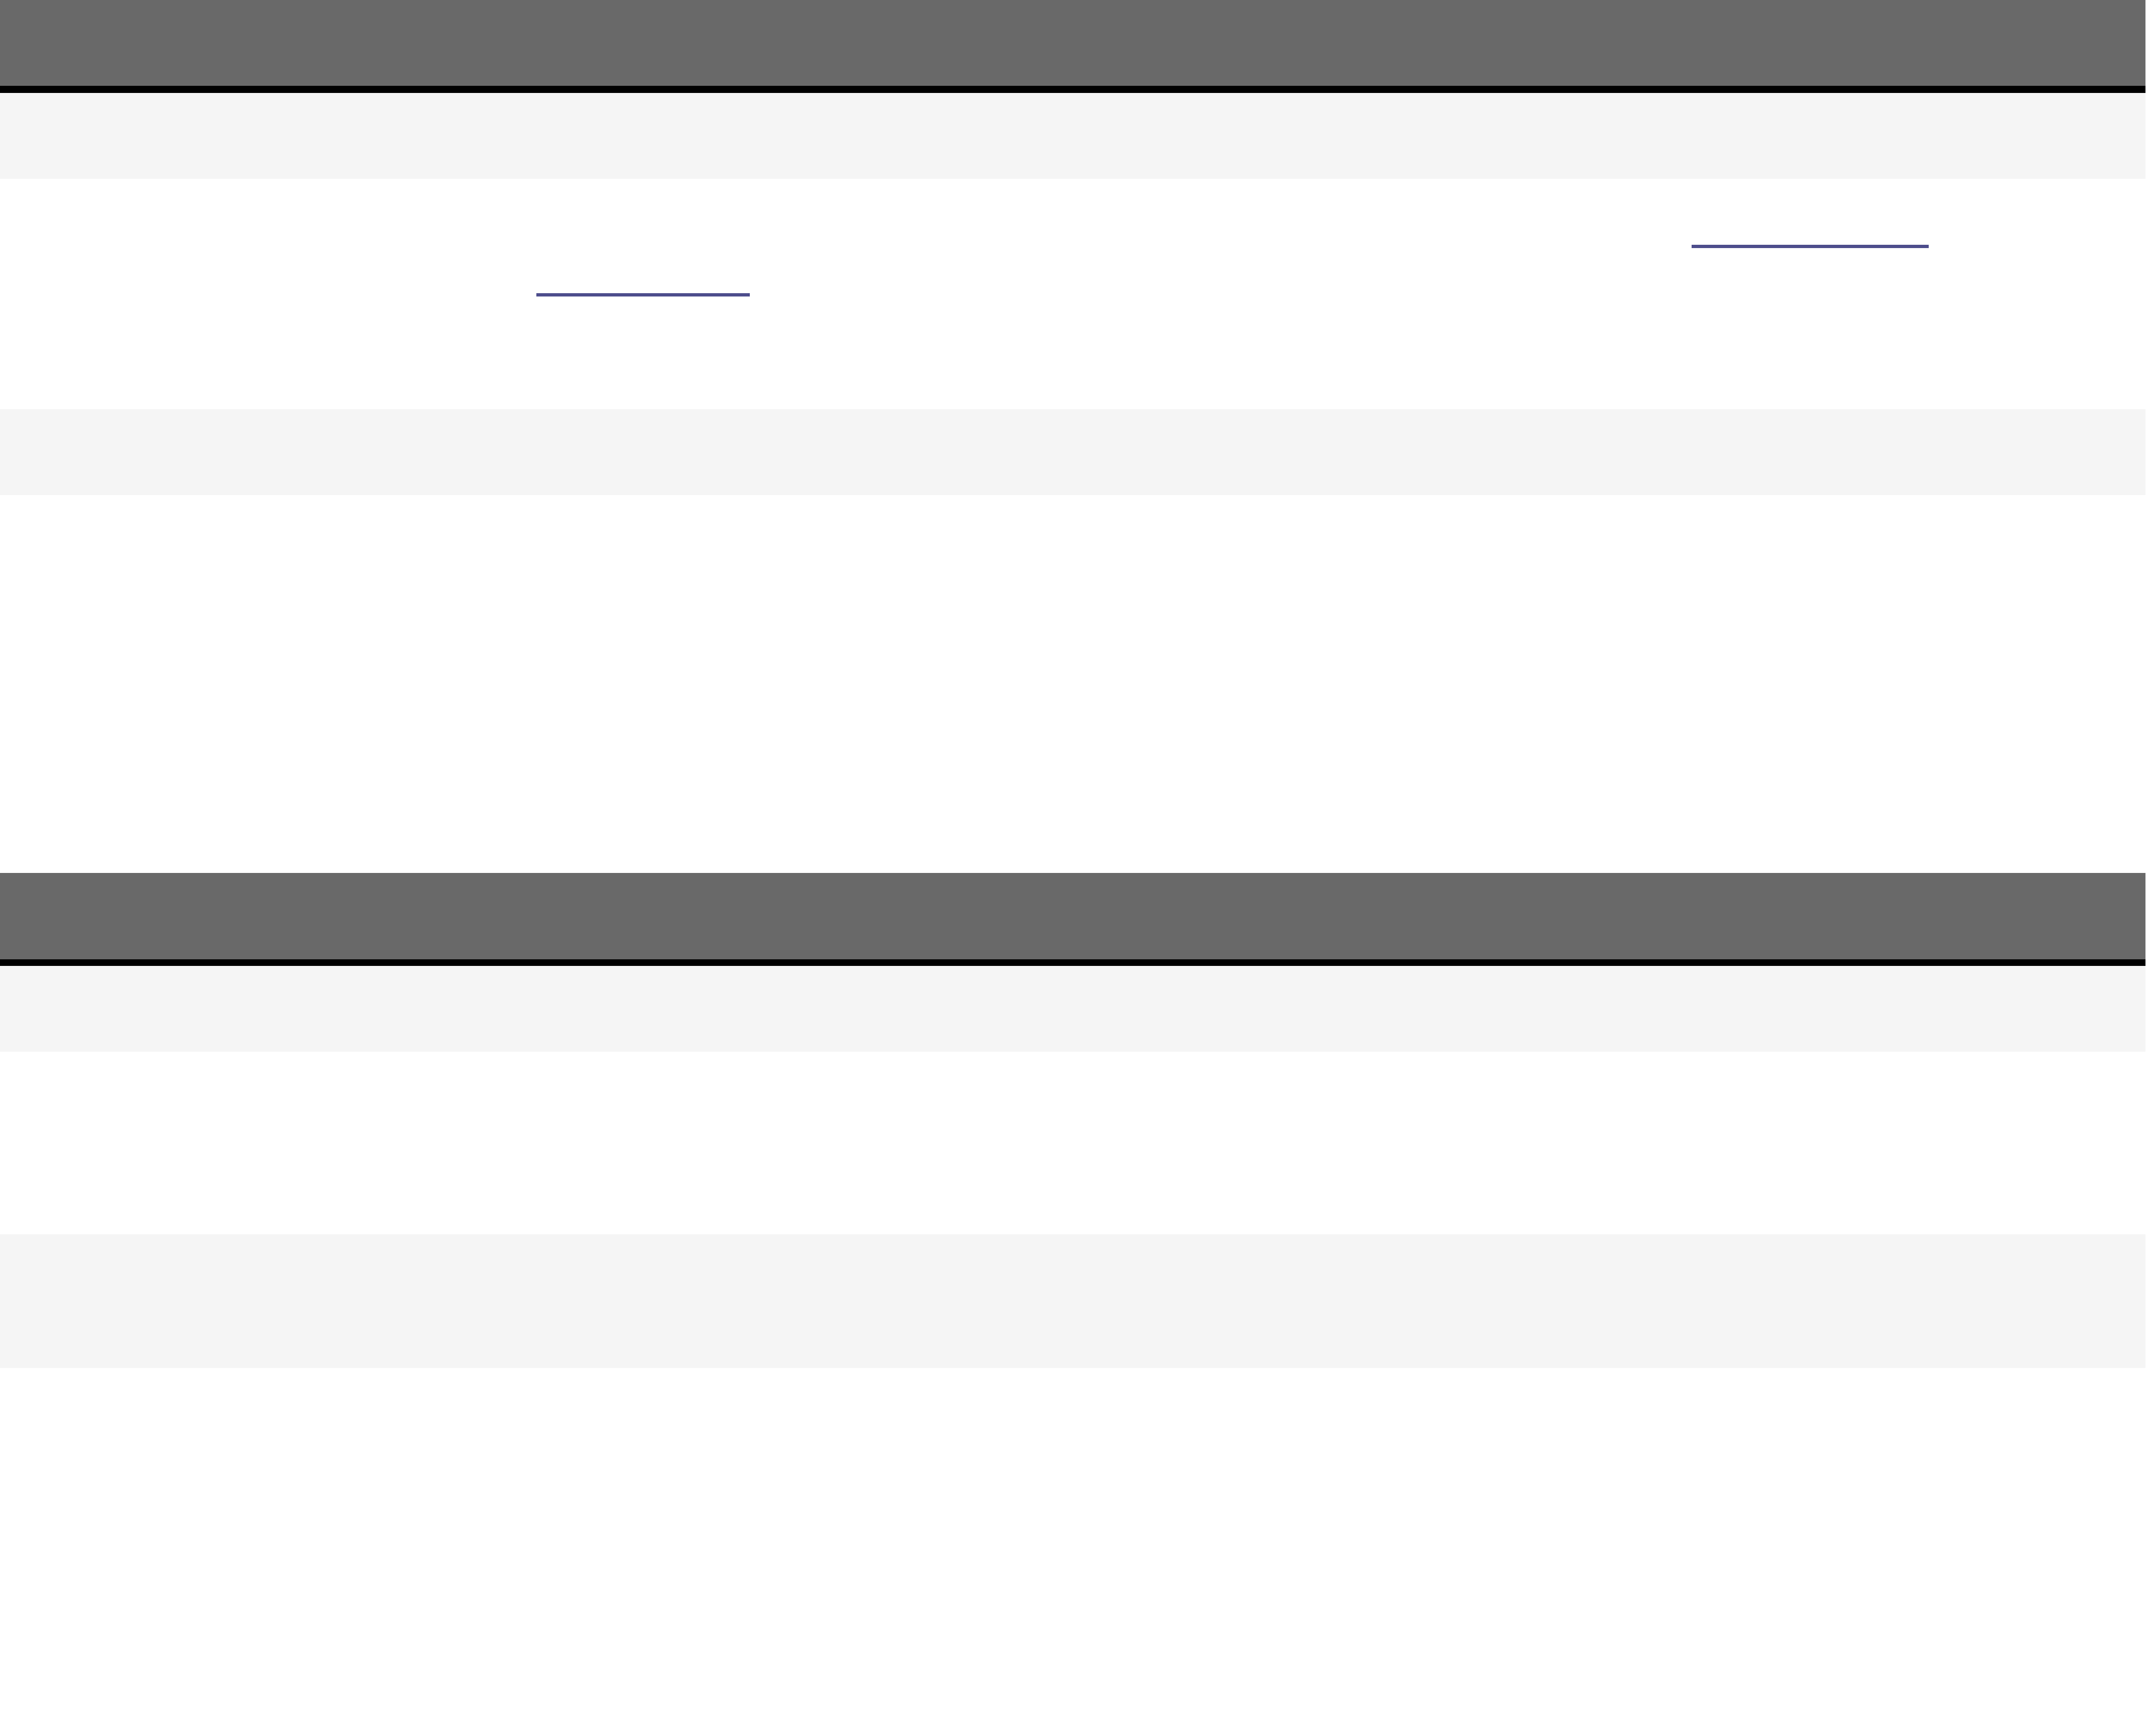
ACDSee Luxea Video Editor User Guide
Page 69 of 74
Video Parameters Options
Field Description
Encoder Specifies the video data compression type.
Resolution By default, the resolution will reflect the current settings of the Display Area
Dimensions. To change the resolution, select a resolution from the drop-down, or select
"Custom" from the drop-down list and specify new dimensions in the adjacent Width
and Height fields.
Frame Rate Determines the frequency of picture refreshes.
Bitrate Select the bitrate to determine how much data will go to the screen per second of play-
back. A higher bitrate allows for a higher quality picture, however, it also increases the
file size.
Audio Parameters Options
Field Description
Encoder Specifies the audio data compression type.
Channel From the drop-down menu, select "Mono" to have the same sound produced from the
left and right speakers, or, select "Stereo" to produce different sounds from the left and
right speakers.
Sample Rate Sampling describes the data rate of a sound recording. A higher sample rate allows for
higher quality sound, however, it also increases the file size.
Bitrate Determines how much audio data will go to the speakers per second of playback. A
higher bitrate allows for a higher quality sound, however, it also increases the file size.
YOUTUBE TAB
The YouTube tab in the Production Assistant is used to craft media assets destined to be uploaded to YouTube.
The YouTube tab is divided into two sections: the left-hand "YouTube Sign-in" section and the right-hand
"Options" section.
YOUTUBE SIGN-IN SECTION
The YouTube Sign-in section contains the YouTube Sign In button. In order to successfully upload a completed
project to YouTube, the sign-in procedure must be enacted.
To sign-in to YouTube:
1. With media assets added to the Timeline, click the Produce and Share button located in the upper right-
hand corner of the Luxea interface.
2. In the Production Assistant dialog's YouTube Sign-in section, click the Sign In button.
3. Reply to all prompts until successfully logged into YouTube.
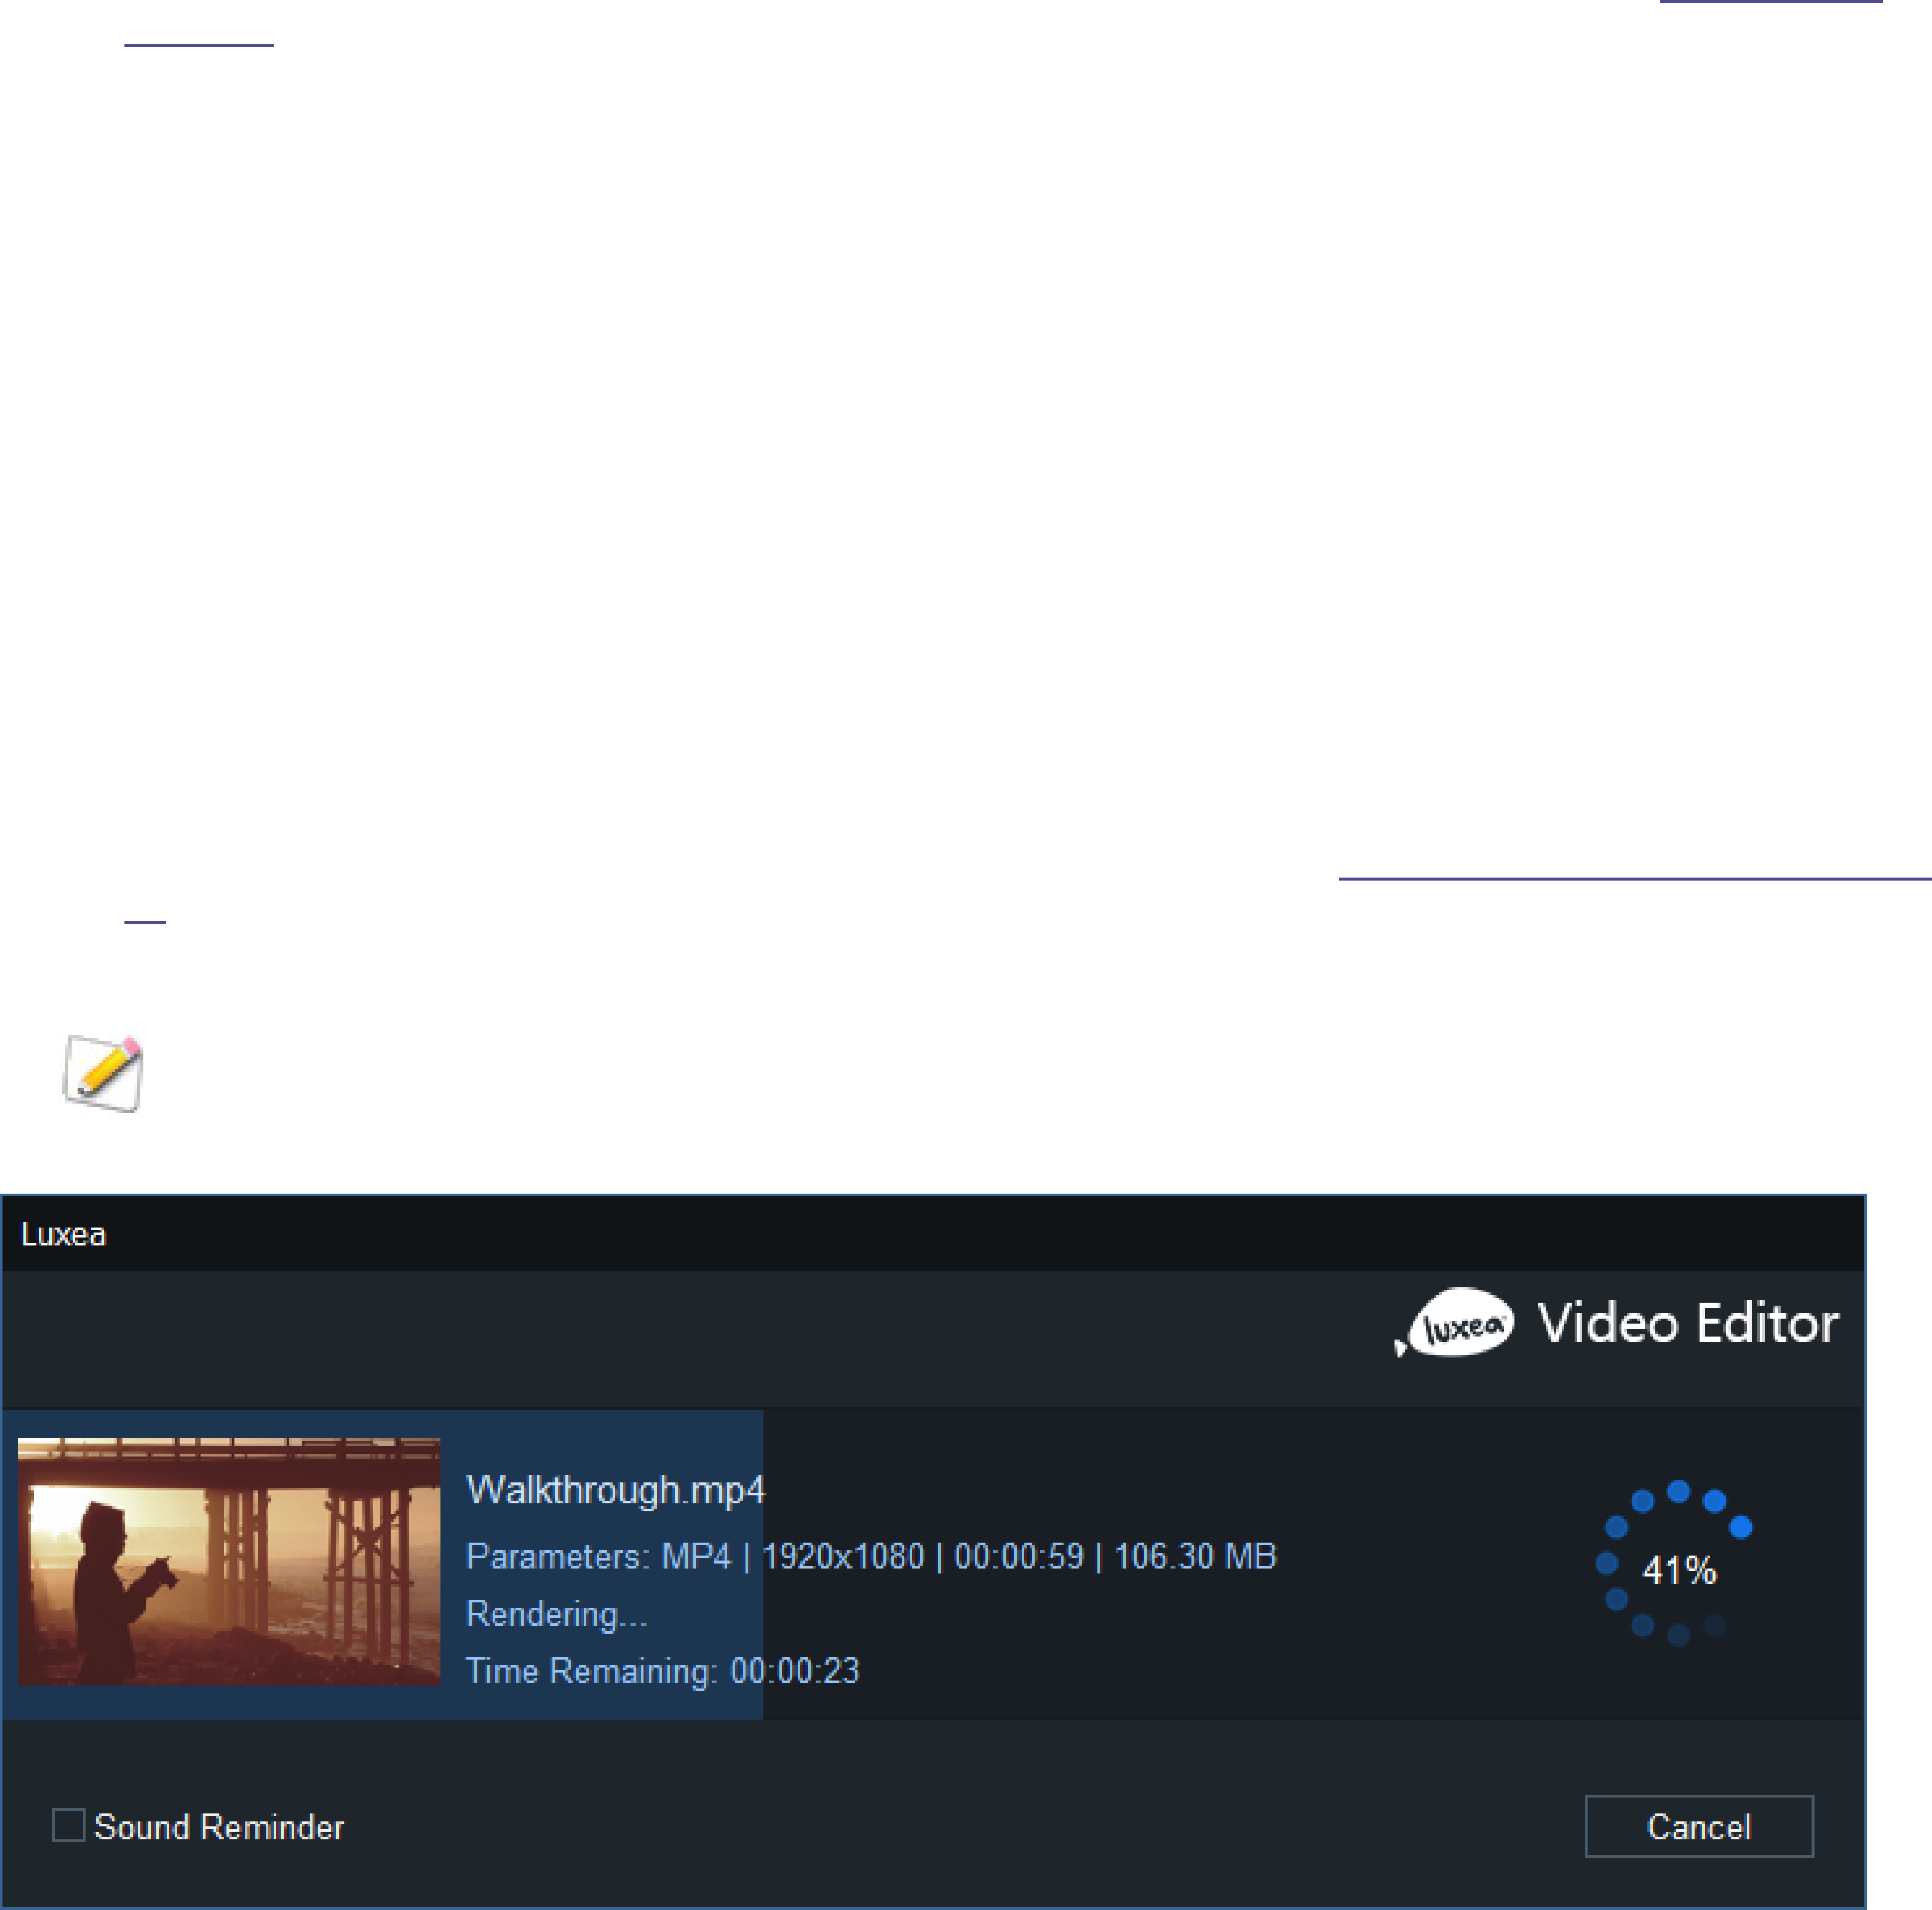
ACDSee Luxea Video Editor User Guide
Page 70 of 74
OPTIONS SECTION
The Options section is used to prepare a project's output for upload to YouTube.
To produce a YouTube output:
1. With media assets added to the Timeline, click the Produce and Share button located in the upper right-
hand corner of the Luxea interface.
2. In the Production Assistant dialog, select the YouTube tab and sign-in to YouTube (see To sign-in to
YouTube).
3. In the Options section, enter a name in the Title field.
4. Enter a description in the Description field.
5. Make a selection from the Category drop-down list. The Category field selection will determine how
YouTube stores and presents the video to their viewers.
6. Enter any relevant tags for the video into the Tags field. Use a comma to separate multiple values.
7. Make a selection from the Privacy drop-down list. The Privacy field selection will determine how YouTube
presents the video to their viewers. Selecting "Private" will restrict the video's availability to only the
uploader. Selecting "Public" will allow the video to be presented to all of YouTube's viewers.
8. Make a selection in the Share link on field. Enabling the Facebook checkbox will allow the video to be
shared with Facebook (Facebook sign-in required). Enabling the Twitter checkbox will allow the video to
be shared with Twitter (Twitter sign-in required).
9. Use the default value for the Save To field, or click the adjacent file folder icon to select a new location.
10. Accept the default values for the Parameters field, or click the adjacent Settings button to set new size
and rate parameters. For more information on the Settings button, see To set custom values for video qual-
ity.
11. Click the Produce button to upload the video to YouTube.
The Produce dialog features a progress preview of the project and a Sound Reminder checkbox for
sounding a reminder when rendering completes.
To set custom values for video quality:
1. Open the Production Assistant.
2. Navigate to the Options section and click the Settings button adjacent to the Parameters field.

ACDSee Luxea Video Editor User Guide
Page 71 of 74
3. In the resultant Settings dialog, enable one of the Normal, Better, or Best radio buttons.
4. Under the Video Parameters heading, make selections for the Encoder, Resolution, Frame Rate, and
Bitrate drop-down lists.
5. Under the Audio Parameters heading, make selections for the Encoder, Channel, Sample Rate, and
Bitrate drop-down lists.
6. Click the OK button.
Video Parameters Options
Field Description
Encoder Specifies the video data compression type.
Resolution By default, the resolution will reflect the current settings of the Display Area
Dimensions. To change the resolution, select a resolution from the drop-down, or select
"Custom" from the drop-down list and specify new dimensions in the adjacent Width
and Height fields.
Frame Rate Determines the frequency of picture refreshes.
Bitrate Select the bitrate to determine how much data will go to the screen per second of play-
back. A higher bitrate allows for a higher quality picture, however, it also increases the
file size.
Audio Parameters Options
Field Description
Encoder Specifies the audio data compression type.
Channel From the drop-down menu, select "Mono" to have the same sound produced from the
left and right speakers, or, select "Stereo" to produce different sounds from the left and
right speakers.
Sample Rate Sampling describes the data rate of a sound recording. A higher sample rate allows for
higher quality sound, however, it also increases the file size.
Bitrate Determines how much audio data will go to the speakers per second of playback. A
higher bitrate allows for a higher quality sound, however, it also increases the file size.
VIMEO TAB
The Vimeo tab in the Production Assistant is used to craft media assets destined to be uploaded to Vimeo.
The Vimeo tab is divided into two sections: the left-hand "Vimeo Sign-in" section and the right-hand "Options"
section.
VIMEO SIGN-IN SECTION
The Vimeo Sign-in section contains the Vimeo Sign In button. In order to successfully upload a completed project
to Vimeo, the sign-in procedure must be enacted.
To sign in to Vimeo:
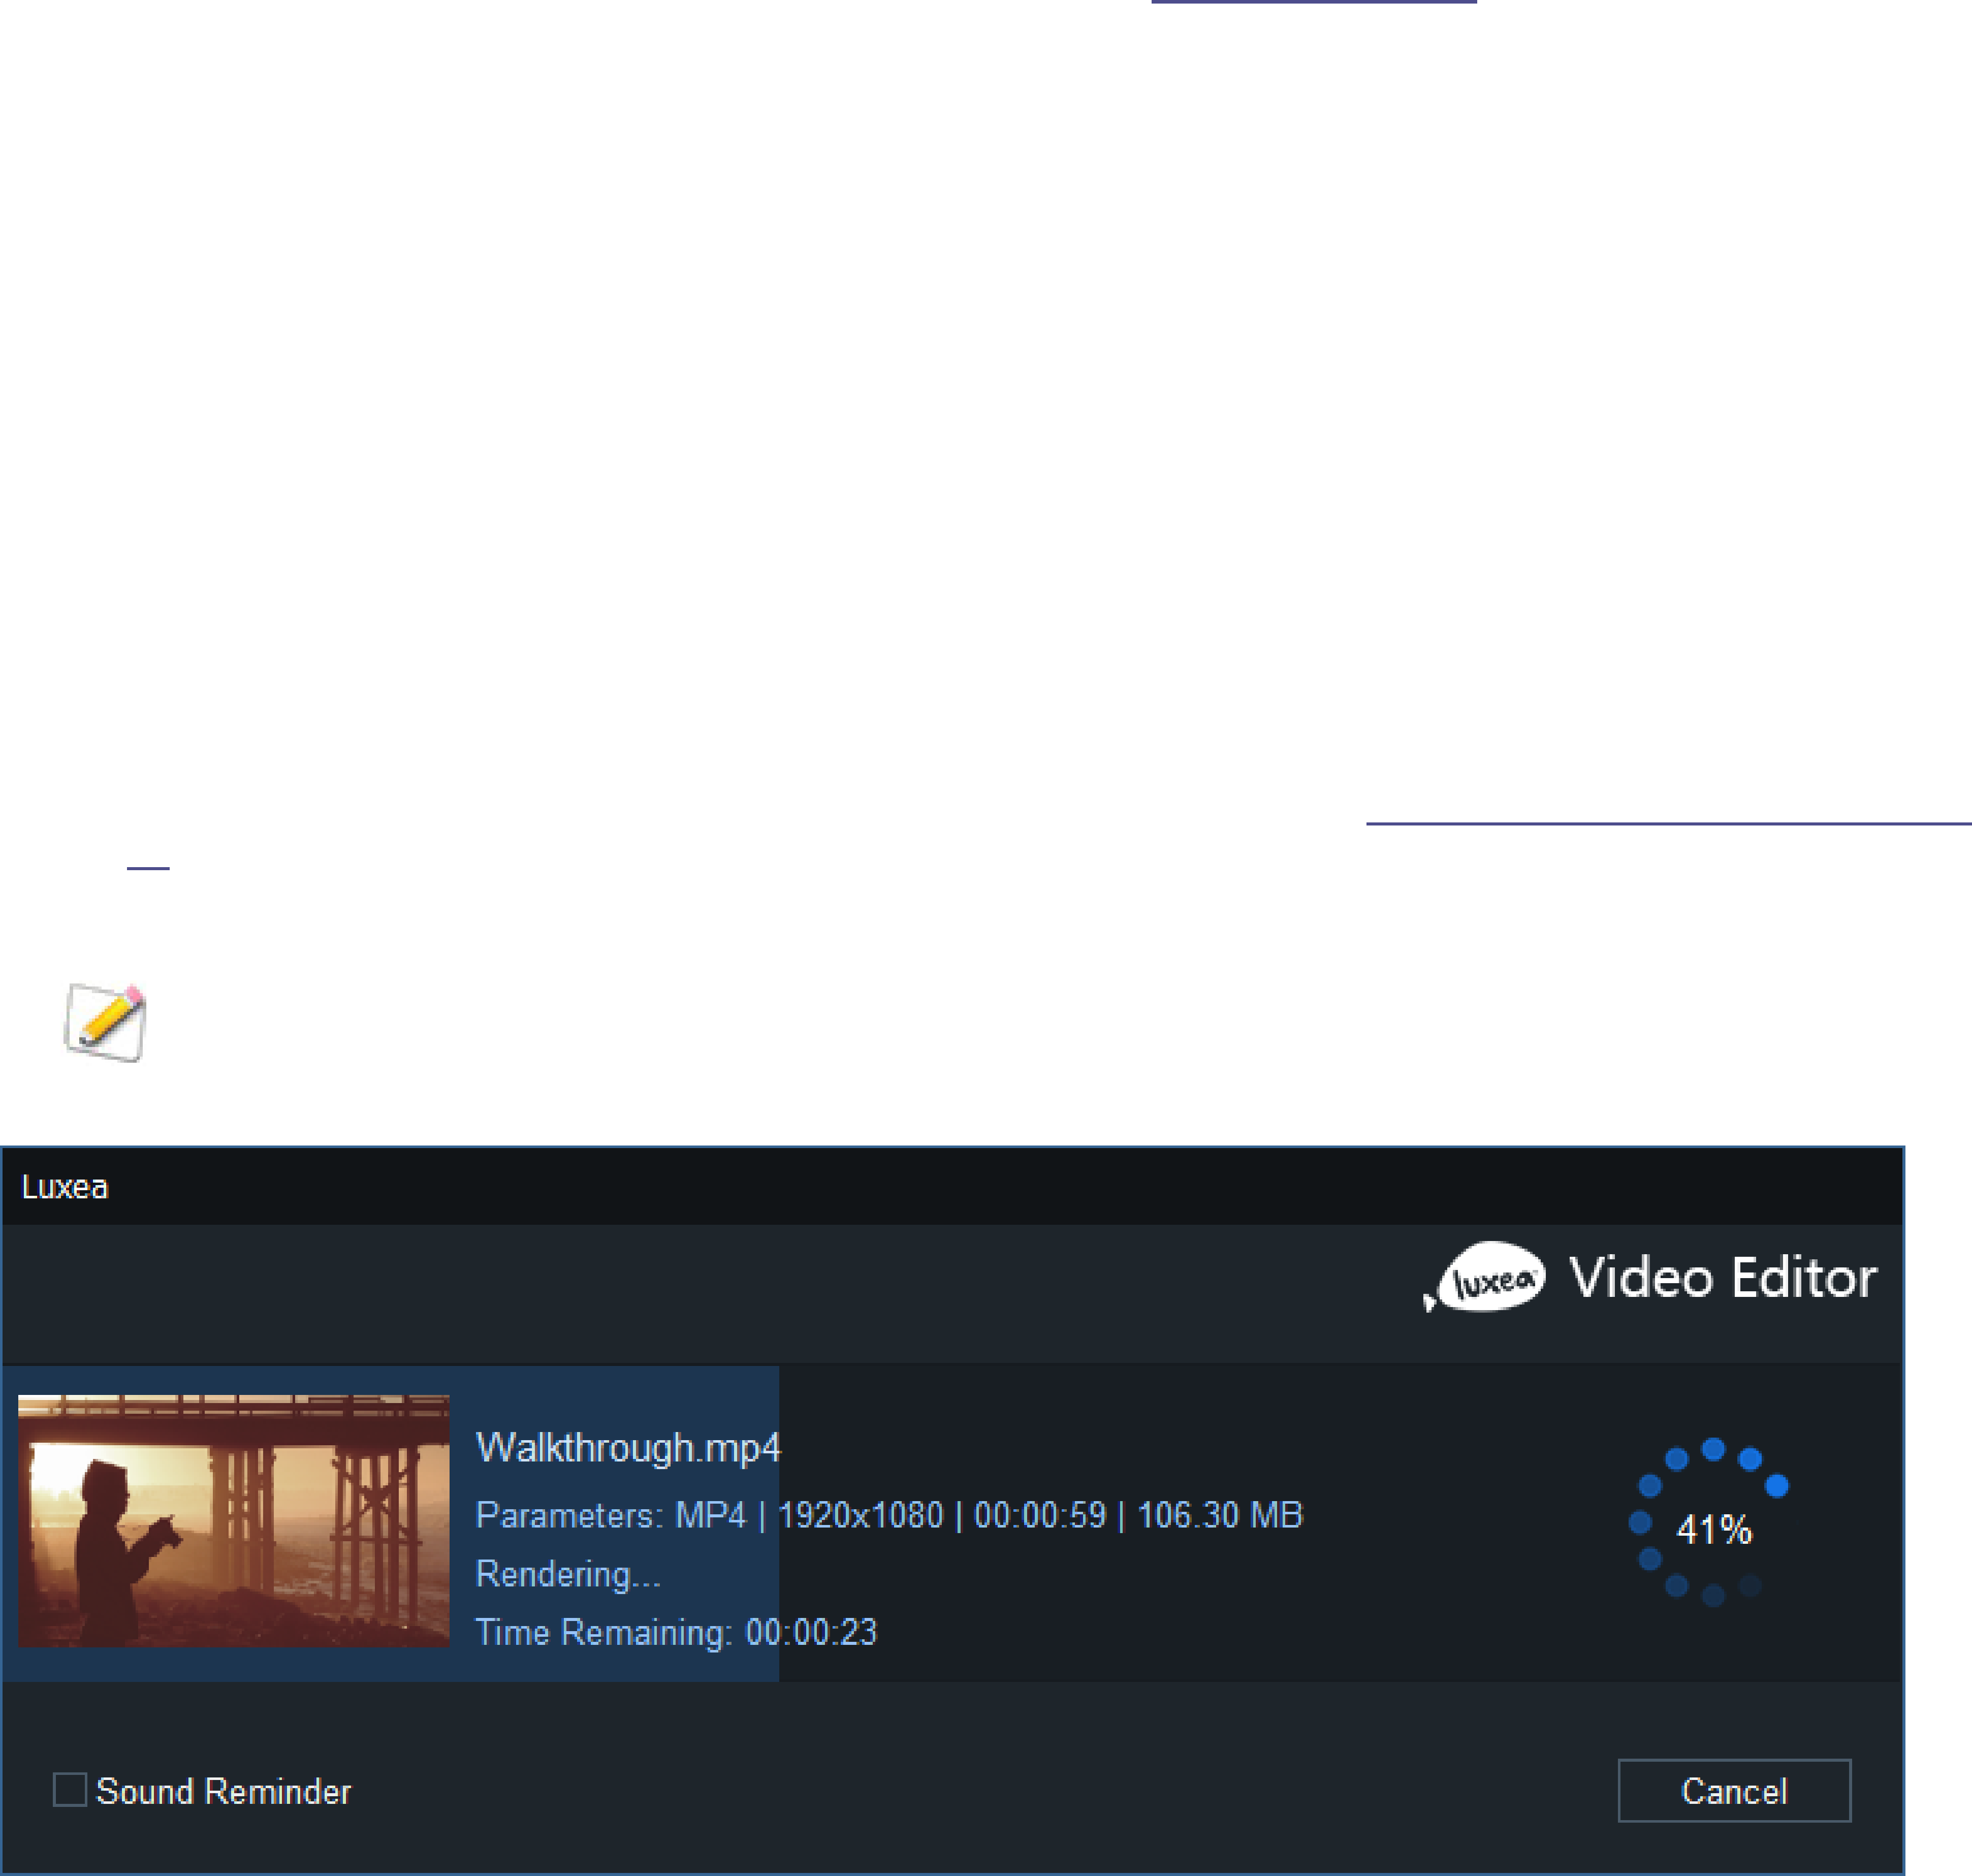
ACDSee Luxea Video Editor User Guide
Page 72 of 74
1. With media assets added to the Timeline, click the Produce and Share button located in the upper right-
hand corner of the Luxea interface.
2. In the Production Assistant dialog's Vimeo Sign-in section, click the Sign In button.
3. Reply to all prompts until successfully logged into Vimeo.
OPTIONS SECTION
The Options section is used to prepare a project's output for upload to Vimeo.
To produce a Vimeo output:
1. With media assets added to the Timeline, click the Produce and Share button located in the upper right-
hand corner of the Luxea interface.
2. In the Production Assistant dialog, sign-in to Vimeo (see To sign in to Vimeo).
3. Enter a project name in the Title field.
4. Enter a project description in the Description field.
5. Enter any relevant tags for the project into the Tags field. Use a comma to separate multiple values.
6. Make a selection from the Privacy drop-down list. The Privacy field selection will determine how Vimeo
presents the project to their viewers. Selecting "Anybody" will allow everyone to see/access the video.
Selecting "Nobody" will restrict the video's availability to only the user who uploaded the video. Selecting
"Password" will restrict the video's availability to those users who have a password. Selecting "Contacts"
will restrict the video's availability to only people the user follows.
7. Make a selection in the Share link on field. Enabling the Facebook checkbox will allow the video to be
shared with Facebook (Facebook sign-in required). Enabling the Twitter checkbox will allow the video to
be shared with Twitter (Twitter sign-in required).
8. Use the default value for the Save To field, or click the adjacent file folder icon to select a new location.
9. Accept the default values for the Parameters field, or click the adjacent Settings button to set new size
and rate parameters. For more information on the Settings button, see To set custom values for video qual-
ity.
10. Click the Produce button to upload the video to Vimeo.
The Produce dialog features a progress preview of the project and a Sound Reminder checkbox for
sounding a reminder when rendering completes.
To set custom values for video quality:
ACDSee Luxea Video Editor User Guide
Page 73 of 74
1. Open the Production Assistant.
2. Navigate to the Options section and click the Settings button adjacent to the Parameters field.
3. In the resultant Settings dialog, enable one of the Normal, Better, or Best radio buttons.
4. Under the Video Parameters heading, make selections for the Encoder, Resolution, Frame Rate, and
Bitrate drop-down lists.
5. Under the Audio Parameters heading, make selections for the Encoder, Channel, Sample Rate, and
Bitrate drop-down lists.
6. Click the OK button.
Video Parameters Options
Field Description
Encoder Specifies the video data compression type.
Resolution By default, the resolution will reflect the current settings of the Display Area
Dimensions. To change the resolution, select a resolution from the drop-down, or select
"Custom" from the drop-down list and specify new dimensions in the adjacent Width
and Height fields.
Frame Rate Determines the frequency of picture refreshes.
Bitrate Select the bitrate to determine how much data will go to the screen per second of play-
back. A higher bitrate allows for a higher quality picture, however, it also increases the
file size.
Audio Parameters Options
Field Description
Encoder Specifies the audio data compression type.
Channel From the drop-down menu, select "Mono" to have the same sound produced from the
left and right speakers, or, select "Stereo" to produce different sounds from the left and
right speakers.
Sample Rate Sampling describes the data rate of a sound recording. A higher sample rate allows for
higher quality sound, however, it also increases the file size.
Bitrate Determines how much audio data will go to the speakers per second of playback. A
higher bitrate allows for a higher quality sound, however, it also increases the file size.
ACDID ACCOUNT
An acdID account is needed to publish and share videos, or to upgrade a license. An acdID account also grants
access to the acdID User Portal, where software and subscriptions are managed and informative video tutorials
and software support can be accessed.
CREATING AN ACDID ACCOUNT
To create an acdID account:

ACDSee Luxea Video Editor User Guide
Page 74 of 74
1.
Click the user icon in the top menu bar in Luxea .
2. In the Luxea dialog, click Sign Up.
3. Follow the on screen instructions to finish creating an account.
UPGRADING A LICENSE
In the Luxea Free Plan, videos are produced with a branded intro/outro. To produce a video without the
intro/outro, upgrade the license from the Free Plan.
To upgrade a license from within Luxea:
1.
Click the user icon in the top menu bar in Luxea .
2. In the Luxea dialog, log in, and click Upgrade.
3. Choose an appropriate plan and click Buy Now.
Or:
1.
Click the shopping cart icon in the top menu bar in Luxea .
2. Choose an appropriate plan and click Buy Now.
